crwdns2915892:0crwdne2915892:0
Use this guide to replace the motherboard & daughterboard in the Huawei Watch GT 2 (46 mm).
crwdns2942213:0crwdne2942213:0
-
-
Before starting repairs, take your watch off the charger and power it down.
-
Remove the watch band.
-
-
-
Remove the four 3.7 mm-long Torx T2 screws.
-
-
-
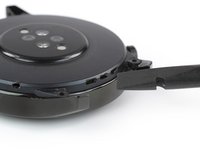
Insert the edge of a spudger into the middle loudspeaker opening at the top edge of your watch.
-
-
-
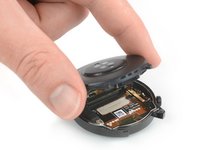
Use the spudger to pry up the back cover assembly of your Huawei watch GT 2.
-
-
-
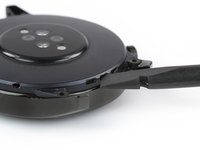
Carefully swing the back cover assembly open to an upward position.
-
-
-
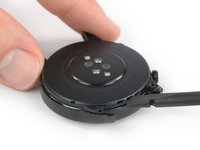
Remove the two 2.3 mm-long Phillips #00 screws.
-
-
-
Use a pair of tweezer to remove the metal shield covering the multi-purpose flex connector.
-
-
-
-
Use the flat end of a spudger to pry up and disconnect the multi-purpose flex connector.
-
-
-
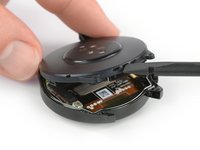
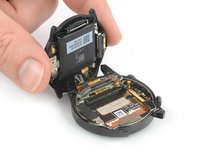
Separate the back cover assembly from the watch case.
-
-
-
Use the flat end of a spudger to pry up and disconnect the main flex cable from the daughterboard.
-
-
-
Use the flat end of a spudger to pry up and disconnect the watch buttons flex cable from the daughterboard.
-
-
-
Use the flat end of a spudger to lift the right edge of the daughterboard off its socket.
-
-
crwdns2935267:0crwdne2935267:0Tweezers$4.99
-
Use a pair of tweezers to remove the daughterboard.
-
-
-
Remove the three 2.3 mm-long Phillips #00 screws.
-
-
-
Use a pair of tweezers to remove the metal shield covering the display connectors.
-
-
-
Use the flat end of a spudger to pry up and disconnect the left display flex cable.
-
-
-
Use the flat end of a spudger to pry up and disconnect the right display flex cable.
-
-
-
Use a pair of tweezers to carefully peel the watch button flex cable off the motherboard and fold it to the side.
-


To reassemble your device, follow these instructions in reverse order.
Take your e-waste to an R2 or e-Stewards certified recycler.
Repair didn’t go as planned? Try some basic troubleshooting, or ask our Answers community for help.
To reassemble your device, follow these instructions in reverse order.
Take your e-waste to an R2 or e-Stewards certified recycler.
Repair didn’t go as planned? Try some basic troubleshooting, or ask our Answers community for help.
crwdns2935221:0crwdne2935221:0
crwdns2935229:014crwdne2935229:0


crwdns2947412:06crwdne2947412:0
Fine, the step 15 is quite difficult, because there is a pin into the U near the edge ... I did have to remove by the middle of the shield and pry It
Good job
Tutoriel très bien détaillé, j'ai suivi toutes les étapes sans problème, merci pour cete aide précieuse.
Many thanks, worked perfect for me. When prying open the watch, I put it face up on the table and placed the side with the speaker on 5 mm thick solid elevation. I then pressed down with a spudger using the middle speaker opening as insertion point.
Re-assembled - no issues. But the capacitive touch screen does not work now - what do I need to check? Everything appears to be back in its place.
Dommage qu il n y ai pas d explication sur comment retirer la batterie😢… elle est soudée et donc pas remplaçable 😢 pas la peine de commander une batterie!