crwdns2915892:0crwdne2915892:0
Use this guide to remove and replace the complete display with the frame of a Huawei P9 Plus.
crwdns2942213:0crwdne2942213:0
-
-
First switch off your phone.
-
Remove the SD and SIM card tray.
-
-
-
Remove the two P2 Pentalobe screws on either side of the USB C port.
-
-
-
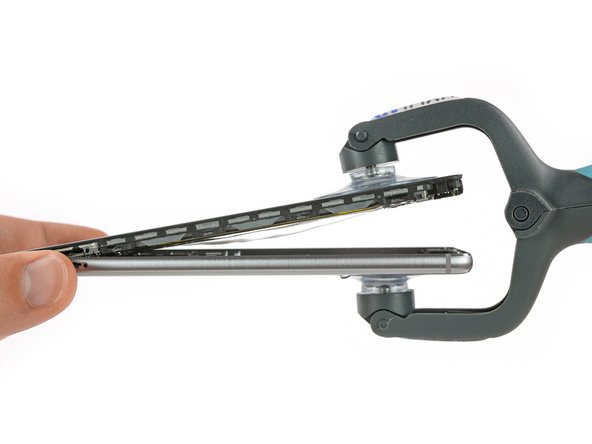
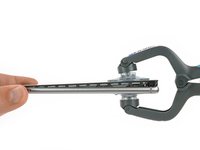
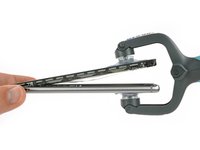
Use an iSclack or a suction handle to separate the display unit from the rear case.
-
-
-
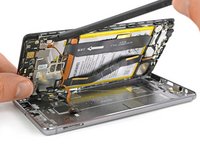
After separating the rear case flip the other half open to get to the flex connectors.
-
With a spudger unplug the flex connector of the fingerprint sensor and the one of the side buttons.
-
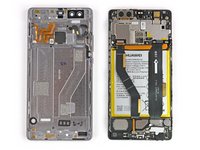
Remove the rear case.
-
-
-
Remove the sticker that sits on top of the left screw above the battery.
-
Remove the three Phillips #00 screws that hold the metal plates in place.
-
-
-
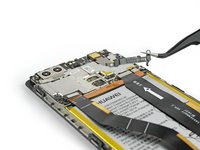
Both metal plates have little hooks. Use a tweezer to free them and unhinge the plates by carefully moving them upwards.
-
-
-
-
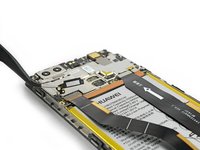
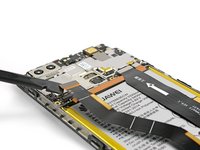
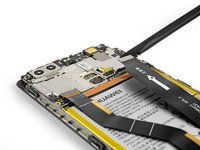
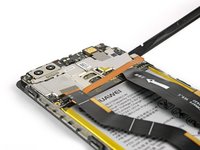
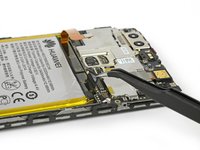
Use a spudger to unplug the screen flex cable.
-
Unplug the motherboard flex cable and the battery flex cable afterwards.
-
-
crwdns2935267:0crwdne2935267:0Tweezers$4.99
-
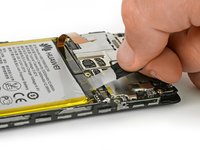
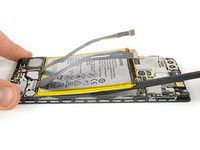
Use a set of tweezers to unfold the black tab enough to grab with your fingers.
-
Pull the first adhesive strip in a slow and constant movement.
-
-
-
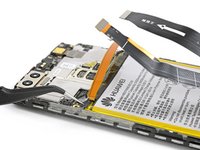
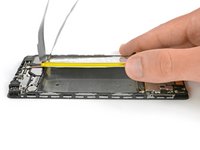
Loosen the end of the other adhesive strip with a tweezer and pull it out. If needed use the iOpener again to soften the glue a little.
-
-
crwdns2935267:0crwdne2935267:0Tesa 61395 Tape$5.99
-
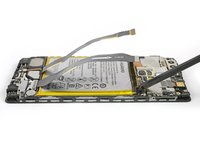
Use a spudger to slide under the battery.
-
Remove the battery.
-
-
-
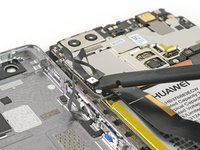
Use a tweezer to remove the sticker that sits on top of the screw next to the antenna cable.
-
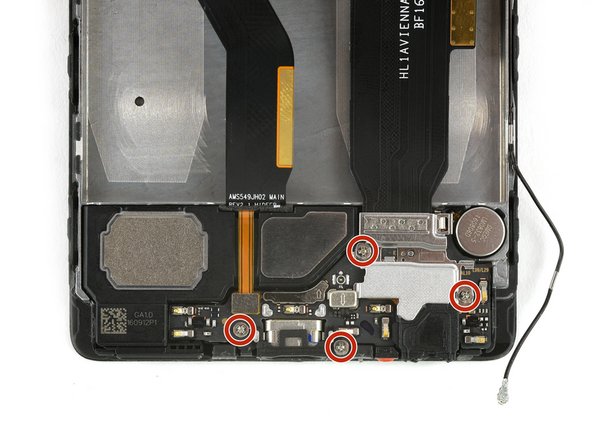
Unplug the antenna cable and release it from the bracket on the metal plate covering the main flex cable.
-
Remove the four Phillips #00 screws.
-
-
-
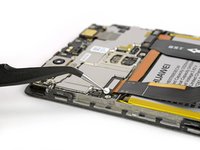
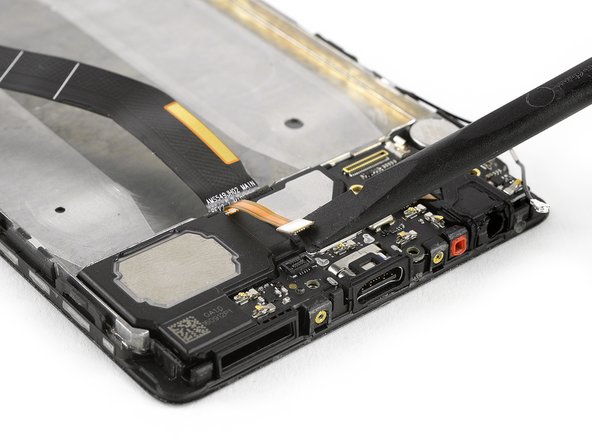
The plate, which is covering the motherboard flex cable, has little hooks on each side. Use a tweezer to free them and unhinge the plate by carefully moving it upwards.
-
Use a spudger to unplug the motherboard flex cable and remove it.
-
Unplug the flex connector of the loudspeaker.
-
-
-
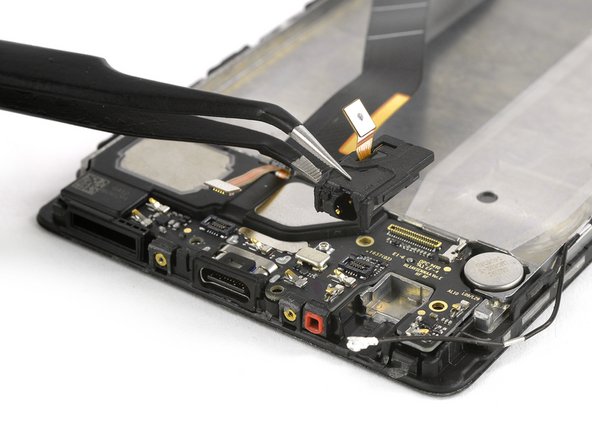
Use a spudger to unplug the flex connector of the headphone jack.
-
Remove the headphone jack.
-
-
-
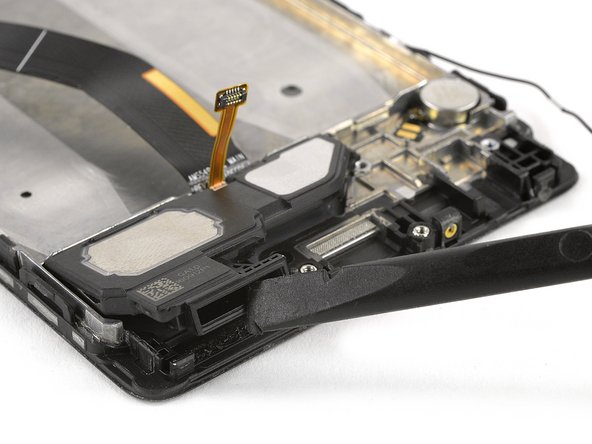
Use a spudger to lift out the daughter board.
-
Lift the loudspeaker out of the mid frame. There is some adhesive underneath, so it can be a little bit sticky.
-
-
-
Use a tweezer to loosen the vibration motor flex cable. Be careful since it is a little bit sticky.
-
Remove the vibration motor.
-
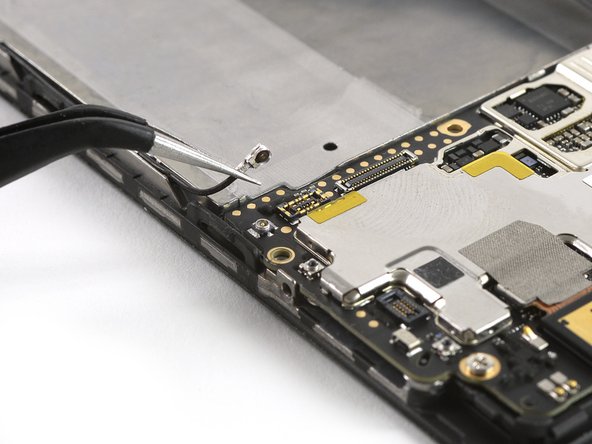
Use a tweezer to unplug the antenna cable and remove it.
-
-
-
Remove the three Phillips #00 screws.
-
Use a spudger to lift and remove the motherboard assembly, being mindful of the cameras.
-
-
-
Remove the earpiece speaker with a tweezer.
-
Carefully remove the proximity sensor from its recess.
-
-
crwdns2935267:0crwdne2935267:0Tesa 61395 Tape$5.99
-
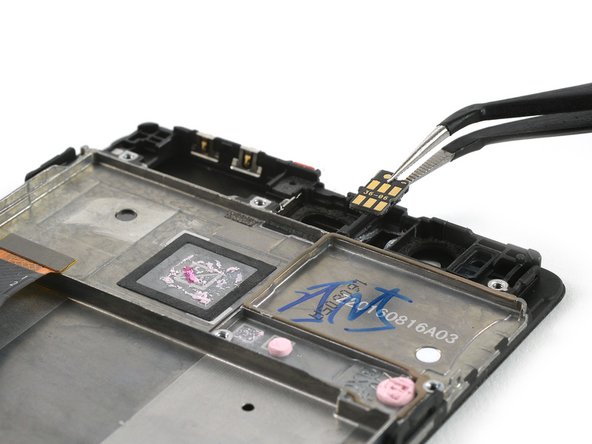
Carefully remove the spring contacts from the display assembly without bending them.
-
Remove the rubber microphone gasket.
-


To reassemble your device, follow these instructions in reverse order. Reapply adhesive where necessary after removing any residue.
crwdns2935221:0crwdne2935221:0
crwdns2935229:08crwdne2935229:0

crwdns2935287:0crwdne2935287:0

iFixit EU Team crwdns2935289:0iFixit EU Teamcrwdne2935289:0
Staff
crwdns2931471:037crwdne2931471:0
crwdns2935297:01,205crwdne2935297:0
crwdns2947412:06crwdne2947412:0
should camera work before putting into rear case?
Can you do with the Camera replacement and where to buy it? Thank you in Advance.
do you sell huawei p9 32gb mainboard?
Hat super geklappt, aber ein kleines Plastikteil war nicht mit in der Anleitung: https://imgur.com/a/SFYVXnE
Worked perfectly, but a small piece of plastic was missing in the instructions: https://imgur.com/a/SFYVXnE
Thanks for the note. Added it as an example for the check old and new part for missing components)