crwdns2915892:0crwdne2915892:0
Use this guide to replace a broken or defective OLED Screen & Digitizer in your Huawei P30 Pro.
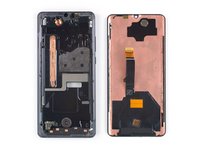
Note: This guide instructs you to replace only the screen while leaving the original frame and motherboard in place. However, some replacement screens for this phone come pre-installed in a new frame (a.k.a. chassis), which requires a very different procedure. Make sure you have the correct part before starting this guide.
Opening the Huawei P30 Pro will damage the waterproof sealing on the device. If you do not replace the adhesive seals, your phone will function normally but will lose its water-protection.
Due to the phone’s design, you need to remove the lithium-ion battery in order to remove the screen. Reusing a deformed battery after it been removed is a potential safety hazard. Replace it with a new battery.
Before disassembling your phone, discharge the battery below 25%. The battery can catch fire and/or explode if accidentally punctured, but the chances of that happening are much lower if discharged.
You’ll need replacement adhesive to reattach components when reassembling the device.
crwdns2942213:0crwdne2942213:0
-
-
Before you begin, switch off your phone.
-
Apply a heated iOpener to the back of the phone to loosen the adhesive beneath the back cover. Apply the iOpener for at least two minutes.
-
-
-
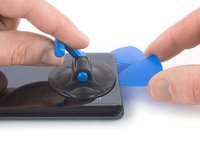
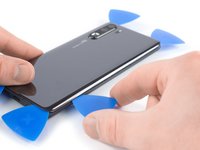
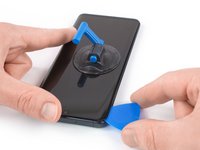
Secure a suction handle to the bottom of the back cover, as close to the edge as possible.
-
Lift the back cover with the suction handle to create a small gap between the cover and the frame.
-
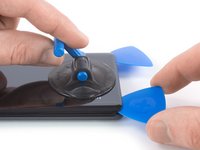
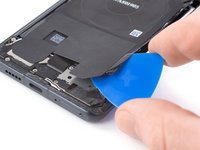
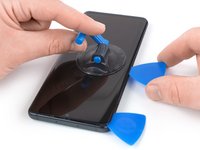
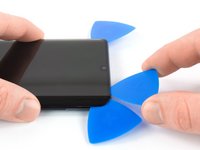
Insert an opening pick into the gap.
-
Slide the opening pick to the bottom right corner.
-
-
-
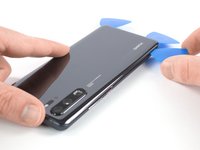
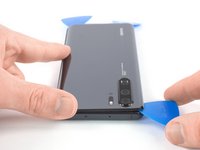
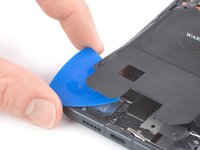
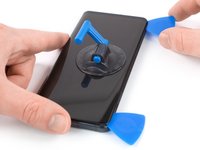
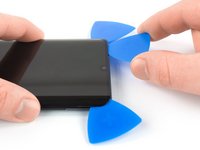
Insert a second opening pick and slide it to the bottom left corner to cut the adhesive.
-
Leave the opening picks in place to prevent the adhesive from resealing.
-
-
-
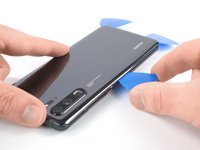
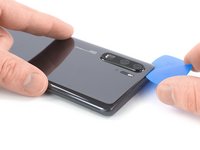
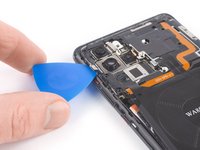
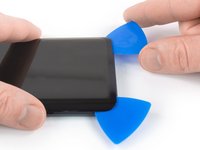
Insert a third opening pick at the bottom left corner.
-
Slide the tip of the opening pick from the bottom left corner along the side of the phone to cut the adhesive.
-
Leave the opening pick in its place at the top left corner to prevent the adhesive from resealing.
-
-
-
If the adhesive becomes hard to cut, it most likely cooled down. Use your iOpener to reheat it.
-
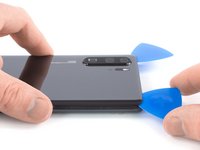
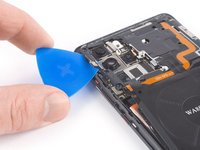
Insert a fourth opening pick under the top left corner of the back cover.
-
Slide the opening pick along the top edge of the phone to cut the adhesive.
-
Leave the opening pick in the top right corner to prevent the adhesive from resealing.
-
-
-
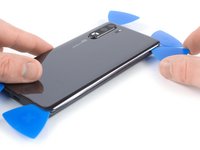
Insert a fifth opening pick at the top right corner of the phone.
-
Slide the opening pick along the right side to cut the remaining adhesive.
-
-
-
Lift and remove the back cover.
-
Before installing fresh adhesive and reassembling, remove any remaining adhesive from the phone, and clean the glued areas with isopropyl alcohol and a lint-free cloth.
-
-
-
Remove the ten Phillips #00 screws (4.3 mm length).
-
-
-
Slide an opening pick under the black adhesive at the bottom right of the charging coil.
-
Carefully loosen the adhesive with the opening pick.
-
-
-
Slide an opening pick under the black adhesive at the bottom left of the charging coil.
-
Carefully loosen the adhesive with the opening pick.
-
-
-
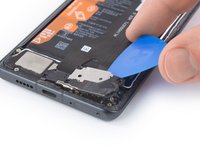
Slide an opening pick under the left side of the motherboard cover.
-
Unhinge the left side of the motherboard cover by slightly rotating the opening pick.
-
-
-
-
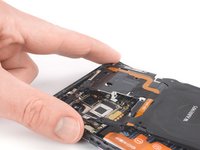
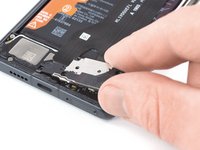
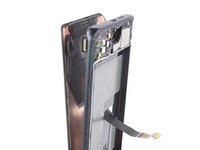
Push the motherboard cover out of the sockets at the top edge of the phone beginning with the top left corner.
-
Remove the motherboard cover including the NFC and charging coil.
-
-
-
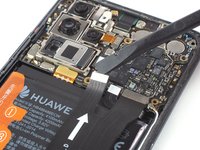
Use a spudger to pry up and disconnect the battery connector.
-
-
-
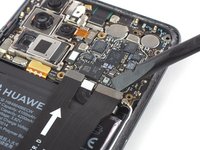
Remove the five Phillips #00 screws (4.3 mm length).
-
-
-
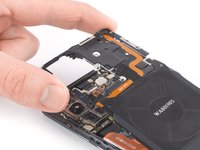
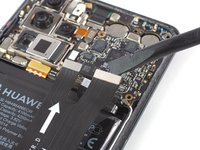
Slide an opening pick under the top edge of the daughterboard cover.
-
Pry up and unhinge the daughterboard cover by slightly rotating the opening pick.
-
-
-
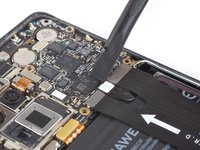
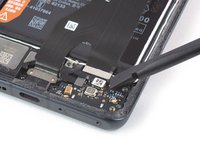
Use a spudger to pry up and disconnect the left main flex cable connector from the motherboard.
-
-
-
Use a spudger to pry up and disconnect the right main flex cable connector from the motherboard.
-
-
-
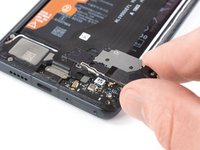
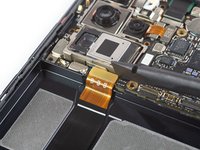
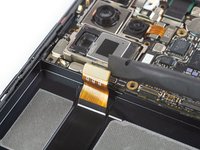
Use a spudger to pry up and disconnect the main flex cable connector from the daughterboard.
-
-
-
Remove the main flex cable including the charging port by lifting it upwards and then pulling it in the direction of the motherboard.
-
-
-
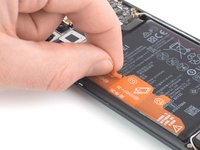
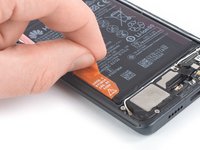
Peel the orange adhesive strip labeled with a 1 off the battery. The orange adhesive tape will rip along a small perforated line.
-
-
-
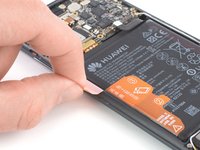
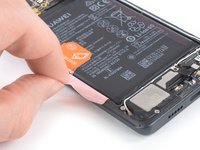
Peel the orange adhesive strip labeled with a 2 off the battery. The orange adhesive tape will rip along a small perforated line.
-
-
-
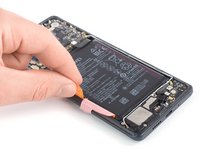
Peel the orange adhesive strip labeled with a 3 off the battery.
-
Pull up the orange adhesive strip to lift the battery out of its recess.
-
-
-
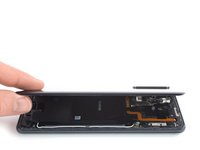
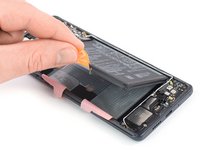
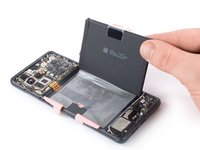
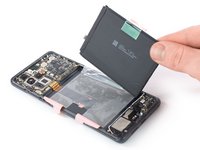
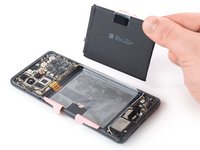
Swing the battery up to an upright position.
-
Peel the battery off the remaining adhesive.
-
Remove the battery.
-
-
-
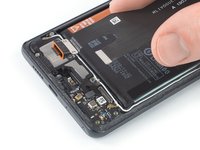
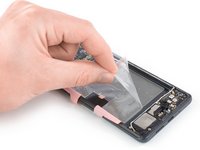
Peel the battery's adhesive sticker off the midframe.
-
-
-
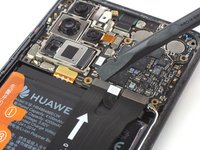
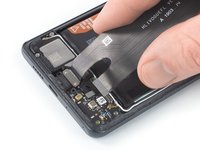
Use a spudger to pry up and disconnect the display flex cable from the motherboard.
-
-
-
Apply a heated iOpener to the screen and all edges of the phone for at least two minutes, to loosen the adhesive.
-
-
-
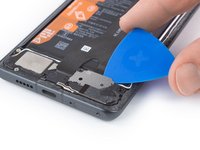
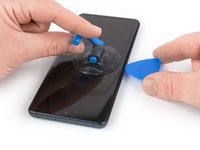
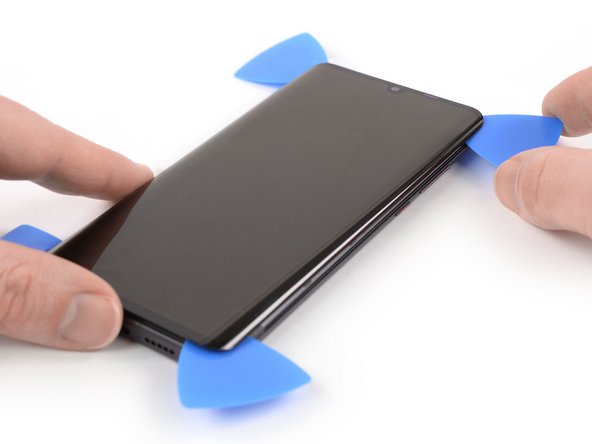
Once the screen is warm to the touch, apply a suction cup to the left edge of the phone.
-
Pull the suction cup upwards and insert an opening pick in the gap between the display glass and the plastic bezel.
-
Cut the adhesive by sliding the opening pick to the top left corner of the phone.
-
-
-
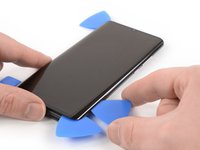
Insert a second opening pick and slide it to the bottom left corner of the phone to cut the adhesive.
-
Leave the opening picks in their place to prevent the adhesive from resealing.
-
-
-
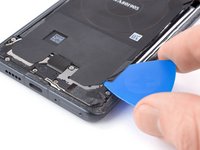
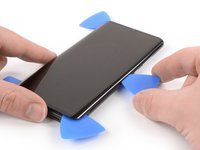
Insert a third opening pick under the bottom left corner of the phone.
-
Slide the opening pick along the bottom edge of the phone to cut the adhesive.
-
Leave the opening pick in the bottom right corner to prevent the adhesive from resealing.
-
-
-
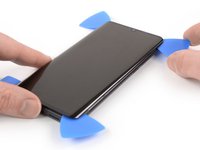
Insert a fourth opening pick at the bottom right corner of the phone.
-
Slide the opening pick along the right edge of the phone to cut the adhesive.
-
If cutting becomes too difficult, reheat and reapply the iOpener.
-
-
-
Insert a fifth opening pick at the top right corner of the phone.
-
Slide the opening pick along the top edge of the phone to cut the remaining adhesive.
-
-
-
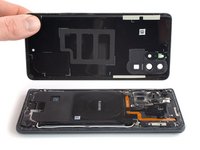
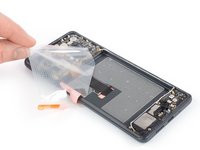
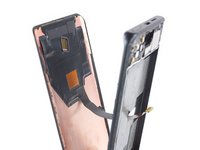
Thread the display flex cable through the gap in the midframe and remove the display.
-


To reassemble your device, follow these instructions in reverse order.
If possible, turn on your phone and test your repair before installing new adhesive and resealing the phone.
Take your e-waste to an R2 or e-Stewards certified recycler.
Repair didn’t go as planned? Check out our Answers community for troubleshooting help.
crwdns2935221:0crwdne2935221:0
crwdns2935229:037crwdne2935229:0


crwdns2947412:024crwdne2947412:0
Hello just wondering it is easier to replace without a new frame??
Hi elizabethpatrinos,
the screen replacement without replacing the midframe is in general more straight forward and the faster procedure if you’re used to repairs like this. For a display with frame replacement you need to transfer all components of your old phone to your new frame which bears the risk of damaging them. However if your midframe is damaged or bent i strongly advise to replace the screen with the frame. Otherwise your new screen might not mount on your old and damaged frame correctly. At the same time the screen adhesive of the P30 Pro can be a little bit sticky and sometimes it can be hard to get an opening pick between midframe and the screen when only replacing the screen itself. For a beginner i’d advise to replace the screen with frame and to take your time for the repair (take care not to miss any components when transfering them to the new frame and be careful with them), if you feel confident with repairs like this you can replace the screen itself as well and save a little time.
will this damage the IP68?
Hi sandeep s,
opening the Huawei P30 Pro will damage the waterproof sealing on the device. If you do not replace the adhesive seals, your phone will function normally but will lose its water-protection.
Hi, could you please tell me which display replacement you used exactly?
I can only find genuine display replacements containing the frame and battery, which is quite expensive. I am searching for a genuine display only replacement part. Can you please help me with that?
Thank you in advance!