crwdns2915892:0crwdne2915892:0
Use this guide to replace a worn-out or dead battery in your Huawei P20.
Opening the Huawei P20 will damage the splash and dust protection seals on the device. If you do not replace the adhesive seals, your phone will function normally but will lose its protection.
If your battery is swollen, take appropriate precautions. For your safety, discharge your battery below 25% before disassembling your phone. This reduces the risk of a dangerous thermal event if the battery is accidentally damaged during the repair.
You’ll need replacement adhesive to reattach components when reassembling the device.
crwdns2942213:0crwdne2942213:0
-
-
Before you begin, switch off your phone.
-
Apply a heated iOpener to the back of the phone to loosen the adhesive beneath the back cover. Apply the iOpener for at least two minutes.
-
-
-
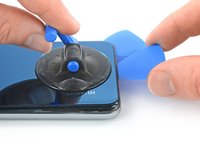
Secure a suction handle to the bottom of the back cover, as close to the edge as possible.
-
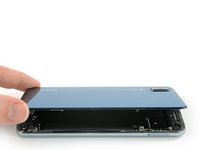
Lift the back cover with the suction handle to create a small gap between the cover and the frame.
-
Insert an opening pick into the gap.
-
If you have trouble, apply more heat to further soften the adhesive. Follow the iOpener instructions to avoid overheating.
-
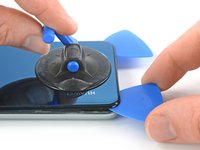
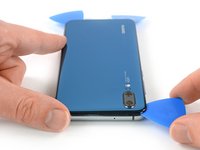
Slide the opening pick to the bottom right corner.
-
-
-
Insert a second opening pick and slide it to the bottom left corner to cut the adhesive.
-
Leave the opening picks in place to prevent the adhesive from resealing.
-
-
-
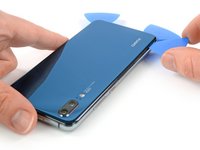
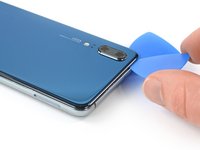
Insert a third opening pick at the bottom left corner.
-
Start to slide the tip of the opening pick from the bottom left corner along the side of the phone to cut the adhesive.
-
Leave the opening pick in its place at the top left corner to prevent the adhesive from resealing.
-
-
-
If the adhesive becomes hard to cut it most likely cooled down. Use your iOpener to reheat it.
-
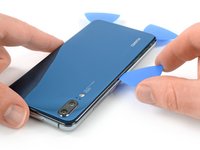
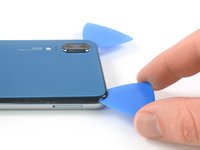
Insert a fourth opening pick under the top left corner of the back cover.
-
Slide the opening pick along the top edge of the phone to cut the adhesive.
-
Leave the opening pick in the top right corner to prevent the adhesive from resealing.
-
-
-
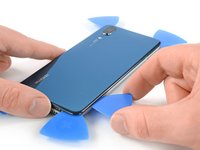
Insert a fifth opening pick at the top right corner of the phone.
-
Slide the opening pick along the right side to cut the remaining adhesive.
-
-
-
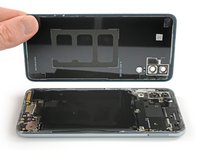
Lift and remove the back cover.
-
Before installing fresh adhesive and reassembling, remove any remaining adhesive from the phone, and clean the glued areas with isopropyl alcohol and a lint-free cloth.
-
-
crwdns2935267:0crwdne2935267:0Tweezers$4.99
-
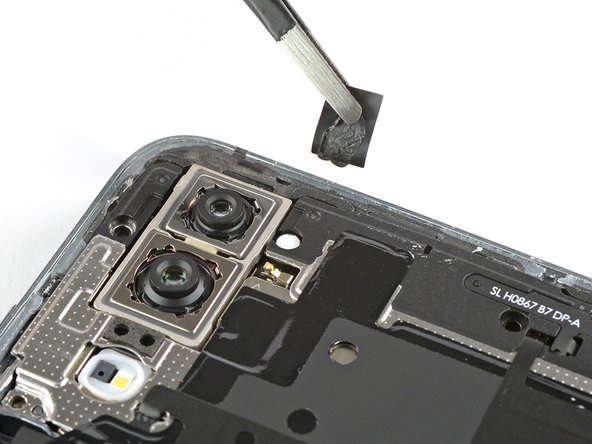
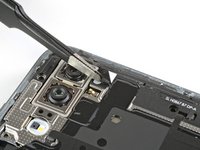
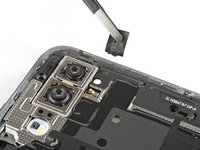
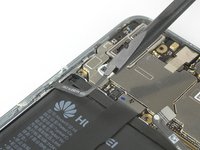
Use a pair of tweezers to peel the black tape next to the rear camera off the motherboard cover.
-
-
-
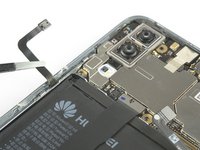
Remove the eight Phillips #00 screws (3.1 mm length).
-
-
-
-
Use a pair of tweezers to peel the black foil at the bottom end of the phone off the loudspeaker.
-
-
-
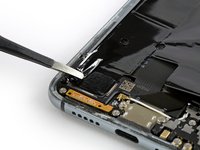
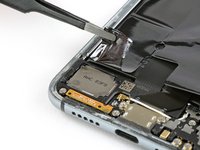
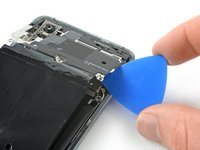
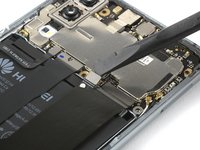
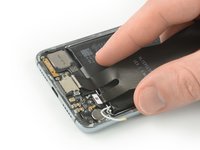
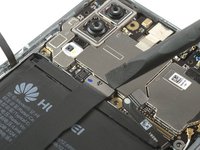
Slide an opening pick under the right side of the motherboard cover.
-
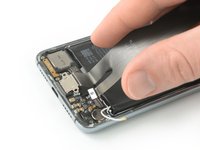
Rotate the opening pick slightly to pry up the motherboard cover.
-
-
-
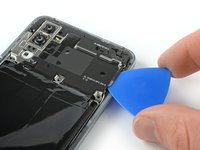
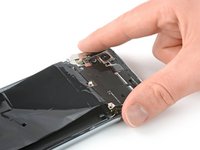
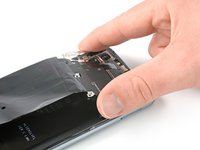
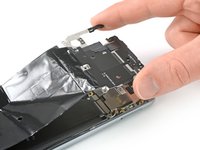
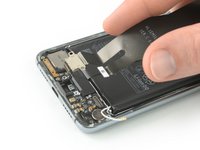
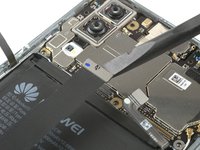
Remove the motherboard cover with NFC.
-
-
-
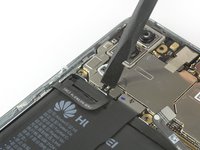
Use a spudger to pry up and disconnect the battery connector.
-
-
-
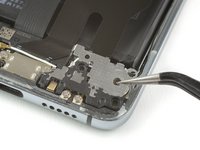
Remove the three Phillips #00 screws (3.2 mm length).
-
-
crwdns2935267:0crwdne2935267:0Tweezers$4.99
-
Use a pair of tweezers to remove the daughterboard cover.
-
-
-
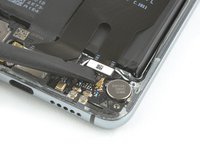
Remove the two Phillips #00 screws (3.2 mm length).
-
-
-
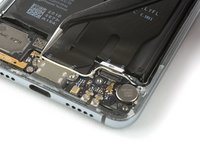
Use a spudger to pry up and disconnect the main daughterboard connector from the daughterboard.
-
-
crwdns2935267:0crwdne2935267:0Tweezers$4.99
-
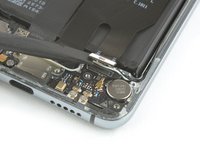
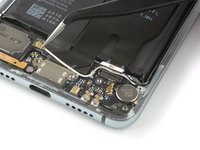
Use a pair of tweezers to pry up and disconnect the connector of the white coax cable from the motherboard.
-
Unroute the white coax cable from the metal clips on the daughterboard and fold it to the side.
-
-
-
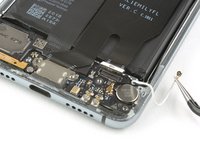
Use a spudger to disconnect the main flex cable connector from the motherboard.
-
-
-
Remove the charging port and main flex cable by lifting it upwards and then pulling it in the direction of the motherboard.
-
-
-
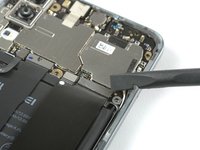
Use a spudger to pry up and disconnect the power and volume button flex connector.
-
-
-
Use a spudger to pry up and disconnect the display flex connector and fold the display cable out of your way to remove the battery.
-
-
-
Apply a heated iOpener to the screen to loosen the adhesive beneath the battery. Apply the iOpener for at least two minutes.
-
-
crwdns2935267:0crwdne2935267:0Plastic Cards$2.99
-
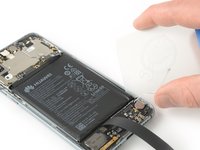
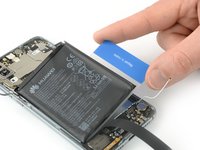
Start to slide a plastic card under the bottom right corner of the battery to cut the adhesive.
-
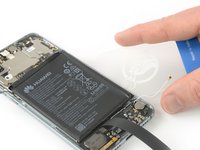
Slide the plastic card along the right side of the battery to further release the adhesive. Gently start to pry up the battery while doing so.
-
-
-
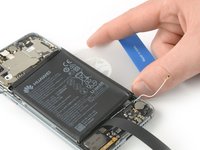
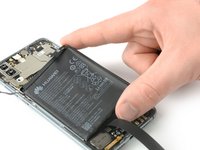
Slide the plastic card under the whole upper part of the battery and cut the adhesive with it.
-
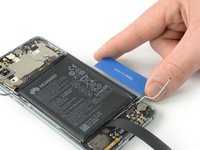
Slide the plastic card down to the bottom end of the battery to cut the remaining adhesive.
-
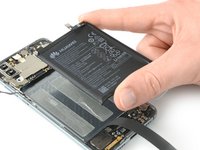
Use the plastic card to pry up the battery.
-
-
crwdns2935267:0crwdne2935267:0Tesa 61395 Tape$5.99
-
Remove the battery.
-


If possible, turn on your phone and test your repair before installing new adhesive and resealing the phone.
Secure the new battery with pre-cut adhesive or double-sided adhesive tape. In order to position it correctly, apply the new adhesive into the phone at the places where the old adhesive was located, not directly onto the battery. Press the new battery firmly into place.
To reassemble your device, follow these instructions in reverse order. Apply new adhesive where necessary after cleaning the relevant areas with isopropyl alcohol (>90%).
For optimal performance, calibrate your newly installed battery: Charge it to 100%, and keep charging it for at least two more hours. Then, use it until it shuts off due to low battery. Finally, charge it uninterrupted to 100%
Take your e-waste to an R2 or e-Stewards certified recycler.
Repair didn’t go as planned? Check out our Answers community for troubleshooting help.
crwdns2935221:0crwdne2935221:0
crwdns2935229:022crwdne2935229:0


crwdns2947412:03crwdne2947412:0
El mío no abre ni con soplete, he aplicado calor con secador del pelo, las cuñas se rompen, la ventosa se despega... no se mueve ni una micra. Al que inventó el USB C habría que colgarlo de los dedos de los pies y lo de las cacharros de cientos de euros cerrados como una caja de seguridad lo mismo.
Thank you so much!!!
Worked perfectly. Step 15 backwards is the biggest challenge.
Very great guide !!! Grande , ho fatto tutto alla perfezione , tranne incollaggio, ho messo poca colla