crwdns2933423:0crwdne2933423:0

How to Open the GuliKit KingKong 2 Pro

crwdns2942213:0crwdne2942213:0

  1. How to Open the GuliKit KingKong 2 Pro, Unfasten the back cover screws: crwdns2935265:01crwdnd2935265:01crwdnd2935265:01crwdne2935265:0
    • Use a Phillips #00 screwdriver to remove the four 11 mm-long screws securing the back cover.

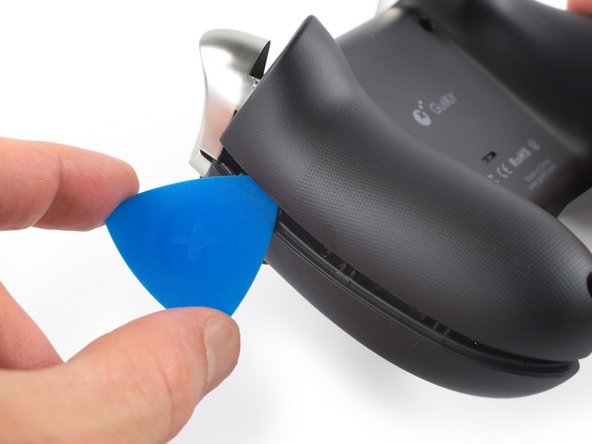
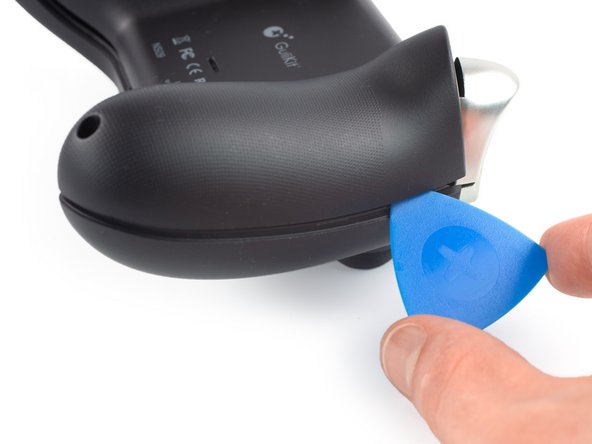
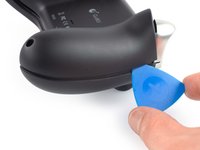
  2. How to Open the GuliKit KingKong 2 Pro, Insert an opening pick: crwdns2935265:02crwdnd2935265:01crwdnd2935265:02crwdne2935265:0 How to Open the GuliKit KingKong 2 Pro, Insert an opening pick: crwdns2935265:02crwdnd2935265:02crwdnd2935265:02crwdne2935265:0
    • The back cover of the GuliKit Kingkong 2 Pro is held in place by plastic clips.

    • Insert an opening pick into the gap between the front assembly and the back cover at the bottom edge of the controller.

    • Tilt your opening pick downwards to widen the gap.

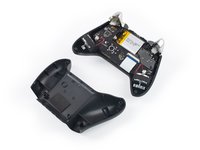
  3. How to Open the GuliKit KingKong 2 Pro, Separate the front assembly and back cover: crwdns2935265:03crwdnd2935265:01crwdnd2935265:02crwdne2935265:0 How to Open the GuliKit KingKong 2 Pro, Separate the front assembly and back cover: crwdns2935265:03crwdnd2935265:02crwdnd2935265:02crwdne2935265:0
    • Insert an opening pick into the gap between the front assembly and the back cover at the outside of the right controller handle.

    • Slide the opening pick along the gap to separate the front assembly from the back cover.

  4. How to Open the GuliKit KingKong 2 Pro: crwdns2935265:04crwdnd2935265:01crwdnd2935265:02crwdne2935265:0 How to Open the GuliKit KingKong 2 Pro: crwdns2935265:04crwdnd2935265:02crwdnd2935265:02crwdne2935265:0
    • Insert an opening pick into the gap between the front assembly and the back cover at the outside of the left controller handle.

    • Slide the opening pick along the gap to separate the front assembly from the back cover.

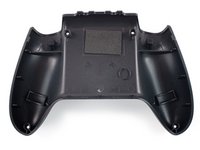
  5. How to Open the GuliKit KingKong 2 Pro, Remove the back cover: crwdns2935265:05crwdnd2935265:01crwdnd2935265:02crwdne2935265:0 How to Open the GuliKit KingKong 2 Pro, Remove the back cover: crwdns2935265:05crwdnd2935265:02crwdnd2935265:02crwdne2935265:0
    • Separate the back cover from the front assembly and remove it.

crwdns2915888:0crwdne2915888:0

To reassemble your device, follow these instructions in reverse order.

Take your e-waste to an R2 or e-Stewards certified recycler.

Repair didn’t go as planned? Check out our Answers community for troubleshooting help.

Dominik Schnabelrauch

crwdns2935283:011/23/16crwdne2935283:0

204,929 crwdns2915208:0crwdne2915208:0

crwdns2935297:0682crwdne2935297:0

crwdns2915084:0crwdne2915084:0

iFixit crwdns2935289:0iFixitcrwdne2935289:0

Staff

crwdns2931471:0136crwdne2931471:0

crwdns2935297:017,420crwdne2935297:0

crwdns2944067:00crwdne2944067:0

crwdns2917038:0crwdne2917038:0

crwdns2936625:0crwdne2936625:0:

crwdns2936751:024crwdne2936751:0 4

crwdns2936753:07crwdne2936753:0 24

crwdns2936753:030crwdne2936753:0 144

crwdns2942667:0crwdne2942667:0 5,549