crwdns2915892:0crwdne2915892:0
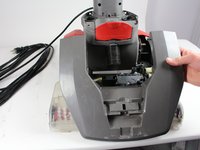
The suction motor is at the core of the proper function of any household floor cleaner. This guide will demonstrate how to properly replace a broken suction motor.
crwdns2942213:0crwdne2942213:0
-
-
Lay the cleaner down horizontally with its wheels closest to the floor.
-
-
-
Hold the lower brush roll with both hands and pull outwards until it is detached.
-
-
-
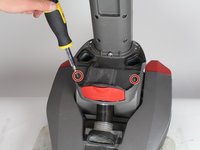
Unscrew the 6 marked screws using a Phillips #2 head screwdriver.
-
Remove the brush roller.
Removing long roller brush is not required and can’t be done at this point because of belt.
Yuck!! I want to clean the transparent curved surface. I can’t get at it.
-
-
-
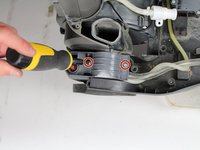
Use a long #2 Philips head screwdriver to remove the 8 numbered screws on the bottom of the cleaner.
The 8 screws are not all shown here. There are arrows with numbers pointing at all of them on the dark plastic. The two shown here in red are labelled on the clear plastic.
-
-
-
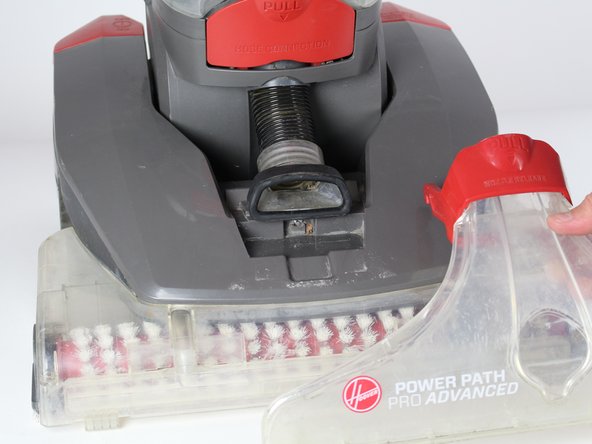
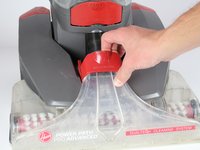
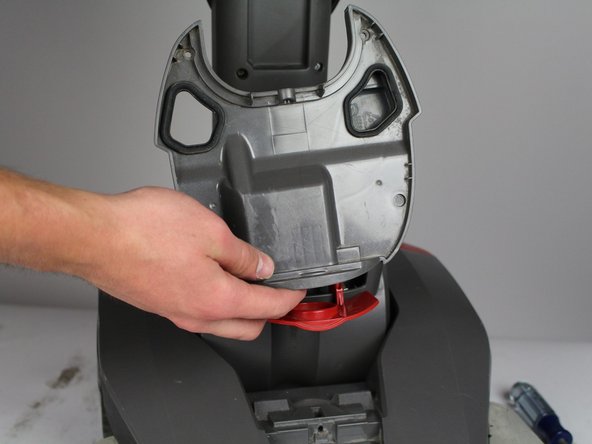
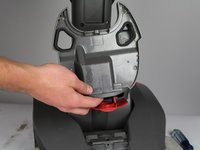
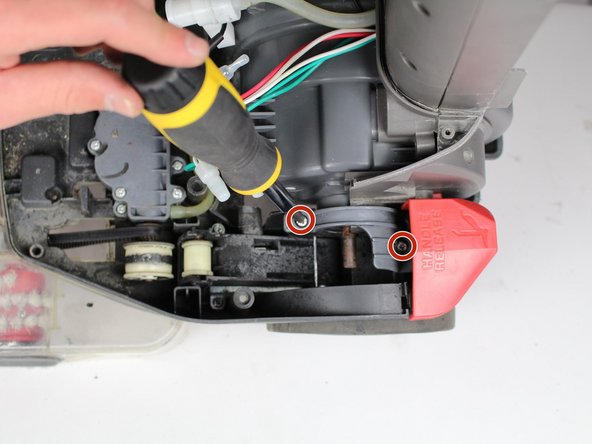
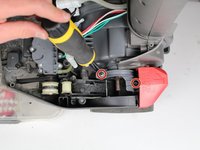
Pull the red handle shown to remove the front suction unit from the cleaner.
-
-
-
-
Unscrew the Phillips #2 screw at the bottom of the hose.
-
-
-
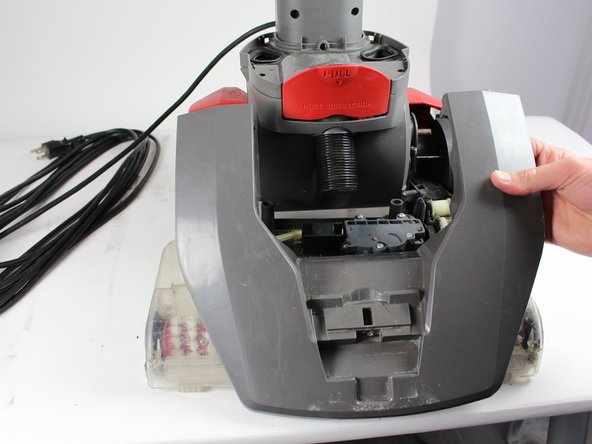
Push down on the handle release button. Pull and disconnect the edge of the top cover on the side of the handle release button.
-
Repeat the above step for the "On/Off" button.
What a load off bollocks following this instruction broke my Hoover
I followed your instructions and after pressing the release button and the start button erasing the clips broke my Hoover as it's not as easy as you
It is impossible to remove the top cover...!!!!! I'm breaking the vacuum!!! you need to give better instructions!!!
This guy forgot about removing the entire underside first...also snapped off a plastic screw casing. Bollocks is correct. There should be 10 or 11 steps. Take off the bottom casing, about 7 screws I believe.
-
-
-
Gently grab the belt and pry it off from the rollers.
-
-
-
Unscrew two screws using Phillips #2 screwdriver.
-
Detach grey piece from vacuum.
-
-
-
Unscrew four screws using a Phillips 2 screwdriver.
How to remove electric on/off switch cover is not mentioned. To keep from breaking cover by prying, drill about a 3/8” hole through plastic cover lined up with partially hidden screw and remove screw. To drill a smoother holed use reverse (CCW).
-
-
-
Flip vacuum over and unscrew three screws with a Phillips #2 screwdriver.
-
-
-
Unscrew two screws with Phillips #2 screwdriver.
-
-
-
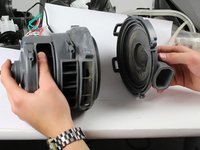
Detach motor and unscrew two screws with a Phillips #2 screwdriver.
-
-
-
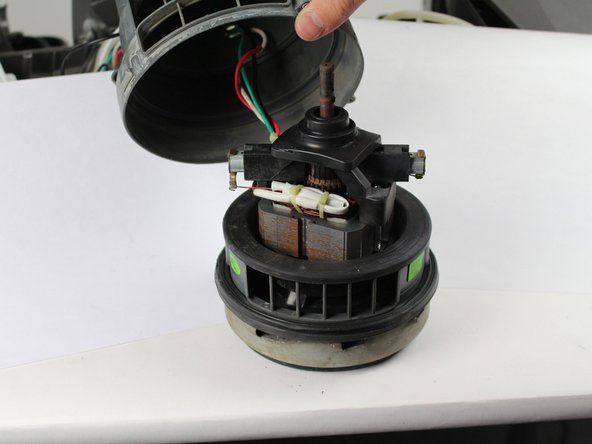
Pull the bottom section off.
-
Pull the cap off.
-


To reassemble your device, follow these instructions in reverse order.
To reassemble your device, follow these instructions in reverse order.
crwdns2935221:0crwdne2935221:0
crwdns2935229:04crwdne2935229:0
crwdns2915084:0crwdne2915084:0

Cal Poly, Team S16-G5, Banghart Winter 2018 crwdns2935289:0Cal Poly, Team S16-G5, Banghart Winter 2018crwdne2935289:0
CPSU-BANGHART-W18S16G5
crwdns2931471:05crwdne2931471:0
crwdns2935297:015crwdne2935297:0
crwdns2947410:01crwdne2947410:0
What to do if the motor is still good but the cooling fan on the top of the armature has broken off?
I have to rollers on mine.
poco24 - crwdns2934203:0crwdne2934203:0
I have two rollers on mine.
poco24 - crwdns2934203:0crwdne2934203:0