crwdns2933423:0crwdne2933423:0

Google Pixel 9a Wireless Charging Assembly Replacement

crwdns2942213:0crwdne2942213:0

  1. Google Pixel 9a Wireless Charging Assembly Replacement, Safety precautions: crwdns2935265:01crwdnd2935265:01crwdnd2935265:02crwdne2935265:0 Google Pixel 9a Wireless Charging Assembly Replacement, Safety precautions: crwdns2935265:01crwdnd2935265:02crwdnd2935265:02crwdne2935265:0
    • Let your Pixel's battery drain below 25% before starting this repair. A charged lithium‑ion battery may catch fire if damaged.

    • Unplug all cables and completely power down your phone.

  2. Google Pixel 9a Wireless Charging Assembly Replacement, Heat the rear cover: crwdns2935265:02crwdnd2935265:01crwdnd2935265:03crwdne2935265:0 Google Pixel 9a Wireless Charging Assembly Replacement, Heat the rear cover: crwdns2935265:02crwdnd2935265:02crwdnd2935265:03crwdne2935265:0 Google Pixel 9a Wireless Charging Assembly Replacement, Heat the rear cover: crwdns2935265:02crwdnd2935265:03crwdnd2935265:03crwdne2935265:0
    • Adhesive secures the rear cover to the frame. Heating the cover softens the adhesive, making it easier to separate.

    • Use a hair dryer to heat the entire rear cover.

    • Only heat your phone so it's just hot to the touch. Extreme heat can damage the rear cover, screen, or battery.

  3. Google Pixel 9a Wireless Charging Assembly Replacement, Apply a suction handle: crwdns2935265:03crwdnd2935265:01crwdnd2935265:02crwdne2935265:0 Google Pixel 9a Wireless Charging Assembly Replacement, Apply a suction handle: crwdns2935265:03crwdnd2935265:02crwdnd2935265:02crwdne2935265:0
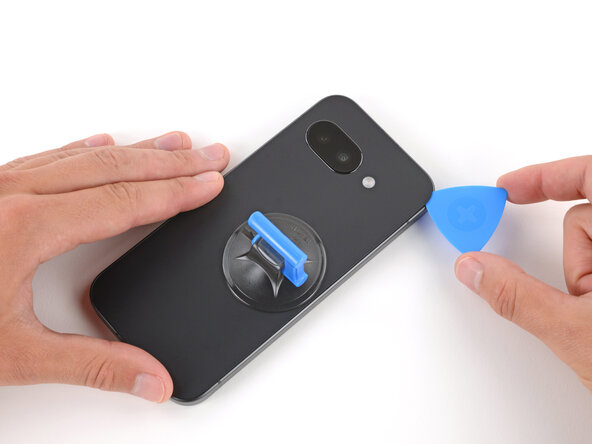
    • Apply a suction handle near the center of the rear cover's right edge, as close to the edge as possible.

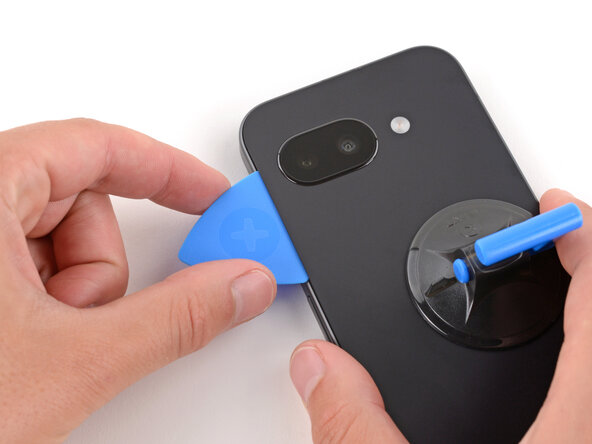
  4. Google Pixel 9a Wireless Charging Assembly Replacement, Insert an opening pick: crwdns2935265:04crwdnd2935265:01crwdnd2935265:03crwdne2935265:0 Google Pixel 9a Wireless Charging Assembly Replacement, Insert an opening pick: crwdns2935265:04crwdnd2935265:02crwdnd2935265:03crwdne2935265:0 Google Pixel 9a Wireless Charging Assembly Replacement, Insert an opening pick: crwdns2935265:04crwdnd2935265:03crwdnd2935265:03crwdne2935265:0
    • Pull up on the suction handle with strong, steady force until a gap forms between the cover and frame.

    • Insert the tip of an opening pick into the gap.

  5. Google Pixel 9a Wireless Charging Assembly Replacement, Adhesive information: crwdns2935265:05crwdnd2935265:01crwdnd2935265:03crwdne2935265:0 Google Pixel 9a Wireless Charging Assembly Replacement, Adhesive information: crwdns2935265:05crwdnd2935265:02crwdnd2935265:03crwdne2935265:0 Google Pixel 9a Wireless Charging Assembly Replacement, Adhesive information: crwdns2935265:05crwdnd2935265:03crwdnd2935265:03crwdne2935265:0
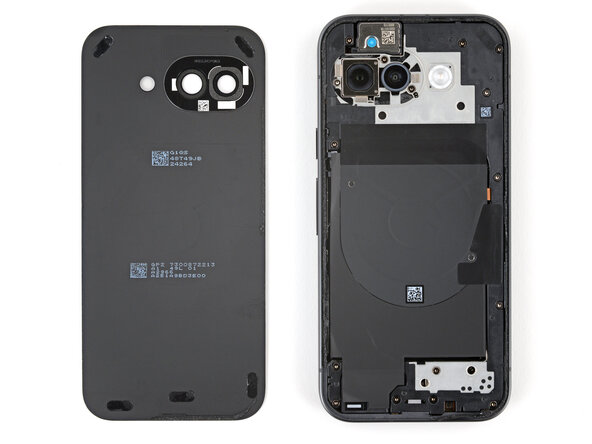
    • The rear cover is secured with adhesive around the perimeter of the frame and near the cameras. Use this picture as a reference while you separate the adhesive.

    • When separating the left and right edge adhesive, don't insert your pick more than 3 mm to avoid damaging the wireless charging coil and its graphite film.

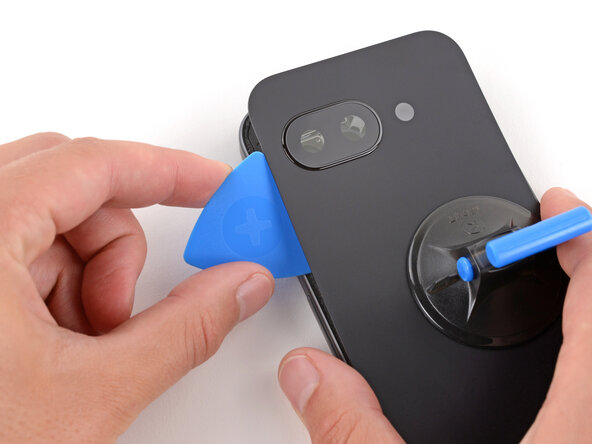
  6. Google Pixel 9a Wireless Charging Assembly Replacement, Separate the rear cover adhesive: crwdns2935265:06crwdnd2935265:01crwdnd2935265:03crwdne2935265:0 Google Pixel 9a Wireless Charging Assembly Replacement, Separate the rear cover adhesive: crwdns2935265:06crwdnd2935265:02crwdnd2935265:03crwdne2935265:0 Google Pixel 9a Wireless Charging Assembly Replacement, Separate the rear cover adhesive: crwdns2935265:06crwdnd2935265:03crwdnd2935265:03crwdne2935265:0
    • If you ever have trouble separating the adhesive, apply more heat and try again.

    • Slide the opening pick up the right edge, around the top right corner, and along the top edge to separate the adhesive securing the rear cover.

  7. Google Pixel 9a Wireless Charging Assembly Replacement: crwdns2935265:07crwdnd2935265:01crwdnd2935265:03crwdne2935265:0 Google Pixel 9a Wireless Charging Assembly Replacement: crwdns2935265:07crwdnd2935265:02crwdnd2935265:03crwdne2935265:0 Google Pixel 9a Wireless Charging Assembly Replacement: crwdns2935265:07crwdnd2935265:03crwdnd2935265:03crwdne2935265:0
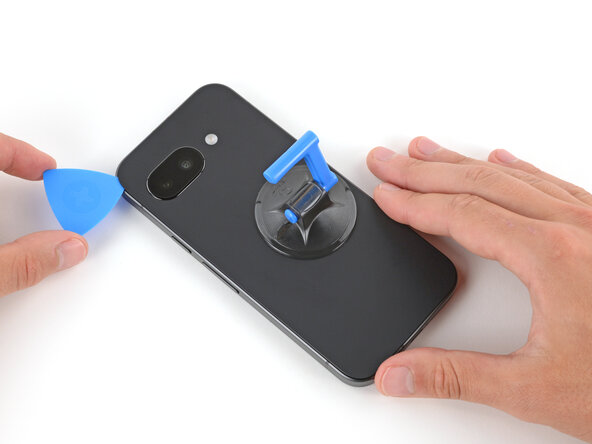
    • Insert an opening pick in the initial gap you created near the center of the rear cover's right edge.

    • Slide the opening pick down the right edge, along the bottom edge, and up the left edge to separate the adhesive securing the cover.

  8. Google Pixel 9a Wireless Charging Assembly Replacement, Separate the camera bezel adhesive: crwdns2935265:08crwdnd2935265:01crwdnd2935265:03crwdne2935265:0 Google Pixel 9a Wireless Charging Assembly Replacement, Separate the camera bezel adhesive: crwdns2935265:08crwdnd2935265:02crwdnd2935265:03crwdne2935265:0 Google Pixel 9a Wireless Charging Assembly Replacement, Separate the camera bezel adhesive: crwdns2935265:08crwdnd2935265:03crwdnd2935265:03crwdne2935265:0
    • Insert the flat edge of an opening pick under the top of the rear cover's left edge, near the camera bezel.

    • Twist the pick and apply constant pressure to separate the adhesive around the camera bezel.

  9. Google Pixel 9a Wireless Charging Assembly Replacement, Remove the rear cover: crwdns2935265:09crwdnd2935265:01crwdnd2935265:02crwdne2935265:0 Google Pixel 9a Wireless Charging Assembly Replacement, Remove the rear cover: crwdns2935265:09crwdnd2935265:02crwdnd2935265:02crwdne2935265:0
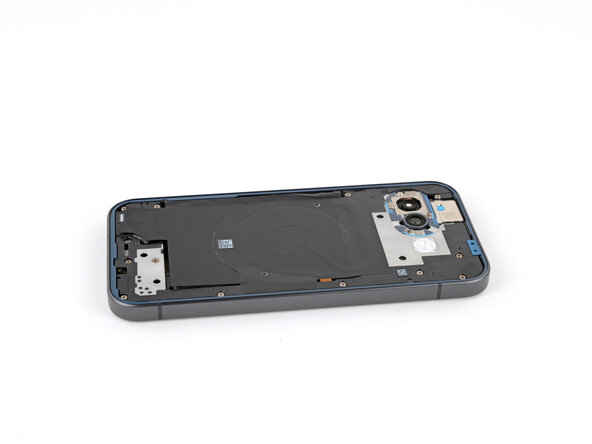
    • Remove the rear cover.

    • If you feel resistance, go back around the perimeter of the cover and use a pick to separate any remaining adhesive.

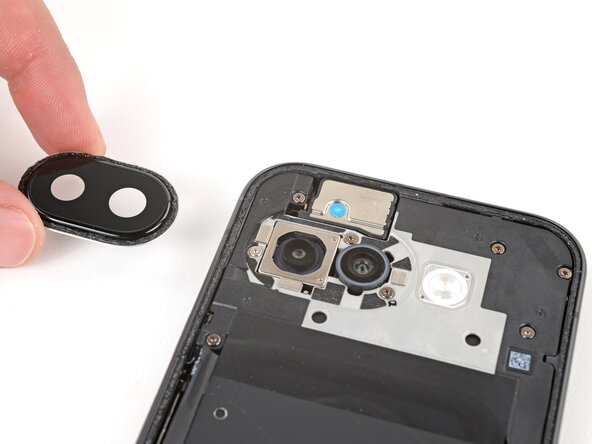
  10. Google Pixel 9a Wireless Charging Assembly Replacement, Remove the camera bezel: crwdns2935265:010crwdnd2935265:01crwdnd2935265:03crwdne2935265:0 Google Pixel 9a Wireless Charging Assembly Replacement, Remove the camera bezel: crwdns2935265:010crwdnd2935265:02crwdnd2935265:03crwdne2935265:0 Google Pixel 9a Wireless Charging Assembly Replacement, Remove the camera bezel: crwdns2935265:010crwdnd2935265:03crwdnd2935265:03crwdne2935265:0
    • If the camera bezel detached from the rear cover and stayed stuck to your phone, follow this step to remove it. Otherwise, skip this step.

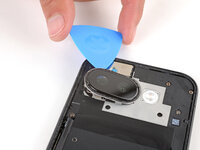
    • Slide an opening pick under the camera bezel and pry up to remove it.

    • Only insert the pick a few millimeters under the bezel, or you risk damaging the cameras.

    • If you're having trouble, lightly heat the camera bezel.

  11. Google Pixel 9a Wireless Charging Assembly Replacement, Remove the wireless charging assembly screws: crwdns2935265:011crwdnd2935265:01crwdnd2935265:02crwdne2935265:0 Google Pixel 9a Wireless Charging Assembly Replacement, Remove the wireless charging assembly screws: crwdns2935265:011crwdnd2935265:02crwdnd2935265:02crwdne2935265:0
    crwdns2935267:0crwdne2935267:0
    Magnetic Project Mat
    $19.95
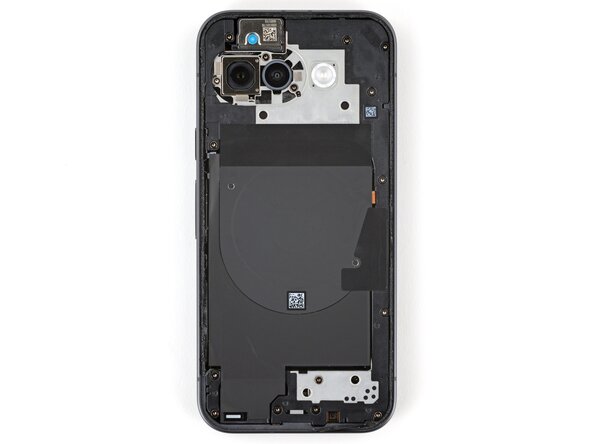
    • Use a Torx Plus 3IP screwdriver to remove the 16 screws securing the wireless charging assembly:

    • Thirteen 5.0 mm‑long screws

    • Three 2.2 mm‑long screws

    • Throughout this repair, keep track of each screw and make sure it goes back exactly where it came from to avoid damaging your phone.

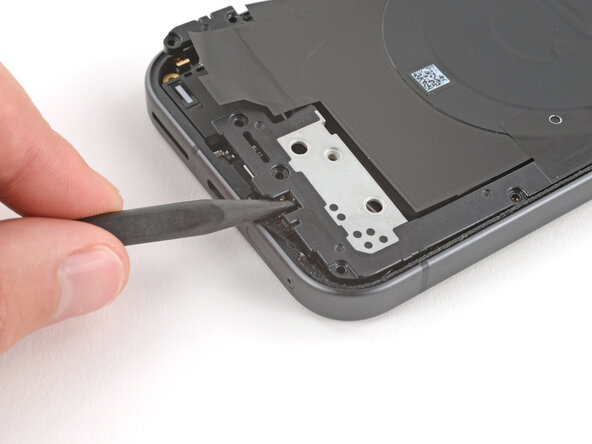
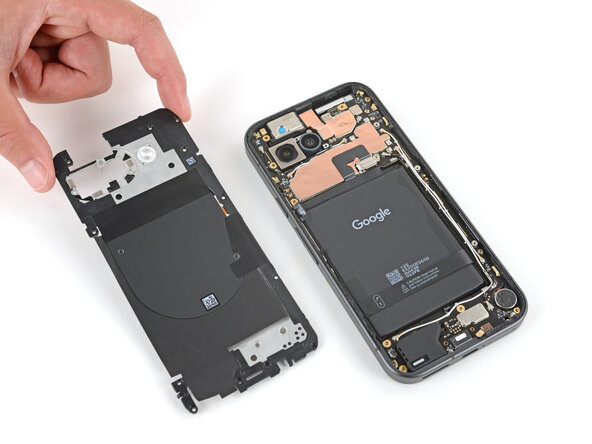
  12. Google Pixel 9a Wireless Charging Assembly Replacement, Unclip the wireless charging assembly: crwdns2935265:012crwdnd2935265:01crwdnd2935265:03crwdne2935265:0 Google Pixel 9a Wireless Charging Assembly Replacement, Unclip the wireless charging assembly: crwdns2935265:012crwdnd2935265:02crwdnd2935265:03crwdne2935265:0 Google Pixel 9a Wireless Charging Assembly Replacement, Unclip the wireless charging assembly: crwdns2935265:012crwdnd2935265:03crwdnd2935265:03crwdne2935265:0
  13. Google Pixel 9a Wireless Charging Assembly Replacement, Remove the wireless charging assembly: crwdns2935265:013crwdnd2935265:01crwdnd2935265:02crwdne2935265:0 Google Pixel 9a Wireless Charging Assembly Replacement, Remove the wireless charging assembly: crwdns2935265:013crwdnd2935265:02crwdnd2935265:02crwdne2935265:0
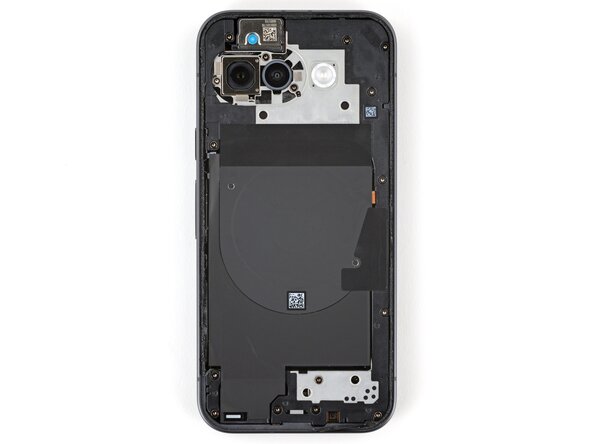
    • Remove the wireless charging assembly.

  14. Google Pixel 9a Wireless Charging Assembly Replacement, Disassembly complete: crwdns2935265:014crwdnd2935265:01crwdnd2935265:01crwdne2935265:0
    • Congratulations on completing disassembly! The remaining steps will show how to reassemble your phone.

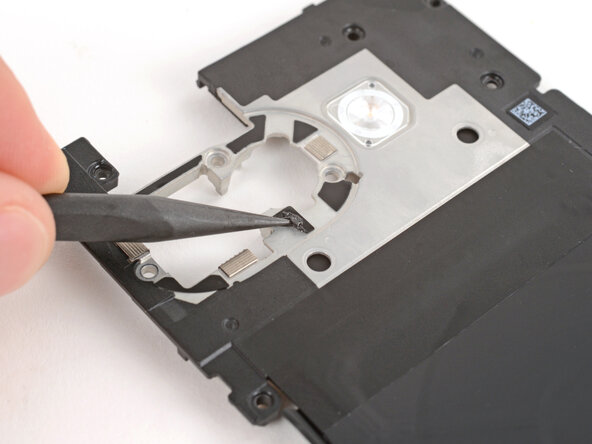
  15. Google Pixel 9a Wireless Charging Assembly Replacement, Remove the old adhesive: crwdns2935265:015crwdnd2935265:01crwdnd2935265:02crwdne2935265:0 Google Pixel 9a Wireless Charging Assembly Replacement, Remove the old adhesive: crwdns2935265:015crwdnd2935265:02crwdnd2935265:02crwdne2935265:0
    • Use a spudger to scrape up and remove the six small pieces of adhesive around the rear cameras.

    • Use high‑concentration (>90%) isopropyl alcohol and a lint‑free cloth (or coffee filter) to clean up and remove any residue from the adhesives that were removed.

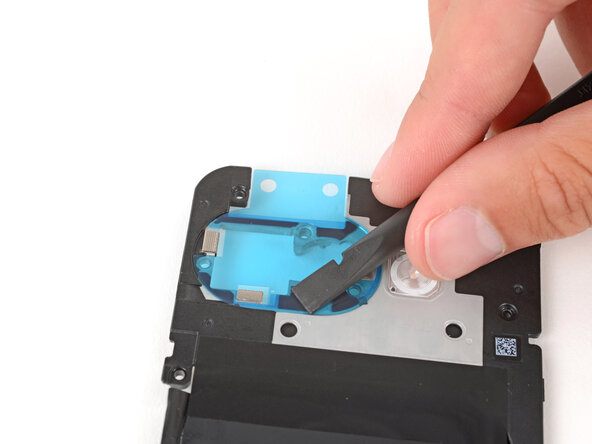
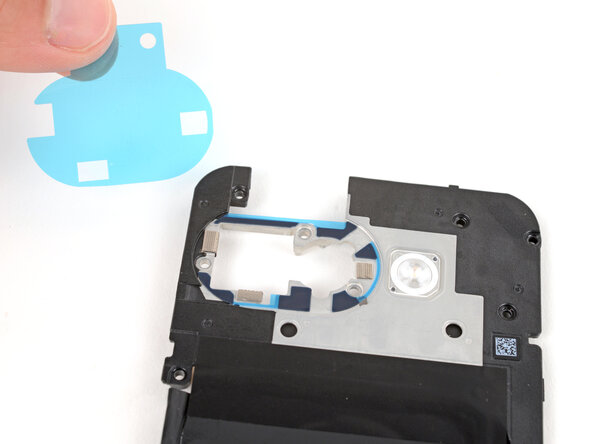
  16. Google Pixel 9a Wireless Charging Assembly Replacement, Apply the adhesive: crwdns2935265:016crwdnd2935265:01crwdnd2935265:03crwdne2935265:0 Google Pixel 9a Wireless Charging Assembly Replacement, Apply the adhesive: crwdns2935265:016crwdnd2935265:02crwdnd2935265:03crwdne2935265:0 Google Pixel 9a Wireless Charging Assembly Replacement, Apply the adhesive: crwdns2935265:016crwdnd2935265:03crwdnd2935265:03crwdne2935265:0
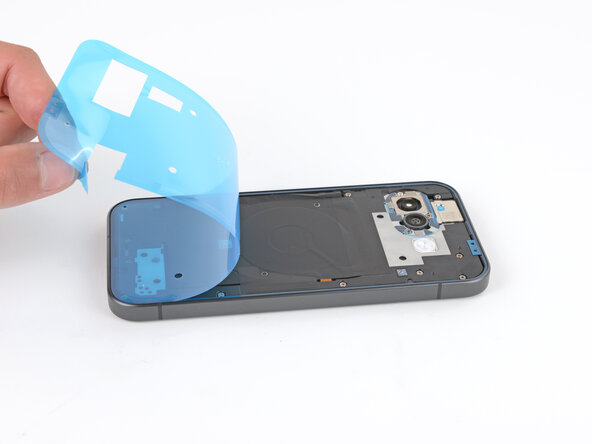
    • Remove the larger, clear liner from the inner housing adhesive and lay it in place around the camera holes.

    • Use the cutouts for the small silver pads to help align the adhesive.

    • Use the flat end of a spudger to firmly push down on each piece of adhesive, securing them in place.

    • Remove the colored liner using the pull tab on the top edge.

    • If the adhesive starts to pull up with the liner, lay it back in place and use your spudger to secure it again.

  17. Google Pixel 9a Wireless Charging Assembly Replacement, Secure the adhesive: crwdns2935265:017crwdnd2935265:01crwdnd2935265:03crwdne2935265:0 Google Pixel 9a Wireless Charging Assembly Replacement, Secure the adhesive: crwdns2935265:017crwdnd2935265:02crwdnd2935265:03crwdne2935265:0 Google Pixel 9a Wireless Charging Assembly Replacement, Secure the adhesive: crwdns2935265:017crwdnd2935265:03crwdnd2935265:03crwdne2935265:0
    • Use a spudger to firmly press down on each of the six pieces of inner housing adhesive to secure them.

    • These pieces of adhesive can easily be pulled up when removing the final liners, so make sure they're firmly in place.

  18. Google Pixel 9a Wireless Charging Assembly Replacement, Install the wireless charging assembly: crwdns2935265:018crwdnd2935265:01crwdnd2935265:02crwdne2935265:0 Google Pixel 9a Wireless Charging Assembly Replacement, Install the wireless charging assembly: crwdns2935265:018crwdnd2935265:02crwdnd2935265:02crwdne2935265:0
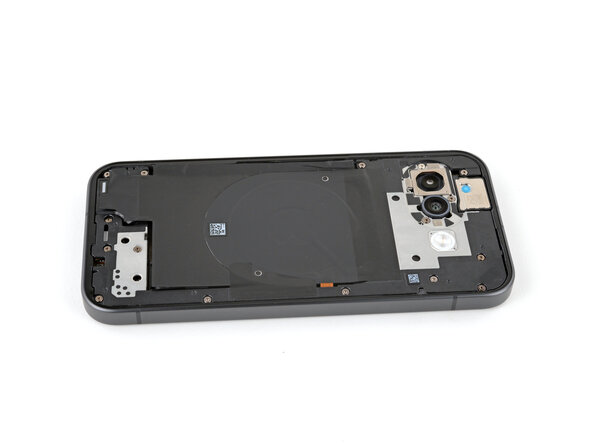
    • Place the wireless charging assembly onto the frame.

  19. Google Pixel 9a Wireless Charging Assembly Replacement: crwdns2935265:019crwdnd2935265:01crwdnd2935265:03crwdne2935265:0 Google Pixel 9a Wireless Charging Assembly Replacement: crwdns2935265:019crwdnd2935265:02crwdnd2935265:03crwdne2935265:0 Google Pixel 9a Wireless Charging Assembly Replacement: crwdns2935265:019crwdnd2935265:03crwdnd2935265:03crwdne2935265:0
    • Use your fingers to firmly press around the perimeter of the wireless charging assembly to re‑engage all of its clips.

  20. Google Pixel 9a Wireless Charging Assembly Replacement, Install the wireless charging assembly screws: crwdns2935265:020crwdnd2935265:01crwdnd2935265:02crwdne2935265:0 Google Pixel 9a Wireless Charging Assembly Replacement, Install the wireless charging assembly screws: crwdns2935265:020crwdnd2935265:02crwdnd2935265:02crwdne2935265:0
    • Use a Torx Plus 3IP screwdriver to install the 16 screws securing the wireless charging assembly:

    • Thirteen 5.0 mm‑long screws

    • Three 2.2 mm‑long screws

  21. Google Pixel 9a Wireless Charging Assembly Replacement, Remove the old rear cover adhesive: crwdns2935265:021crwdnd2935265:01crwdnd2935265:03crwdne2935265:0 Google Pixel 9a Wireless Charging Assembly Replacement, Remove the old rear cover adhesive: crwdns2935265:021crwdnd2935265:02crwdnd2935265:03crwdne2935265:0 Google Pixel 9a Wireless Charging Assembly Replacement, Remove the old rear cover adhesive: crwdns2935265:021crwdnd2935265:03crwdnd2935265:03crwdne2935265:0
    • Take your time during the next two steps. A clean frame allows replacement adhesive to lay evenly, ensuring a better bond.

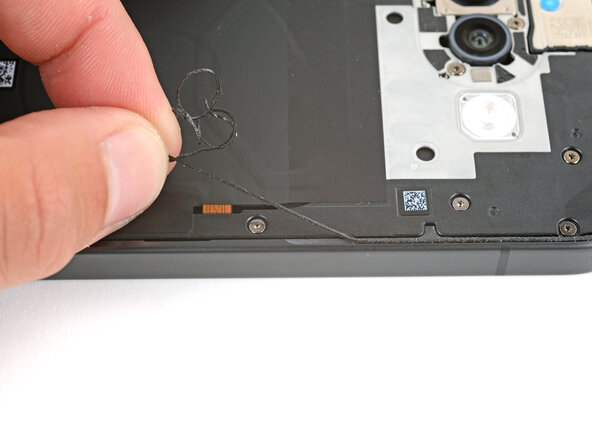
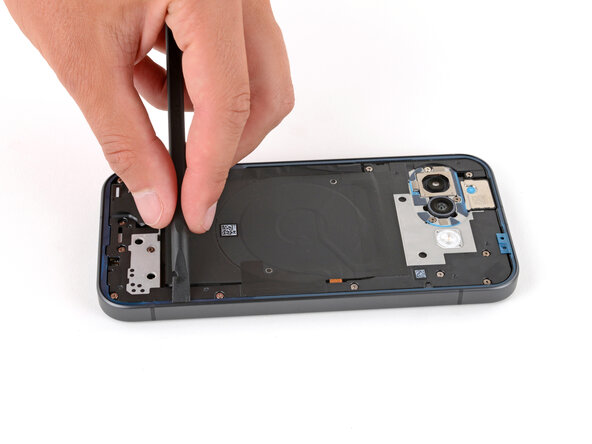
    • Use a spudger and tweezers to scrape up and remove all the old rear cover adhesive from the perimeter of your phone.

    • If you scrape up a piece big enough to grip with your fingers, you can pull long sections of the adhesive up. Pull slowly and straight in the opposite direction of the adhesive.

  22. Google Pixel 9a Wireless Charging Assembly Replacement, Clean the frame: crwdns2935265:022crwdnd2935265:01crwdnd2935265:01crwdne2935265:0
    • Using some high-concentration (>90%) isopropyl alcohol and a lint‑free cloth (or coffee filter), clean the areas of the frame where the adhesive was.

  23. Google Pixel 9a Wireless Charging Assembly Replacement, Find the adhesive orientation: crwdns2935265:023crwdnd2935265:01crwdnd2935265:02crwdne2935265:0 Google Pixel 9a Wireless Charging Assembly Replacement, Find the adhesive orientation: crwdns2935265:023crwdnd2935265:02crwdnd2935265:02crwdne2935265:0
    • Before applying the rear cover adhesive, make sure you know how it will sit on the frame. If you apply the adhesive incorrectly, you'll need to restart with new adhesive.

    • Hold the adhesive above the frame to find its orientation. Use the camera cutout in the liner to help visualize how it will lay on the frame.

  24. Google Pixel 9a Wireless Charging Assembly Replacement, Peel the liner halfway down: crwdns2935265:024crwdnd2935265:01crwdnd2935265:01crwdne2935265:0
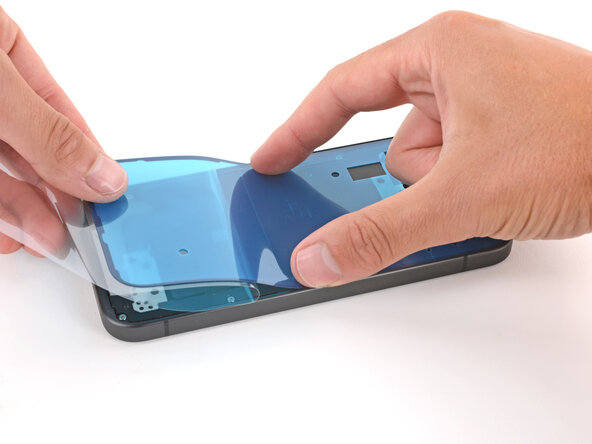
    • Peel down the top half of the large, clear liner to expose the adhesive—don't fully remove the liner yet.

  25. Google Pixel 9a Wireless Charging Assembly Replacement, Apply the adhesive: crwdns2935265:025crwdnd2935265:01crwdnd2935265:03crwdne2935265:0 Google Pixel 9a Wireless Charging Assembly Replacement, Apply the adhesive: crwdns2935265:025crwdnd2935265:02crwdnd2935265:03crwdne2935265:0 Google Pixel 9a Wireless Charging Assembly Replacement, Apply the adhesive: crwdns2935265:025crwdnd2935265:03crwdnd2935265:03crwdne2935265:0
    • Take your time aligning the adhesive with the frame—it's very sticky and can't be moved once you apply it.

    • With the larger, clear liner folded towards the bottom of the phone, lay the exposed top edge of the adhesive onto the frame.

    • Use the lip of the frame to help align the adhesive.

    • Once the top edge is properly aligned, gently press down on the top corners with your fingers to secure the adhesive.

  26. Google Pixel 9a Wireless Charging Assembly Replacement: crwdns2935265:026crwdnd2935265:01crwdnd2935265:03crwdne2935265:0 Google Pixel 9a Wireless Charging Assembly Replacement: crwdns2935265:026crwdnd2935265:02crwdnd2935265:03crwdne2935265:0 Google Pixel 9a Wireless Charging Assembly Replacement: crwdns2935265:026crwdnd2935265:03crwdnd2935265:03crwdne2935265:0
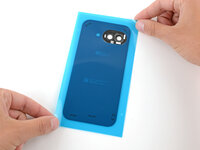
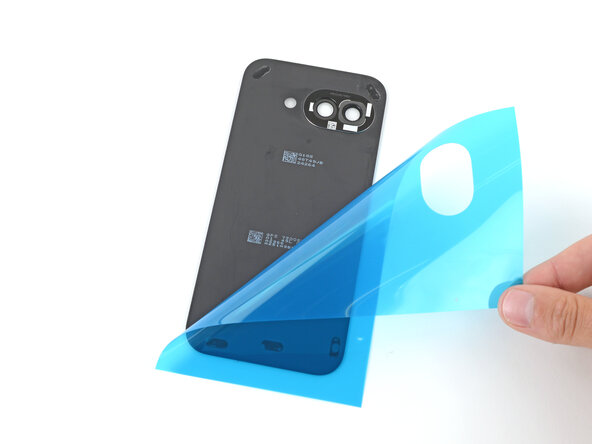
    • Slowly lay the rest of the adhesive onto the frame, pressing it into place and peeling away the larger liner as you go.

  27. Google Pixel 9a Wireless Charging Assembly Replacement, Remove the top liner: crwdns2935265:027crwdnd2935265:01crwdnd2935265:03crwdne2935265:0 Google Pixel 9a Wireless Charging Assembly Replacement, Remove the top liner: crwdns2935265:027crwdnd2935265:02crwdnd2935265:03crwdne2935265:0 Google Pixel 9a Wireless Charging Assembly Replacement, Remove the top liner: crwdns2935265:027crwdnd2935265:03crwdnd2935265:03crwdne2935265:0
    • Use the pull tab to remove the large, colored liner.

  28. Google Pixel 9a Wireless Charging Assembly Replacement, Secure the adhesive: crwdns2935265:028crwdnd2935265:01crwdnd2935265:03crwdne2935265:0 Google Pixel 9a Wireless Charging Assembly Replacement, Secure the adhesive: crwdns2935265:028crwdnd2935265:02crwdnd2935265:03crwdne2935265:0 Google Pixel 9a Wireless Charging Assembly Replacement, Secure the adhesive: crwdns2935265:028crwdnd2935265:03crwdnd2935265:03crwdne2935265:0
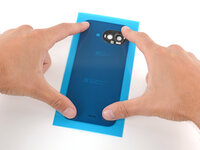
    • Use a spudger to press down firmly on the adhesive around the perimeter of your phone to secure it to the frame.

  29. Google Pixel 9a Wireless Charging Assembly Replacement, Remove the old camera bezel adhesive: crwdns2935265:029crwdnd2935265:01crwdnd2935265:02crwdne2935265:0 Google Pixel 9a Wireless Charging Assembly Replacement, Remove the old camera bezel adhesive: crwdns2935265:029crwdnd2935265:02crwdnd2935265:02crwdne2935265:0
    • If the camera bezel detached when removing the rear cover, follow the next five steps to install it. Otherwise, skip down five steps.

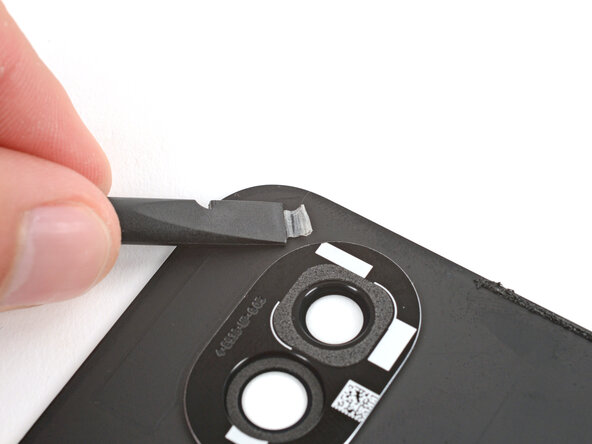
    • Use a spudger to scrape up and remove any of the old adhesive from the camera bezel and its corresponding spot on the rear cover.

  30. Google Pixel 9a Wireless Charging Assembly Replacement, Remove the adhesive residue: crwdns2935265:030crwdnd2935265:01crwdnd2935265:02crwdne2935265:0 Google Pixel 9a Wireless Charging Assembly Replacement, Remove the adhesive residue: crwdns2935265:030crwdnd2935265:02crwdnd2935265:02crwdne2935265:0
    • Use high-concentration (>90%) isopropyl alcohol and a lint‑free cloth (or coffee filter) to clean up and remove any adhesive residue from the camera bezel and its corresponding spot on the rear cover.

  31. Google Pixel 9a Wireless Charging Assembly Replacement, Apply the adhesive: crwdns2935265:031crwdnd2935265:01crwdnd2935265:02crwdne2935265:0 Google Pixel 9a Wireless Charging Assembly Replacement, Apply the adhesive: crwdns2935265:031crwdnd2935265:02crwdnd2935265:02crwdne2935265:0
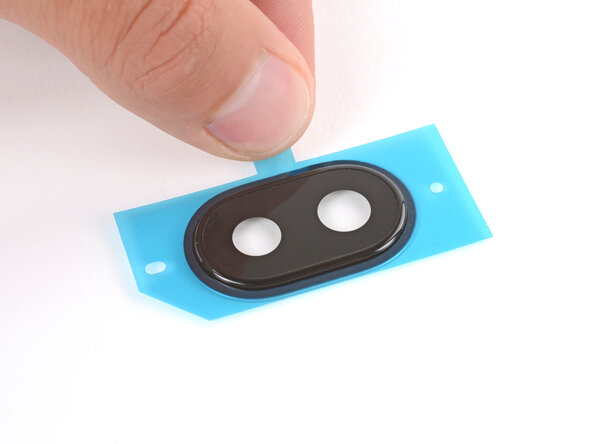
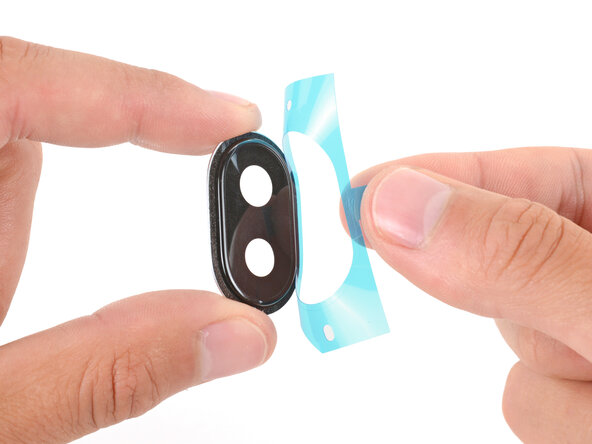
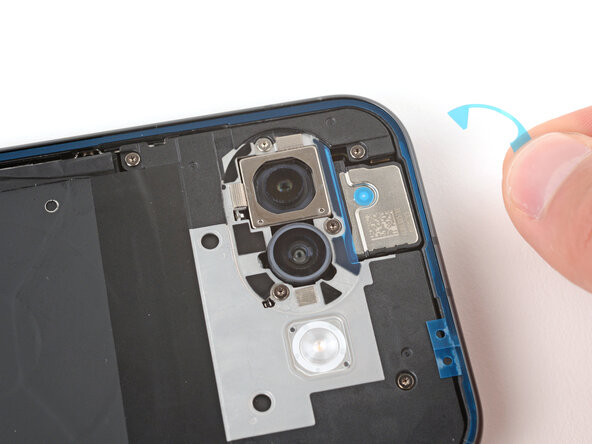
    • Remove the large, clear liner from the camera bezel adhesive.

    • Put the adhesive over the top of the camera bezel and set it in place.

  32. Google Pixel 9a Wireless Charging Assembly Replacement: crwdns2935265:032crwdnd2935265:01crwdnd2935265:03crwdne2935265:0 Google Pixel 9a Wireless Charging Assembly Replacement: crwdns2935265:032crwdnd2935265:02crwdnd2935265:03crwdne2935265:0 Google Pixel 9a Wireless Charging Assembly Replacement: crwdns2935265:032crwdnd2935265:03crwdnd2935265:03crwdne2935265:0
    • Use a spudger to firmly press around the perimeter of the camera bezel to secure the adhesive.

    • Remove the second, colored liner from the camera bezel adhesive.

  33. Google Pixel 9a Wireless Charging Assembly Replacement, Install the camera bezel: crwdns2935265:033crwdnd2935265:01crwdnd2935265:02crwdne2935265:0 Google Pixel 9a Wireless Charging Assembly Replacement, Install the camera bezel: crwdns2935265:033crwdnd2935265:02crwdnd2935265:02crwdne2935265:0
    • Align the camera bezel such that the square foam is closest to the edge.

    • Use your fingers to press the camera bezel into place on the rear cover, squeezing firmly around the perimeter to secure it with the adhesive.

  34. Google Pixel 9a Wireless Charging Assembly Replacement, Remove the old rear cover adhesive: crwdns2935265:034crwdnd2935265:01crwdnd2935265:02crwdne2935265:0 Google Pixel 9a Wireless Charging Assembly Replacement, Remove the old rear cover adhesive: crwdns2935265:034crwdnd2935265:02crwdnd2935265:02crwdne2935265:0
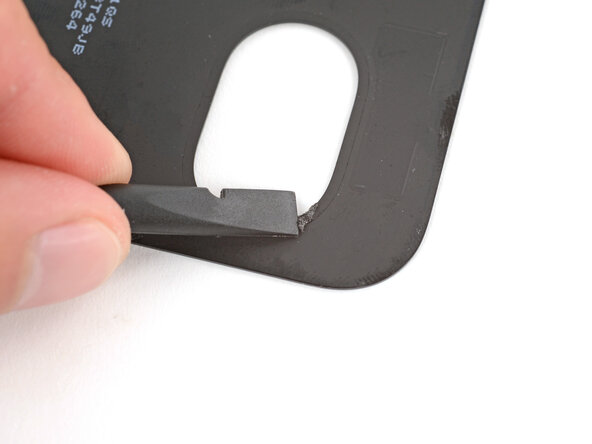
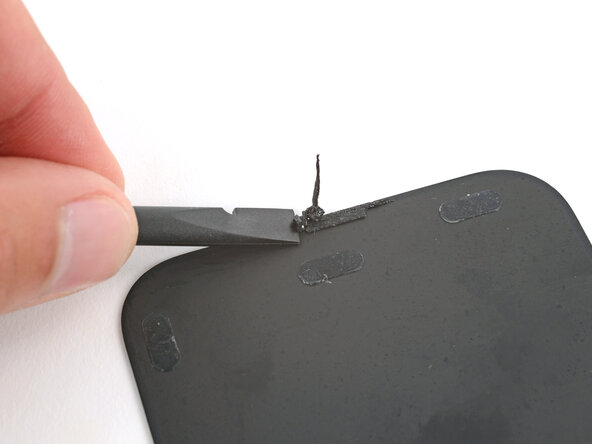
    • Use the flat end of a spudger to scrape up and remove any all the old adhesive that stayed on the back cover, including the five pieces of small, oval‑shaped adhesive.

    • If you don't see all the oval adhesives, some might've stuck to the phone frame.

  35. Google Pixel 9a Wireless Charging Assembly Replacement: crwdns2935265:035crwdnd2935265:01crwdnd2935265:01crwdne2935265:0
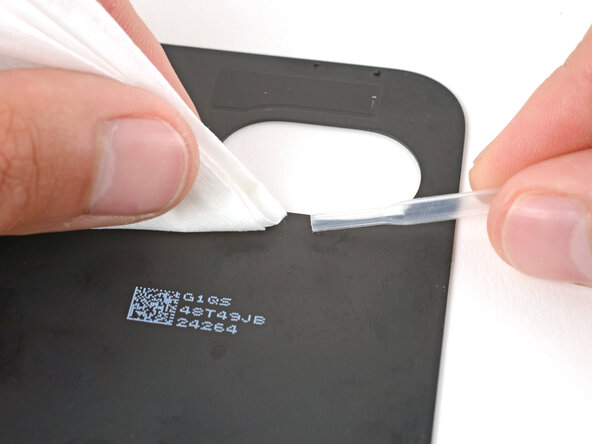
    • Use high‑concentration (>90%) isopropyl alcohol and a lint‑free cloth (or coffee filter) to clean up and remove any residue from the adhesives you removed.

  36. Google Pixel 9a Wireless Charging Assembly Replacement, Apply the adhesive: crwdns2935265:036crwdnd2935265:01crwdnd2935265:02crwdne2935265:0 Google Pixel 9a Wireless Charging Assembly Replacement, Apply the adhesive: crwdns2935265:036crwdnd2935265:02crwdnd2935265:02crwdne2935265:0
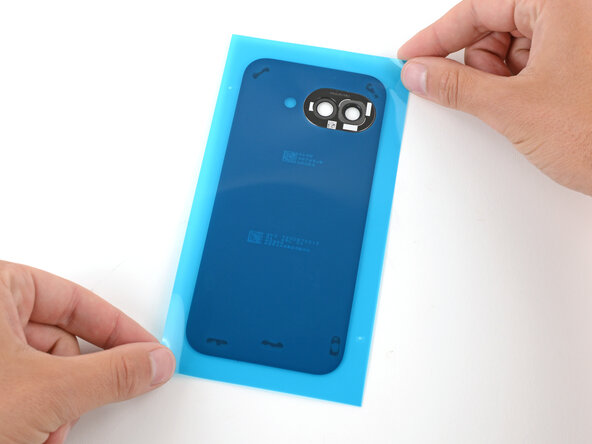
    • Remove the larger, clear liner from the back cover inner adhesive.

    • Lay the adhesive onto the bottom of the back cover, making sure the cutout goes around the camera bezel.

  37. Google Pixel 9a Wireless Charging Assembly Replacement, Secure the adhesive: crwdns2935265:037crwdnd2935265:01crwdnd2935265:02crwdne2935265:0 Google Pixel 9a Wireless Charging Assembly Replacement, Secure the adhesive: crwdns2935265:037crwdnd2935265:02crwdnd2935265:02crwdne2935265:0
    • Use your fingers or a spudger to firmly push down on the five small adhesives to secure them to the back cover.

    • Slowly peel up and remove the remaining liner.

    • If the adhesives start to peel up with the liner, lay it back down and use your spudger to secure the adhesive again.

  38. Google Pixel 9a Wireless Charging Assembly Replacement, Remove the remaining liners: crwdns2935265:038crwdnd2935265:01crwdnd2935265:03crwdne2935265:0 Google Pixel 9a Wireless Charging Assembly Replacement, Remove the remaining liners: crwdns2935265:038crwdnd2935265:02crwdnd2935265:03crwdne2935265:0 Google Pixel 9a Wireless Charging Assembly Replacement, Remove the remaining liners: crwdns2935265:038crwdnd2935265:03crwdnd2935265:03crwdne2935265:0
    • Use the point of a spudger to lift and remove the plastic liners from the adhesive around the rear cameras.

    • If the adhesive starts to pull up with the liner, lay it back in place and use your spudger to secure it again.

  39. Google Pixel 9a Wireless Charging Assembly Replacement: crwdns2935265:039crwdnd2935265:01crwdnd2935265:02crwdne2935265:0 Google Pixel 9a Wireless Charging Assembly Replacement: crwdns2935265:039crwdnd2935265:02crwdnd2935265:02crwdne2935265:0
    • Use the pull tabs to remove the final liner from the rear cover adhesive.

  40. Google Pixel 9a Wireless Charging Assembly Replacement, Install the rear cover: crwdns2935265:040crwdnd2935265:01crwdnd2935265:03crwdne2935265:0 Google Pixel 9a Wireless Charging Assembly Replacement, Install the rear cover: crwdns2935265:040crwdnd2935265:02crwdnd2935265:03crwdne2935265:0 Google Pixel 9a Wireless Charging Assembly Replacement, Install the rear cover: crwdns2935265:040crwdnd2935265:03crwdnd2935265:03crwdne2935265:0
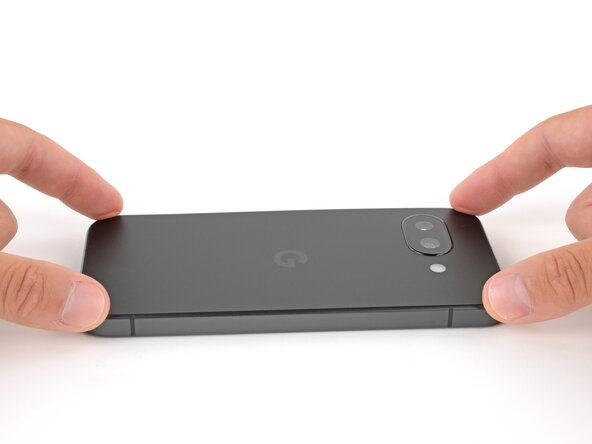
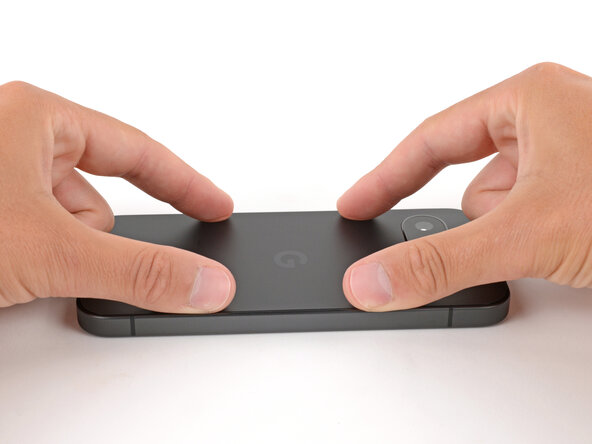
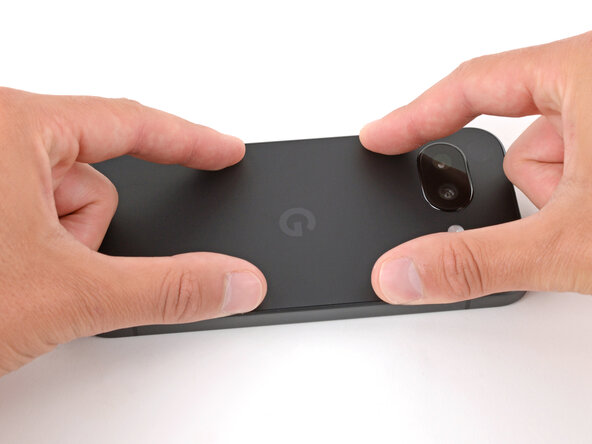
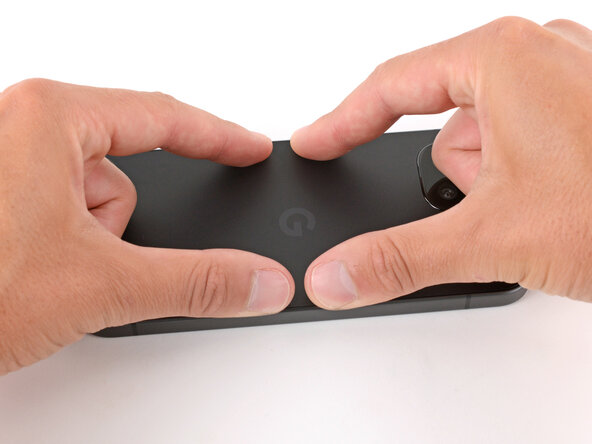
    • Align the rear cover over the frame and press it into place.

  41. Google Pixel 9a Wireless Charging Assembly Replacement: crwdns2935265:041crwdnd2935265:01crwdnd2935265:03crwdne2935265:0 Google Pixel 9a Wireless Charging Assembly Replacement: crwdns2935265:041crwdnd2935265:02crwdnd2935265:03crwdne2935265:0 Google Pixel 9a Wireless Charging Assembly Replacement: crwdns2935265:041crwdnd2935265:03crwdnd2935265:03crwdne2935265:0
crwdns2915888:0crwdne2915888:0

Congratulations on completing your repair!

Take your e-waste to an R2 or e-Stewards certified recycler.

To run a diagnostics test with the built-in Pixel Diagnostic tool, click here.

Repair didn’t go as planned? Try some basic troubleshooting, or ask our Answers community for help.

Spencer Day

crwdns2935283:009/14/22crwdne2935283:0

111,815 crwdns2915208:0crwdne2915208:0

crwdns2935297:0811crwdne2935297:0

crwdns2915084:0crwdne2915084:0

iFixit crwdns2935289:0iFixitcrwdne2935289:0

Staff

crwdns2931471:0120crwdne2931471:0

crwdns2935297:020,002crwdne2935297:0

crwdns2947412:00crwdne2947412:0

crwdns2917038:0crwdne2917038:0

crwdns2936625:0crwdne2936625:0:

crwdns2936751:024crwdne2936751:0 5

crwdns2936753:07crwdne2936753:0 21

crwdns2936753:030crwdne2936753:0 88

crwdns2942667:0crwdne2942667:0 88