crwdns2915892:0crwdne2915892:0
This repair guide was authored by the iFixit staff and hasn’t been endorsed by Google. Learn more about our repair guides here.
Use this guide to remove or replace the bottom side’s microphone on your Google Pixel 4.
The microphone is sealed against the frame with an adhesive gasket. If you remove the microphone, the Pixel will no longer retain its water resistance.
Caution: Google warns that disassembly of the front laser assembly could result in hazardous exposure to invisible infrared laser emissions. Read their safety warnings here.
crwdns2942213:0crwdne2942213:0
-
-
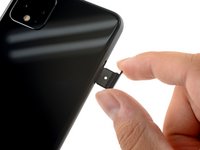
Insert a SIM eject tool, bit, or a straightened paper clip into the small hole on the SIM card tray on the left edge of the phone.
-
Press firmly to eject the tray.
-
Remove the SIM card tray.
-
-
-
Prepare an iOpener and apply it to the bottom edge of the back panel for one minute.
-
-
-
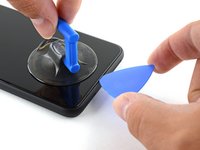
Apply a suction cup to the heated edge of the back panel by pressing down on it to create suction, as close to the edge as possible.
-
-
-
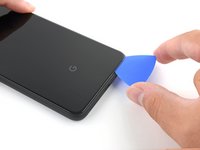
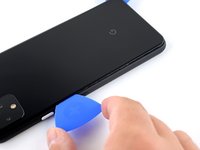
Pull up on the suction cup with strong, steady force to create a gap between the back panel and the frame.
-
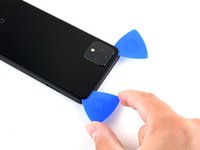
Insert the point of an opening pick into the gap.
-
-
-
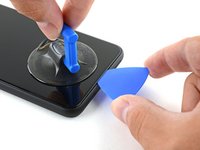
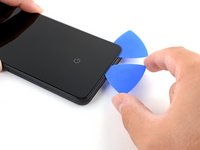
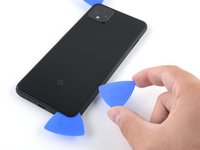
Slide the opening pick across the bottom towards the left corner to slice the adhesive.
-
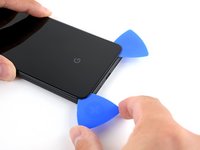
With the pick still inserted, slide it from the bottom left corner over to the bottom right corner to completely slice the bottom side adhesive.
-
Leave the pick inserted in the bottom right corner to prevent the adhesive from re-sealing.
-
-
-
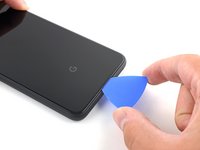
Prepare an iOpener and apply it on the left edge of the phone for one minute.
-
-
-
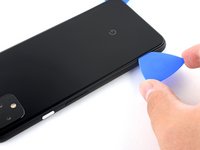
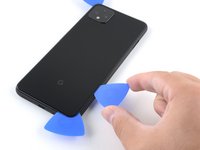
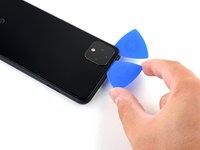
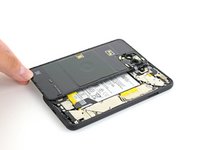
Insert a second opening pick underneath the back panel directly over the charge port.
-
Slide the opening pick to the bottom left corner of the phone.
-
-
-
Slide the opening pick around the bottom left corner and across the left side of the phone to slice the adhesive.
-
Stop when you reach the top left corner, near the camera, and leave the pick inserted.
-
-
-
Prepare an iOpener and apply it on the right edge of the phone for one minute.
-
-
-
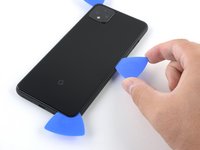
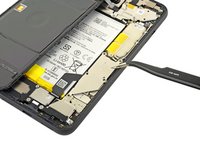
With the first two opening picks still in place, insert a third pick on the lower part of the righthand side.
-
Slide the opening pick up towards the top of the phone, slicing the right side's adhesive.
-
Stop when you reach the top right corner, and leave the pick inserted.
-
-
-
Slide the third opening pick around the top right corner and across the top side of the phone, slicing the final strip of adhesive.
-
-
-
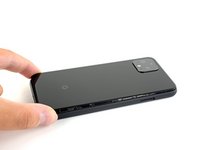
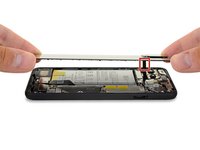
Once you have sliced around the perimeter of the phone, carefully lift the right edge of the back cover, opening it like a book.
-
Do not try to pull the panel all the way off yet, as it is still connected to the phone.
-
-
-
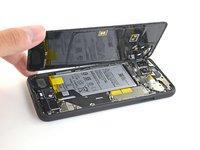
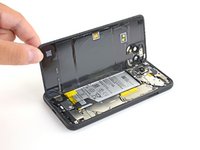
Continue swinging open the back panel until you can rest it on the left edge the phone, being careful not to put any stress on the attached ribbon cable.
At this point I suggest taking a photo of what you're seeing in there. This way you can make sure you put it all back the way it was when you're done.
-
-
crwdns2935267:0crwdne2935267:0Magnetic Project Mat$19.95
-
Remove the five T3 Torx screws securing the battery connector shield:
-
Four 4.0 mm screws
-
One 2.1 mm screw
Does anyone know where I can get a replacement T3 - 2.1mm screw (the one circled in orange)? I lost this screw during the battery replacement. Had it, dogs fought, had to get up to break it up, and couldn’t find it. I swore I put it on the mat, but I couldn’t find it when I got back to the table. :(
-
-
-
crwdns2935267:0crwdne2935267:0Tweezers$4.99
-
Use a pair of tweezers to remove the battery connector shield.
-
-
-
Using the pointed end of a spudger, pry the battery connector straight up from the motherboard to disconnect the battery.
-
-
-
Using the flat end of a spudger, gently fold the battery cable over so it doesn't accidentally make contact during the rest of your repairs.
-
-
-
Use a T3 Torx driver to remove the two 4 mm screws securing the back panel connector cover.
-
-
-
Use a pair of tweezers to remove the back panel connector cover.
-
-
-
Using the pointed end of a spudger, pry up and disconnect the back panel connector.
-
-
-
Remove the back panel.
Why does the kit not come with the back panel adhesive?
It's not cheap to get the full kit, and it seems like it's such a small thing to include.
I ended up re-using the existing back panel adhesive and now a bit worried that it's not as strong and I will have issues with water or moisture getting into the device more easily.
-
-
-
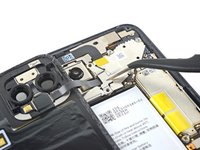
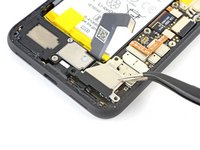
Use a T3 Torx driver to remove the four 4 mm screws securing the camera connector cover.
-
-
crwdns2935267:0crwdne2935267:0Tweezers$4.99
-
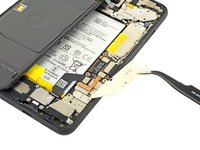
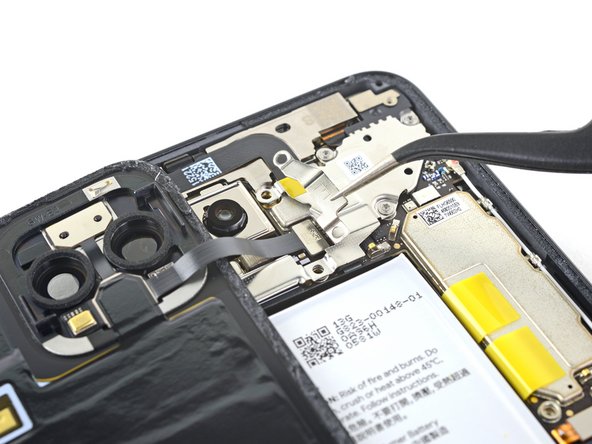
Using a pair of tweezers, tilt the camera cover up and slide it out of the retaining slot on the upper right corner of the phone to remove.
-
-
-
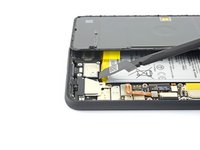
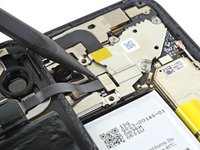
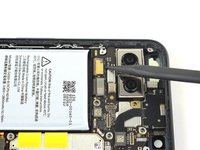
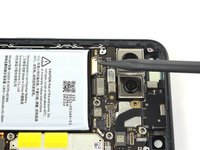
Using the pointed end of a spudger, pry the camera and sensor connectors straight up from the motherboard.
-
-
-
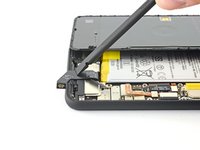
Disconnect the laser module connector.
-
-
-
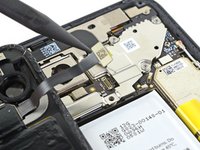
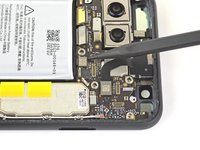
Use a T3 Torx driver to remove the two 2.4 mm screws securing the front camera and sensor assembly.
-
-
-
Use a pair of tweezers to remove the front camera and sensor assembly.
I have done the whole step twice with two different (aftermarket) cameras on a Google Pixel 4 and the first one didn’t work at all and the second one worked perfectly good but then stopped working after restarting the phone. Why? And the faceID doesn’t work when the whole thing is replaced so I put the old one back so I can use the faceID. Why did the front camera work perfectly untill we restarted the phone and then stopped working???
Maybe Google’s face ID works the same as Apple’s fingerprint or face ID module, they are bound with motherboards for security reasons.
FROD Yeh -
-
-
-
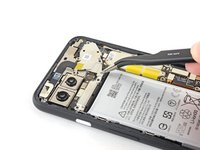
Remove the two T3 Torx screws securing the vibration motor shield:
-
One 4.2 mm screw
-
One 4.4 mm shouldered screw
-
-
crwdns2935267:0crwdne2935267:0Tweezers$4.99
-
Use a pair of tweezers to remove the vibration motor shield.
-
-
-
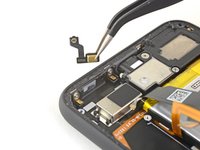
Use the pointed end of a spudger to disconnect the two rear-facing camera connectors from the motherboard.
-
-
-
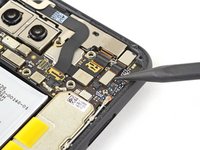
Disconnect the side buttons connector from the motherboard.
-
Disconnect the earpiece speaker connector from the motherboard.
-
-
-
Disconnect the left grip sensor connector from the motherboard.
-
Disconnect the charge port connector from the motherboard.
-
-
-
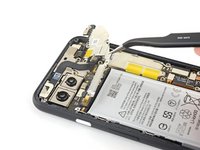
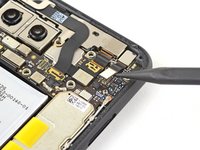
Disconnect the display connector from the motherboard.
-
Disconnect the right grip sensor connector from the motherboard.
-
-
-
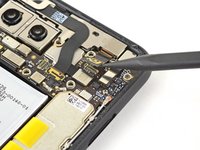
Use a pair of tweezers to grip the metal clip and pull the connector straight up off of the motherboard
-
-
-
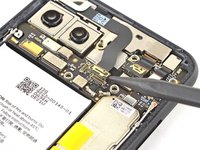
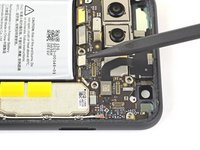
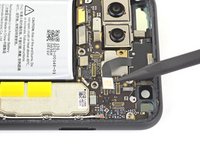
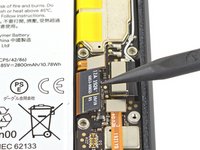
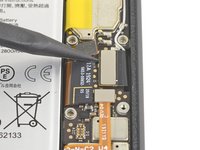
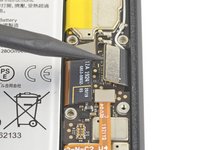
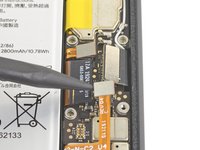
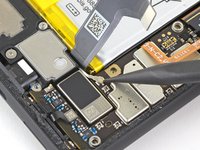
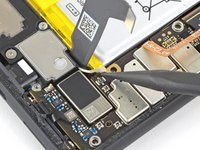
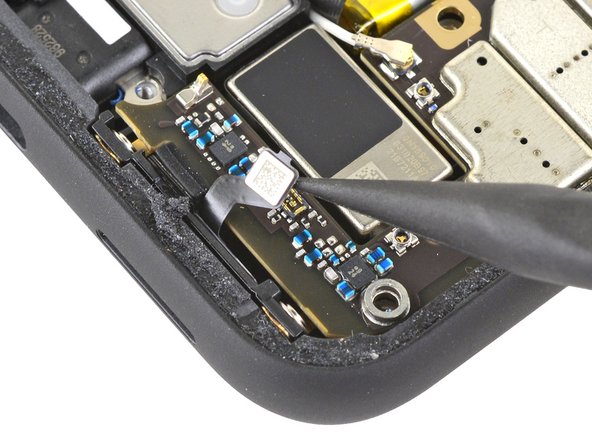
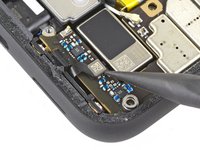
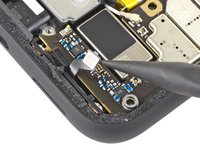
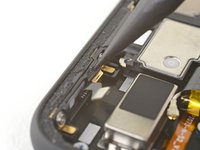
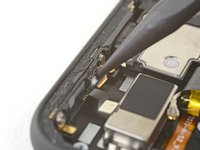
Disconnect the bottom microphone connector from the motherboard.
-
-
-
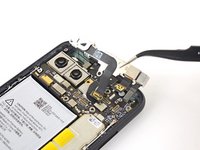
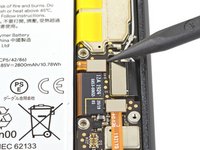
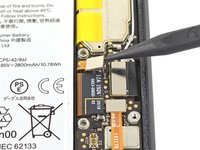
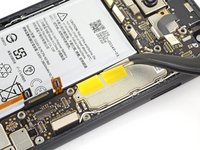
Gently pry back—but don't remove—the two battery adhesive pull tabs lightly adhered to the motherboard.
-
-
-
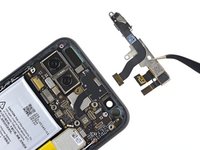
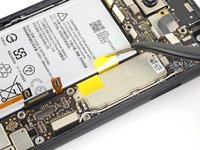
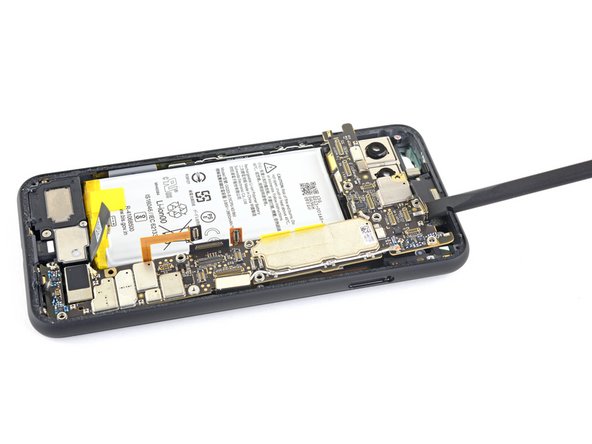
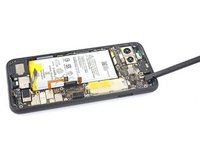
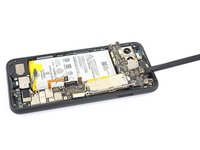
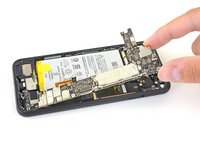
Using a spudger, pivot the top end of the motherboard up and out of the phone's frame.
-
-
-
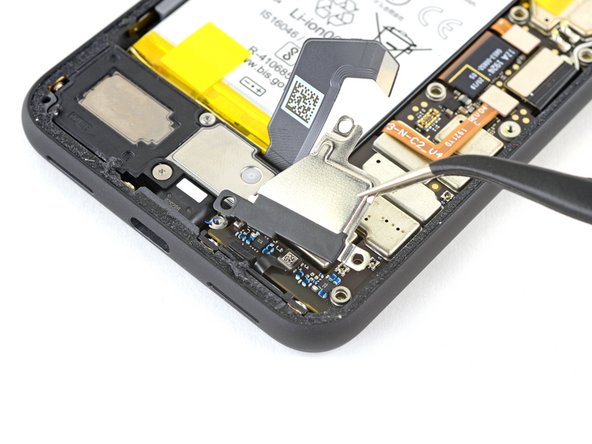
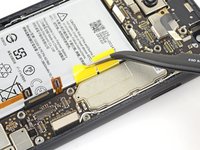
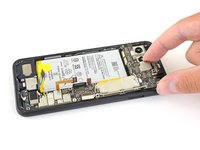
Slowly lift out the motherboard, being careful not to snag any ribbon cable connectors.
-
Completely remove the motherboard.
-
-
crwdns2935267:0crwdne2935267:0Tweezers$4.99
-
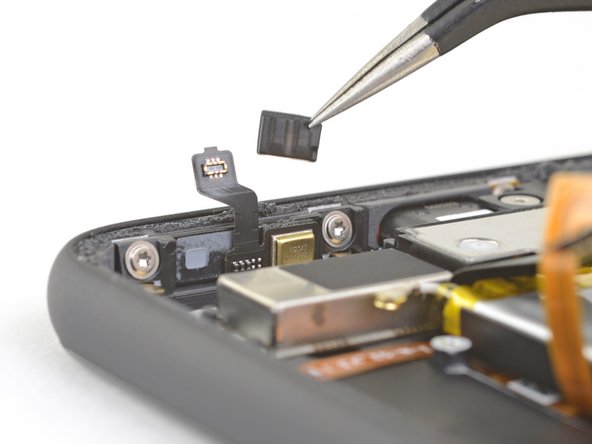
Use a pair of tweezers to remove the small rubber microphone cover.
-
-
-
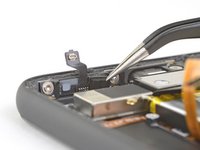
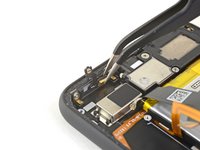
Use the pointed end of a spudger to peel the microphone away from the bottom edge of the phone's frame. It's secured with some light adhesive.
-
-
crwdns2935267:0crwdne2935267:0Tesa 61395 Tape$5.99
-
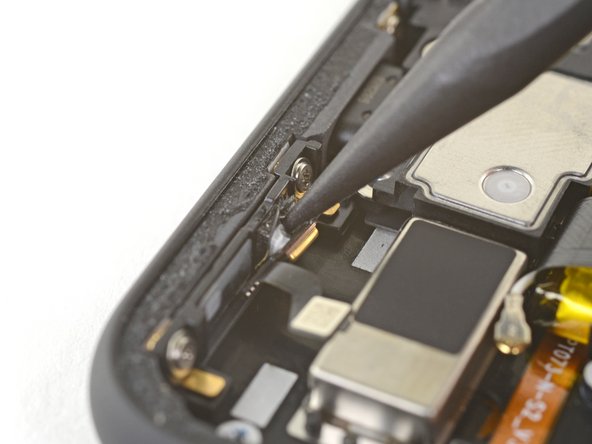
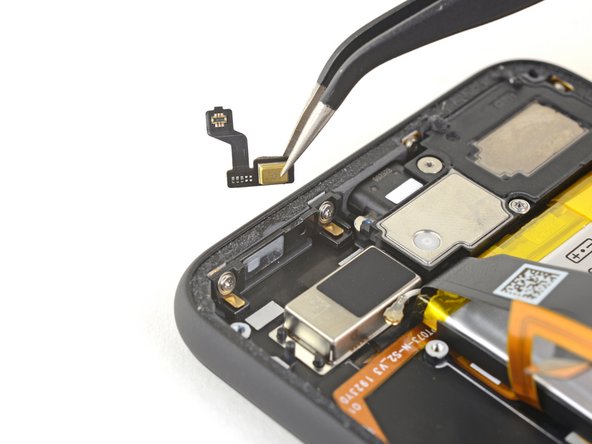
Use a pair of tweezers to remove the microphone.
-
If it is in good condition, you can re-use the gasket. Make sure that the gasket does not cover the hole.
-
If the gasket is pulled out of place, remove it and replace the adhesive with a pre-cut strip or Tesa tape.
-


Compare your new replacement part to the original part—you may need to transfer remaining components or remove adhesive backings from the new part before installing.
To reassemble your device, follow the above steps in reverse order.
Take your e-waste to an R2 or e-Stewards certified recycler.
Repair didn’t go as planned? Try some basic troubleshooting, or ask our Answers community for help.
crwdns2935221:0crwdne2935221:0
crwdns2935227:0crwdne2935227:0


crwdns2947412:02crwdne2947412:0
Is this mic also compatible with the 4 XL?
Does the Pixel 4 have the same bottom mic as the Pixel 4A 5G?