crwdns2915892:0crwdne2915892:0
This repair guide was authored by the iFixit staff and hasn’t been endorsed by Google. Learn more about our repair guides here.
This guide will show you how to replace the USB-C port in a Pixel 3a XL.
The Pixel 3a XL’s display panel is fragile. If you plan to reuse your screen after this repair, be sure to pay special attention to the warnings in the opening procedure.
crwdns2942213:0crwdne2942213:0
-
-
For reference, the backside of the screen is shown in this step.
-
Note the narrow clearance between the edge of the screen and the OLED panel under the glass. If you plan to re-use your screen, be sure to follow the instructions below closely.
-
Also note the two different seams between the body of the phone and the screen:
-
The screen seam: where the screen meets the rest of the phone. This is where the screen will separate, and where you should pry.
-
The midframe seam: where the midframe meets the body of the phone. This part is held down by screws. Do not pry at this seam.
-
-
-
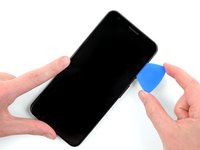
Place a suction cup on the right edge of the screen, just below the volume button.
My screen was SUPER shattered right in this spot — just below the volume button to the bottom right corner and with another shatter diagonal toward the bottom center. You can place the suction cup in a different location and start the prying, as long as you’re not trying to start it at the top or bottom edge. I started above the volume button but below the top edge.
-
-
-
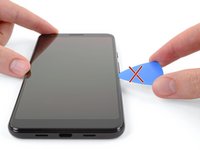
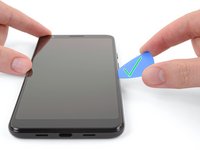
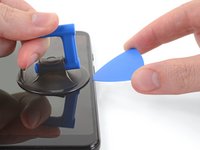
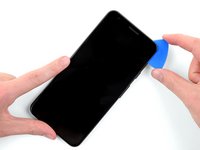
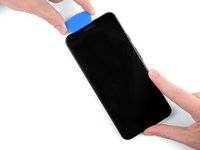
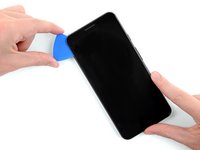
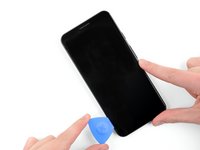
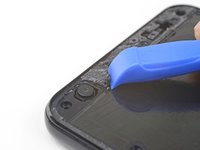
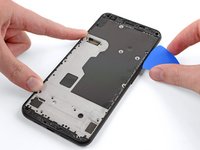
If you aren't careful, the plastic opening tool can damage the fragile OLED display panel underneath the glass.
-
If you want to re-use your phone's screen, make sure you insert your pick at a downward angle, as shown in the second photo of this step.
-
This will ensure the opening pick slides under the OLED panel rather than between the glass and the panel, which will ruin the screen.
-
-
-
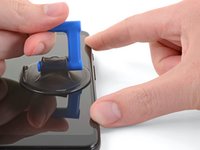
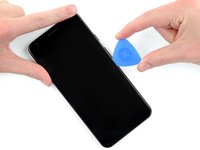
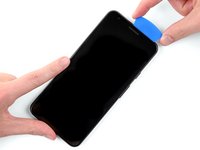
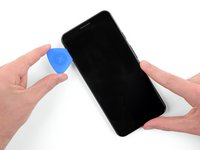
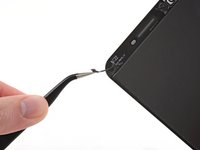
Pull up on the suction cup with a strong, steady force to create a gap between the screen and the phone.
-
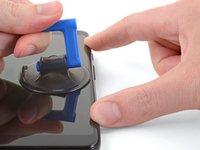
Insert your opening pick into the gap.
-
Stop if you feel the tip of the pick hitting against something. The pick may be pressing against the edge of the OLED panel. Angle the pick downward and try again.
The suction cup won’t work if you’re trying to place it over a shattered area.
-
-
-
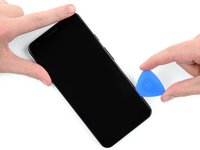
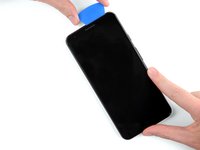
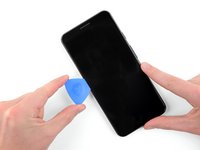
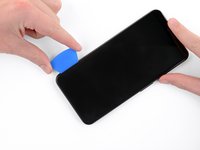
Once the pick is inserted, slide it up and down along the right edge of the phone to cut though the adhesive holding the screen in place.
The kit comes with 5 picks, you can use multiple picks to prop the screen up as you go so you don’t lose your progress.
-
-
-
If you plan to reuse your screen, heat up the top edge of the phone with an iOpener, a heat gun, or a hair dryer to loosen the adhesive there before you begin slicing.
It takes a minute or two to work. I was too impatient and made the job harder on myself by not waiting long enough.
-
-
-
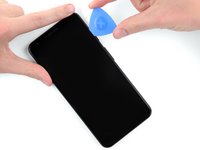
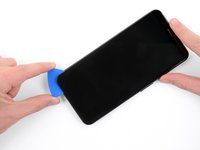
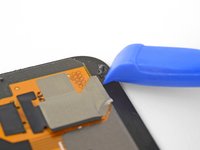
Carefully slide your opening pick around the upper-right-hand corner of the screen.
-
If you plan to reuse your screen, take special care in this step to either keep your pick deep in the phone under the OLED display (as shown in this step's photos), or only insert it 5 mm into the device to avoid coming into contact with the display under the glass.
-
-
-
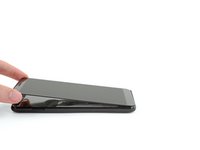
Continue to separate the adhesive along the top edge of the display.
For me, there were multiple cracks/shatters around the bottom edge and bottom right edge. It was a huge pain to get the screen off—I eventually pulled most of the screen off and then had a bunch of shattered pieces still stuck to the bottom edge that I had to take off with the tweezers. If you’ve got some really bad shattering around the TOP edge, you’ll have to be extremely careful here.
-
-
-
Slide your opening pick down the left side of the phone to separate the adhesive there.
-
-
-
-
If you plan to reuse your screen, heat up the bottom edge of the phone with an iOpener, a heat gun, or a hair dryer to loosen the adhesive there before you begin slicing.
-
-
-
Slide your opening pick along the bottom edge of the phone to separate the last of the adhesive holding the screen in place.
-
If you plan to reuse your screen, take special care in this step to either keep your pick deep in the phone under the OLED display (as shown in this step's photos), or only insert it 5 mm into the device to avoid coming into contact with the display under the glass.
-
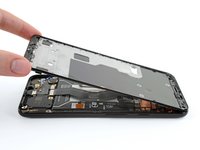
Don't try to remove the screen yet! It is still connected to the phone by a display cable.
-
-
-
Lift the screen by its top edge (where the front-facing camera is) and carefully flip it 180° so that the screen is resting face-down on the phone.
-
-
crwdns2935267:0crwdne2935267:0Tweezers$4.99
-
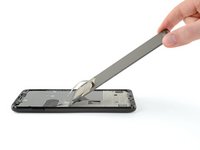
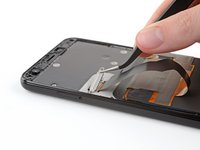
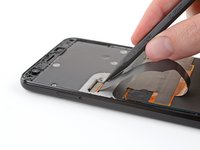
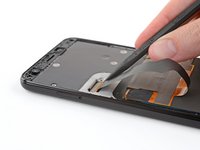
Use tweezers to remove the black sticker covering the display cable bracket.
Make sure the tweezers are oriented as shown in the picture. I had them upside down and tore the tape partially.
-
-
crwdns2935267:0crwdne2935267:0Magnetic Project Mat$19.95
-
Remove the two 4.3mm T3 screws holding the display cable bracket in place.
T3 was small for these screws. I had to use T4 to remove the screws
-
-
-
Remove the display cable bracket.
-
Pry up on the cable connector with the pointy end of a spudger to disconnect the screen from the phone.
-
-
-
Remove the screen from the phone.
-
Compare your new replacement part to the original part. You may need to transfer remaining components such as the speaker grille and the camera bracket to the new part.
Keep your broken screen! Your replacement screen may be missing two pieces - the top speaker grill and the grey plastic camera surround. You’ll need to salvage these carefully from your old screen. Heat the glue to soften it before removing, if you’re lucky it will still be attached to the pieces and you can simply stick them onto the new screen.
Good point! I will add a note to point this out.
-
-
crwdns2935267:0crwdne2935267:0Tesa 61395 Tape$5.99
-
Use tweezers or an opening tool to remove all traces of adhesive from the phone frame. You can use high concentration isopropyl alcohol to help with the cleaning.
-
If you plan to re-use the screen, be sure to remove all adhesive residue from the screen. Be careful with metal tools to avoid scratching the screen.
-
Apply pre-cut adhesive or double-sided tape (such as Tesa tape) to re-attach the screen to the frame.
Maybe it’s because I didn’t heat my adhesive enough but it took me FOREVER to get it fully off. I was scraping with the flat side of the black spudger but it would have been better to use the blue scraper, which is in this kit but never mentioned. The kit also includes a single 70% isopropyl alcohol wipe but I needed at least 3. You can buy boxes of hundreds of the little pads at any drugstore—they’re good to have on hand for first aid kits, too. Be sure to get the adhesive off the narrow edges along the sides, I used the pointy end of the black spudger for that.
When you go to apply the pre-cut adhesive, it will be harder than correctly applying screen protectors. Although it’s awkward, align it from the top first without taking the backing off, make sure it’s flush all the way down. fix it in place at the top with your hand and then remove the backing. Hopefully that will help apply it evenly. I started from the bottom and it was a huge mistake. If you mess it up and try to peel it up, the narrow adhesive on the sides will stretch a lot and you’ll have to break it and then sort of carefully nudge it into place millimeter by millimeter. I had to do this and used the pointy black spudger end. Even so, I was able to get it relatively flat and the screen seems pretty flush with the body.
I did all thoses steps but didn’t glued the screen yet and it’s not working do I need to glue it to make it function or is there another problem?
Sealing your phone after a repair won’t interfere with its function. Good choice to test the phone before installing replacement adhesive, though! Sounds like it will need more troubleshooting. Head on over to our Answers community if you get stuck!
Ah, I forgot to reapply the electrical tape on the display connection point. Should I be worried? Screen works fine for now.
-
-
crwdns2935267:0crwdne2935267:0Magnetic Project Mat$19.95
-
Remove the following 4.3mm screws:
-
14 silver T3 Torx screws
-
2 black T3 Torx screws
In my phone the silver screw along the left edge between the black screw and the top-left corner took a T-4 bit.
図の右側の一番上赤丸のネジとその下の赤丸のネジとの間にもう一本t3ネジが存在します。このネジは赤丸がありませんが取る必要がある様です。
You are correct! Thank you very much!
正解です!ありがとうございました!
-
-
-
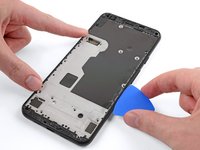
Insert an opening pick into the seam along the bottom of the phone.
-
Slide the pick along the seam to release the clips holding the midframe to the rest of the phone.
-
-
-
Slide the opening pick along the left and right edges of the phone to release the midframe clips there.
-
Lift up the bottom edge of the midframe but don’t completely remove it yet. The midframe is still connected to the phone by a fragile cable.
-
-
-
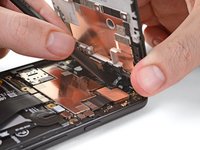
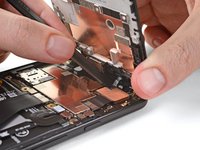
Use a spudger to pry up and detach the proximity sensor cable from the motherboard.
-
-
-
This takes a bit of patience and finesse. Once you have the connector aligned, you can also use a finger to gently press the connector onto the socket.
Should you not disconnect the battery first?
Hi Brian,
Good catch! In this situation, it is alright to keep the battery connected, as long as you do not use metal tools. We usually instruct users to disconnect the battery early on for two main reasons: to prevent accidental damage to the internals via electrical shorts, and to prevent damage to the display backlight circuitry for certain phones.
-
-
-
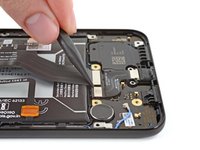
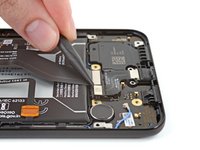
Use a spudger to pry up and disconnect the battery connector.
-
-
-
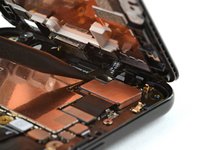
Remove the two T3 screws holding the USB-C port in place.
-
-
-
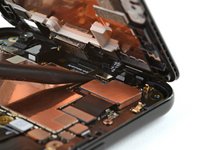
Use the pointy end of a spudger to pry up and disconnect the USB-C port from the lower board.
-
-
-
Remove the USB-C port from the phone.
-


To reassemble your device, follow these instructions in reverse order.
Take your e-waste to an R2 or e-Stewards certified recycler.
Repair didn’t go as planned? Check out our Google Pixel 3a XL Answers community for troubleshooting help.
To reassemble your device, follow these instructions in reverse order.
Take your e-waste to an R2 or e-Stewards certified recycler.
Repair didn’t go as planned? Check out our Google Pixel 3a XL Answers community for troubleshooting help.
crwdns2935221:0crwdne2935221:0
crwdns2935229:06crwdne2935229:0

crwdns2947412:02crwdne2947412:0
Guys if you really want to re-utilize the screen, I would suggest keep heating the area, while pulling with the suction cup gently, and using the pick to separate the screen with the body when glued. The bottom part adhesive is really tough to remove … so have patience.
Also, I would recommend using playing cards, or somethin REALLY thin. I used a flat spudger, and trust me, pushing the screen up more than 2mm when glued will crack the OLED. This happened because probably the pannel is Hard OLED and not Soft OLED like in an iPhone X, which you can remove with no issue. This one cracked while being very gentle…
When you get to removing the screws, and afterwards removing the mid frame, it only marks the 2 black screws and 13 silver, I couldnt remove the frame and that's when I saw another screw in the upper right area. After I removed it, removing the midframe was easy so I would recommend also removing that screw.
The note about the different seams is very helpful! Thank you for including this!
David - crwdns2934203:0crwdne2934203:0