crwdns2915892:0crwdne2915892:0
This repair guide was authored by the iFixit staff and hasn’t been endorsed by Google. Learn more about our repair guides here.
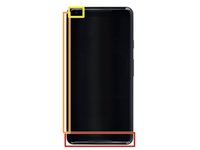
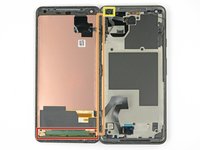
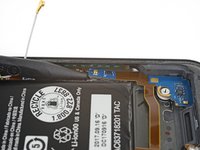
Use this guide to replace the charging assembly in your Pixel 2 XL. The charging assembly contains the USB-C port, microphone, and other hardware.
crwdns2942213:0crwdne2942213:0
-
-
Insert a SIM card eject tool or a paperclip into the small hole in the SIM card tray, located on the left edge of the phone, opposite of the power and volume buttons.
-
Press firmly to eject the tray.
-
-
-
Remove the SIM card tray from the phone.
-
-
-
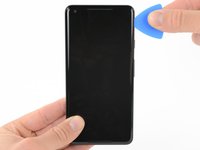
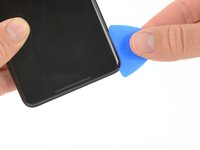
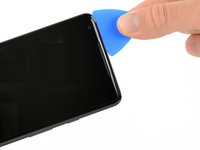
Apply a suction cup as close to the SIM slot edge of the phone as you can while avoiding the curved edge.
-
-
-
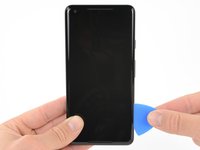
Pull up on the suction cup with firm, constant pressure and insert an opening pick between the front panel and rear case.
-
-
-
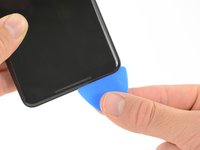
Do not insert the pick more than 0.25 inches (6 mm) into the bottom edge of the phone. If the pick contacts the folded portion of the OLED panel, it can damage the display.
-
Do not cut along the left edge; there are delicate display cables that can be damaged.
-
Only make very shallow cuts in the upper left corner; prying deeply can damage the front-facing camera.
-
-
-
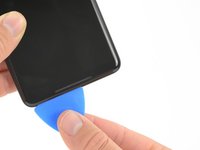
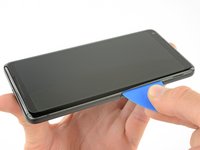
Slide the opening pick down the right side of the phone to separate the display adhesive.
-
-
-
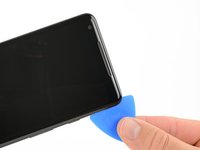
Slide the opening pick around the lower-right corner and along the bottom edge of the phone.
-
-
-
Reinsert the flat edge of the pick at the top-right corner of the phone, and slide it around the corner and the top edge of the phone.
-
-
-
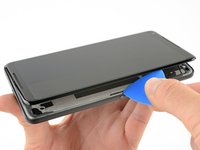
Gently lift the display from the right side of the phone, opening it like a book.
-
Carefully lay the display flat on the table next to the rest of the phone, keeping it close to the phone to avoid straining the display and digitizer cables.
-
-
-
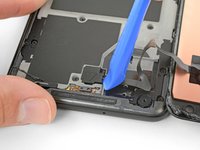
Use the corner of an opening tool to pry up and unclip on the lower edge of the digitizer cable connector cover.
-
Remove the connector cover.
-
-
-
Use the point of a spudger to lift the digitizer cable connector up and out of its socket on the motherboard.
-
-
-
crwdns2935267:0crwdne2935267:0Tweezers$4.99
-
Use tweezers to remove any tape from the display connector cover.
-
-
-
Insert the point of a spudger into the small hole on the edge of the display connector cover.
-
Use the spudger to pry the cover out of its recess.
-
Remove the connector cover.
-
-
-
Use the flat edge of a spudger to lift the display cable connector up from its socket.
-
Remove the display.
-
-
crwdns2935267:0crwdne2935267:0Magnetic Project Mat$19.95
-
Remove eleven 3.8 mm Phillips screws securing the midframe.
-
-
-
Insert an opening tool into the notch in the midframe near the volume buttons and pry the midframe up and away from the rest of the phone.
-
Remove the midframe.
-
-
-
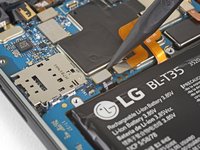
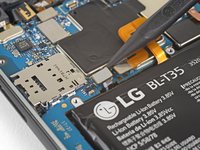
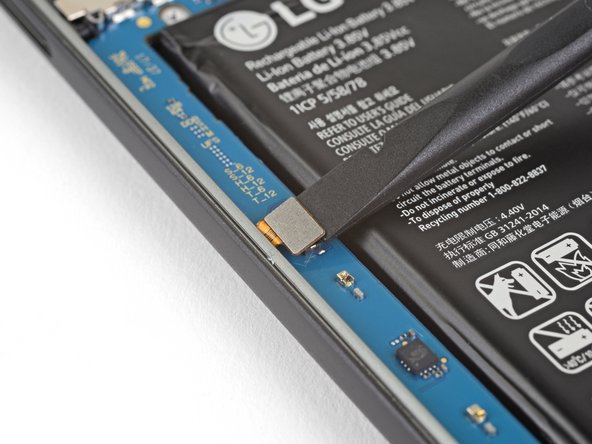
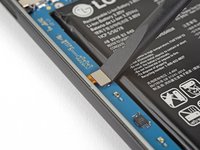
Use the flat end of a spudger to disconnect the battery connector.
-
-
-
Use the point of a spudger to disconnect the front-facing camera connector.
Please add picture to disconnect the top speaker and microphone connector next to the front facing camera. I missed this one during re-assembly twice and could not get it to work properly.
-
-
-
Use the flat end of a spudger to disconnect the right Active Edge sensor connector.
-
Disconnect the antenna cable.
Also disconnect the antenna cable just to the right of the right Active Edge sensor connector
How do I disconnect the antenna cable? it doesn’t come out as easily as the other press fit connectors
Gently remove the antenna with the angled tweezers included in the tool kit by gently grabbing the sides of the socket connector and pulling upwards. If it doesn't come off easily, lightly twist the fitting side to side while pulling up.
-
-
-
Use the point of a spudger to disconnect the fingerprint sensor connector.
-
-
-
Use the flat end of a spudger to disconnect the left Active Edge sensor connector.
-
-
-
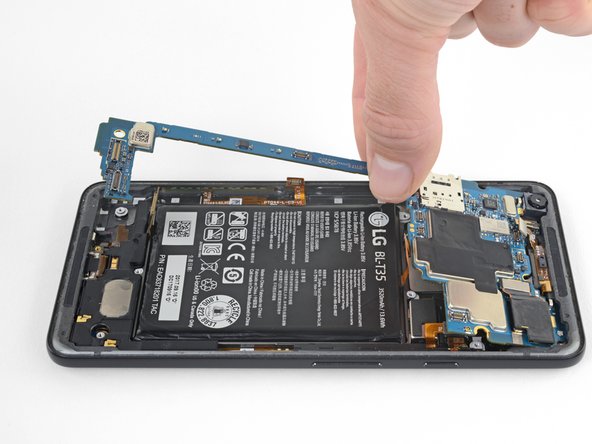
Use the flat end of a spudger to disconnect the charging assembly connector.
-
-
-
Use the point of a spudger to disconnect the front-facing sensor assembly connector.
-
-
-
Make sure all the cables and connectors are clear of the board, and use the flat edge of a spudger to gently lift the bottom of the motherboard.
-
Holding the wide part of the motherboard near the SIM card slot, carefully slide the board toward the bottom of the phone while lifting it out of the phone.
-
Remove the motherboard.
-
Try to keep the phone flat with the battery facing up after you remove the motherboard, as the front-facing camera can fall out of the phone case very easily.
Need to take antenna connector off first, picture shows cable disconnected
Agreed. No mention of the antenna cable.
-
-
-
Slide the point of a spudger under the lower left side of the loudspeaker and slowly pry the speaker assembly up from the phone.
This step was very difficult, I believe I just snapped the loudspeaker to the left of silver oval piece
I was just able to remove the loud speaker using the directions provided. The piece sprung out of the phone. The bottom of the piece is flat with pieces of metal and it appears to be slightly bent from my prying. We will see if it still works.
I ended up using my metal silver spudger. It goes in farther without prying on the fragile plastic. I’m replacing the charging circuit anyway, so not too worried about minor damage
This is a difficult step. Pictures indicating other safe pry points would be helpful.
Most stubborn component to remove.
I was able to remove this without great stress on the part by inserting my right thumbnail (thumbprint facing the battery / top of the phone) in between the loudspeaker and the phone body above the silver oval, while at the same time using my left index fingernail to gently lift the long left side protrusion of the loudspeaker. Note that the plastic opening picks were too thick for this. Took twenty minutes or more to figure this out, but about two minutes or less to do it. The fundamental problem seems to be that this part is friction-fit into place, and you won’t get it out all in one motion without risk of breaking it, you have to work at it alternately from every angle. I also added a few drops of everclear (95% ethanol, isopropyl was hard to come by because of COVID), which may or may not have mattered (I have no control for this experiment). I believe there was no damage to the part.
I agree with the above comment. Insert your pry tool on the bottom, then lift with the left edge and the top right arm at the same time. The piece has to slide a bit closer to the battery, as it lifts up, to be removed.
It's a bit complicated, but be gentle and slow, and it should pop out without breaking.
-
-
-
Remove the loudspeaker from the phone.
-
-
-
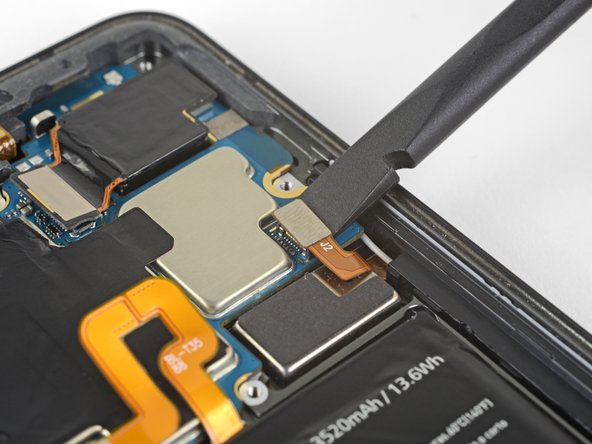
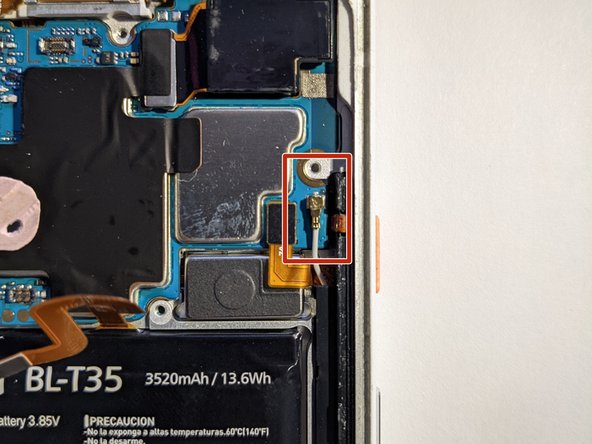
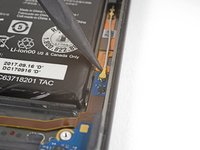
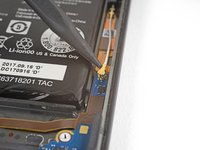
Use the point of a spudger to disconnect the white antenna cable to the right of the battery.
The antenna cable was difficult to re-connect due to a slight misalignment of the new charging assembly (which of course is held in place by adhesive and hard to re-position as a result).
-
-
-
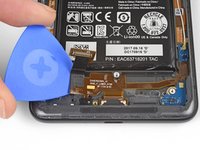
Use a hairdryer or heat gun, or prepare an iOpener and apply it to the bottom of the back of the phone for about a minute, in order to soften the adhesive securing the charging assembly.
Remove camera first, likely to fall out when case is inverted.
-
-
-
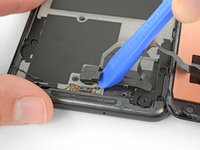
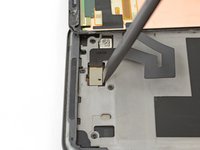
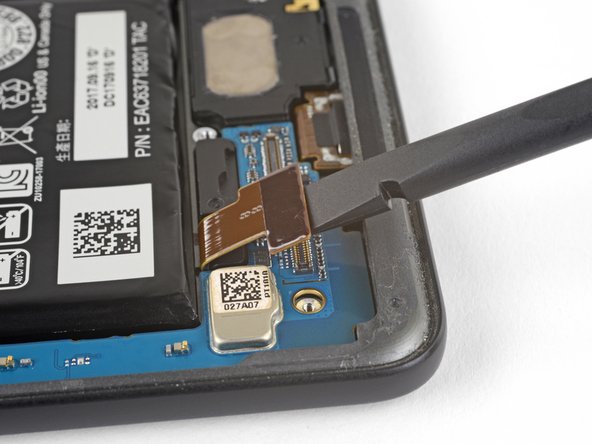
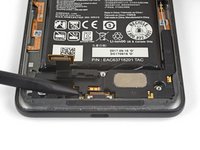
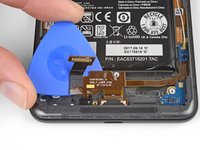
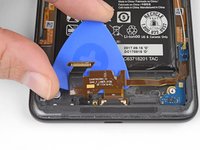
Starting from the left side, slide an opening pick under the charging assembly flex cable to separate it from the phone case.
First, remove the small plastic retainer that holds the ribbon assembly next to the power connector. Hold onto this for installation later.
Yes, there is a small plastic retainer. But I think I think it secures the microphone in place? I think that is the component to the left of the charging port? It’s connected to a channel that exits the body at the mesh screen…
The small plastic retainer was stuck. I did step 31 first, then I came back to this and used 3 drops of 95% ethanol to soften whatever was sticking before proceeding to step 30.
-
-
-
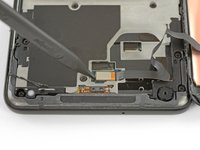
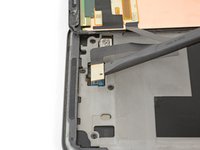
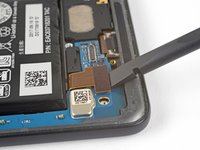
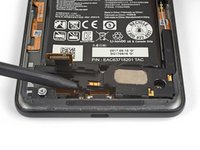
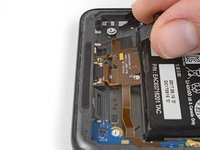
Gently pull the USB-C port out of its recess in the phone case.
Be careful with the microphone, which is glued to a mesh screen over the microphone hole. Gentle tugging should remove it without breaking the cable.
-
-
-
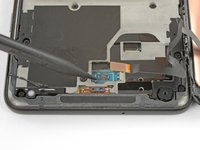
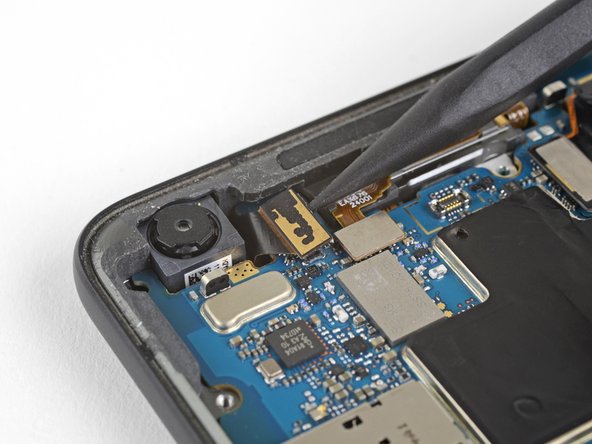
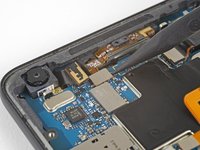
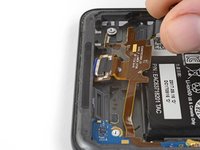
Slowly slide the point of a spudger underneath the antenna board to separate the adhesive tape under the board.
-
-
-
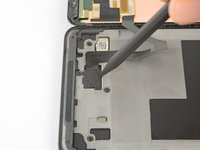
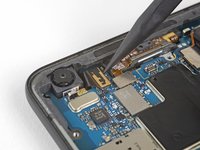
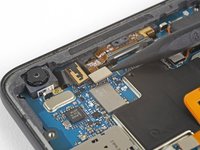
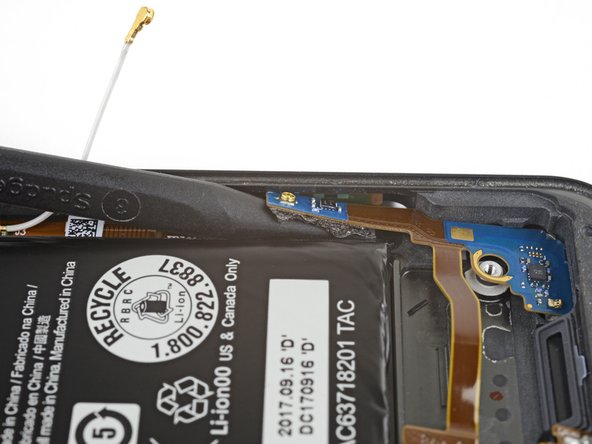
Lift the charging assembly out of the phone case.
When reversing this step to install a new charging assembly, consider how you will re-attach the antenna cable disconnected in step 27 — a slight misalignment made it very difficult to reconnect.
-


Compare your new replacement part to the original part—you may need to transfer remaining components or remove adhesive backings from the new part before installing.
To reassemble your device, follow the above steps in reverse order.
Take your e-waste to an R2 or e-Stewards certified recycler.
Repair didn’t go as planned? Check out our Answers community for troubleshooting help.
crwdns2935221:0crwdne2935221:0
crwdns2935229:032crwdne2935229:0

crwdns2947412:012crwdne2947412:0
Take your time removing the screen. I was bit impatient and cracked it :( . The screen is the most expensive part of the phone now so will be very costly for me to replace
Why do I need the Tesa 61395 Tape for this repair? I don’t see it used anywhere in the guide.
Hey Jay,
The Tesa tape is needed only necessary if you do not use the custom-cut back display panel adhesive.
Should I apply some kind of glue around the port?
Is there any possibility to keep it waterproof?
Hi Erik,
Once you have opened the phone, there is no reliable DIY way to make it water resistant.
can I just send the phone to you for repair? I’ve worked on PC motherboards half my life but this work seems to tedious for me? Its a great demo tho!
While we fix many things at iFixit, we do not offer it as a service. Your best option would be to find a reputable local repair shop and have them fix your Pixel. Good luck!
should we apply glue to the new battery and charging port when we replace them? what kinds of glue?
So satisfying that my phone is back up and charging! Thank you!
The Pixel 2XL has been an excellent phone…not ready to give it up yet!
Is anyone here missing a capacitor on the charging port?
When I took the charging port out of the housing, I noticed a capacitor missing on it. Was wondering if it is important because I bought two new charging ports and one of them has the exact same capacitor missing.
It seems to be in charge of the microphone, but I’m not sure if its vital for it to function properly.
If anyone is missing this capacitor, or no what it does it will be much appreciated.
Thanks for your time
Imgur Link:
Great guide! This was my first ever phone repair attempt and it went off without a hitch.
Hey I replaced the charging port while it solved my charging problem but now my phone has network issue it looses network very often should i try a new port or signal cable