crwdns2933423:0crwdne2933423:0

Framework Laptop 12 SSD Clip Replacement

crwdns2942213:0crwdne2942213:0

  1. Framework Laptop 12 SSD Clip Replacement, Power down your laptop: crwdns2935265:01crwdnd2935265:01crwdnd2935265:03crwdne2935265:0 Framework Laptop 12 SSD Clip Replacement, Power down your laptop: crwdns2935265:01crwdnd2935265:02crwdnd2935265:03crwdne2935265:0 Framework Laptop 12 SSD Clip Replacement, Power down your laptop: crwdns2935265:01crwdnd2935265:03crwdnd2935265:03crwdne2935265:0
    • Before you begin repairs, unplug your laptop and shut it down from the operating system. This ensures that the laptop isn't in standby/suspend mode.

    • The indicator LEDs along the edges should be unlit. The laptop should be silent.

    • If you accidentally turn on the laptop during repair, hold the power button down for 10 seconds to shut it down.

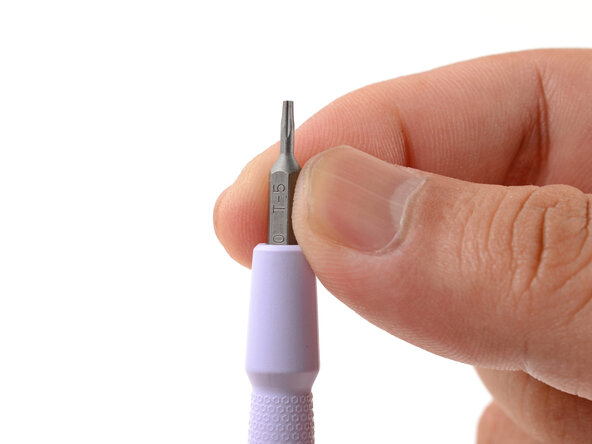
    • Make sure your Framework Screwdriver has the T5 Torx bit (labeled as T-5) facing outwards. If it's not, pull the bit out and flip it.

  2. Framework Laptop 12 SSD Clip Replacement, Set your laptop down: crwdns2935265:02crwdnd2935265:01crwdnd2935265:01crwdne2935265:0
    • Set your Framework Laptop face-down on a clean work surface.

  3. Framework Laptop 12 SSD Clip Replacement, Loosen the bottom screws: crwdns2935265:03crwdnd2935265:01crwdnd2935265:02crwdne2935265:0 Framework Laptop 12 SSD Clip Replacement, Loosen the bottom screws: crwdns2935265:03crwdnd2935265:02crwdnd2935265:02crwdne2935265:0
    • Use your Framework Screwdriver to fully loosen the eight captive T5 Torx screws on the bottom of your laptop.

    • Most screws in your Framework Laptop (including these) are captive—they're designed to stay in place after you loosen them.

    • Your laptop comes with a spare set of screws in the frame above the battery. Be careful—the replacement screws aren't captive.

  4. Framework Laptop 12 SSD Clip Replacement, Flip your laptop over: crwdns2935265:04crwdnd2935265:01crwdnd2935265:01crwdne2935265:0
    • Flip your laptop over so it's face-up on your work surface.

  5. Framework Laptop 12 SSD Clip Replacement, Open your laptop: crwdns2935265:05crwdnd2935265:01crwdnd2935265:02crwdne2935265:0 Framework Laptop 12 SSD Clip Replacement, Open your laptop: crwdns2935265:05crwdnd2935265:02crwdnd2935265:02crwdne2935265:0
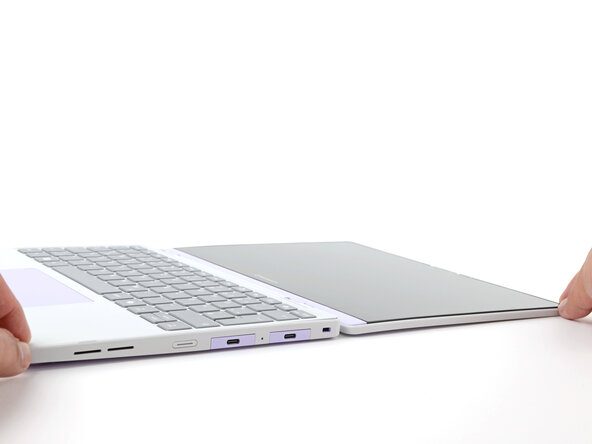
    • Open the laptop lid so that both the screen and the base lie flat on your work surface.

  6. Framework Laptop 12 SSD Clip Replacement, Remove the Input Cover: crwdns2935265:06crwdnd2935265:01crwdnd2935265:03crwdne2935265:0 Framework Laptop 12 SSD Clip Replacement, Remove the Input Cover: crwdns2935265:06crwdnd2935265:02crwdnd2935265:03crwdne2935265:0 Framework Laptop 12 SSD Clip Replacement, Remove the Input Cover: crwdns2935265:06crwdnd2935265:03crwdnd2935265:03crwdne2935265:0
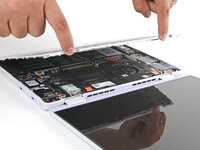
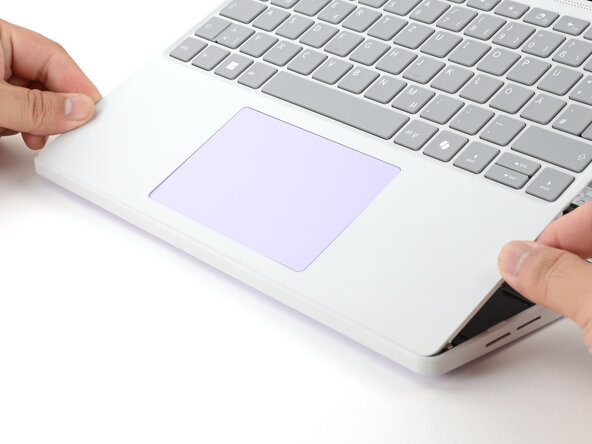
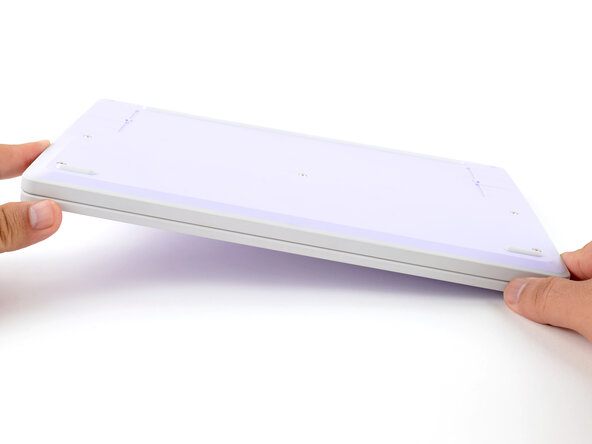
    • Use your fingers to grip the Input Cover in the hinge cutouts.

    • Lift upwards to swing the Input Cover up from the base of the laptop.

    • There are magnets holding the Input Cover down, so you'll feel some resistance. If it feels like a lot of force is required, check that you've fully loosened all the screws on the bottom of your laptop.

    • Remove the Input Cover.

  7. Framework Laptop 12 SSD Clip Replacement, Unlatch the SSD: crwdns2935265:07crwdnd2935265:01crwdnd2935265:02crwdne2935265:0 Framework Laptop 12 SSD Clip Replacement, Unlatch the SSD: crwdns2935265:07crwdnd2935265:02crwdnd2935265:02crwdne2935265:0
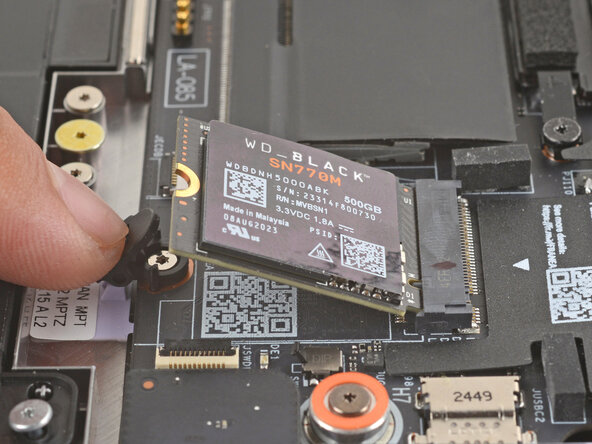
    • Use your finger to press down on the black SSD latch to unlatch the SSD.

    • The SSD will pop up to an angle when it's unlatched.

  8. Framework Laptop 12 SSD Clip Replacement, Remove the SSD: crwdns2935265:08crwdnd2935265:01crwdnd2935265:03crwdne2935265:0 Framework Laptop 12 SSD Clip Replacement, Remove the SSD: crwdns2935265:08crwdnd2935265:02crwdnd2935265:03crwdne2935265:0 Framework Laptop 12 SSD Clip Replacement, Remove the SSD: crwdns2935265:08crwdnd2935265:03crwdnd2935265:03crwdne2935265:0
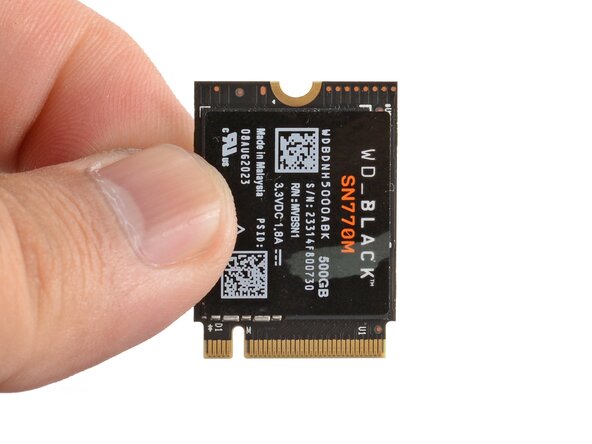
    • Grab the SSD by its edges and pull it out of its socket.

    • Remove the SSD.

  9. Framework Laptop 12 SSD Clip Replacement, Remove the SSD clip screw: crwdns2935265:09crwdnd2935265:01crwdnd2935265:01crwdne2935265:0
    • Use your Framework Screwdriver to remove the 3.5 mm‑long T5 Torx screw securing the SSD clip.

    • This screw is not captive. Store it in a safe location for reassembly.

  10. Framework Laptop 12 SSD Clip Replacement, Remove the SSD clip: crwdns2935265:010crwdnd2935265:01crwdnd2935265:02crwdne2935265:0 Framework Laptop 12 SSD Clip Replacement, Remove the SSD clip: crwdns2935265:010crwdnd2935265:02crwdnd2935265:02crwdne2935265:0
    • Use your fingers to lift and remove the SSD clip.

  11. Framework Laptop 12 SSD Clip Replacement, Disassembly complete: crwdns2935265:011crwdnd2935265:01crwdnd2935265:01crwdne2935265:0
    • Congratulations on completing disassembly! The remaining steps will show how to reassemble your Framework Laptop.

  12. Framework Laptop 12 SSD Clip Replacement, Install the SSD clip: crwdns2935265:012crwdnd2935265:01crwdnd2935265:02crwdne2935265:0 Framework Laptop 12 SSD Clip Replacement, Install the SSD clip: crwdns2935265:012crwdnd2935265:02crwdnd2935265:02crwdne2935265:0
    • Align the SSD clip with its screw hole and set its two pins into their slots on the Mainboard.

  13. Framework Laptop 12 SSD Clip Replacement: crwdns2935265:013crwdnd2935265:01crwdnd2935265:01crwdne2935265:0
    • Use your Framework Screwdriver to install the 3.5 mm‑long T5 Torx screw to secure the SSD clip.

  14. Framework Laptop 12 SSD Clip Replacement, Install the SSD: crwdns2935265:014crwdnd2935265:01crwdnd2935265:02crwdne2935265:0 Framework Laptop 12 SSD Clip Replacement, Install the SSD: crwdns2935265:014crwdnd2935265:02crwdnd2935265:02crwdne2935265:0
    • Hold the SSD by its edges. Don't touch the gold contacts with your fingers. If you do, wipe the contacts with a clean, lint-free cloth to remove any finger oils.

    • Align the SSD's gold contacts with its socket.

    • Insert the SSD into the socket at a shallow angle. The gold contacts should mostly be covered by the socket.

    • The SSD fits into the socket in one orientation. If it doesn't feel like it fits, try flipping the module.

  15. Framework Laptop 12 SSD Clip Replacement: crwdns2935265:015crwdnd2935265:01crwdnd2935265:03crwdne2935265:0 Framework Laptop 12 SSD Clip Replacement: crwdns2935265:015crwdnd2935265:02crwdnd2935265:03crwdne2935265:0 Framework Laptop 12 SSD Clip Replacement: crwdns2935265:015crwdnd2935265:03crwdnd2935265:03crwdne2935265:0
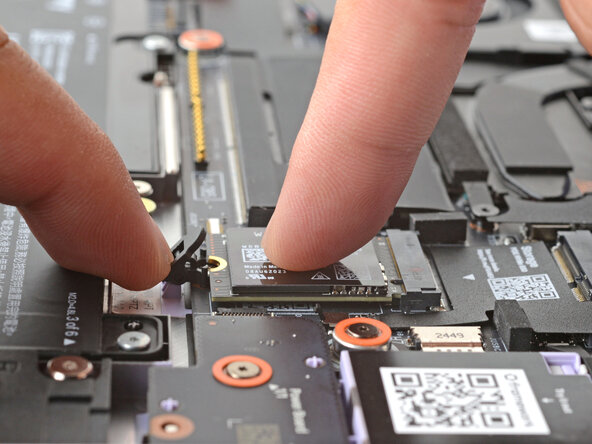
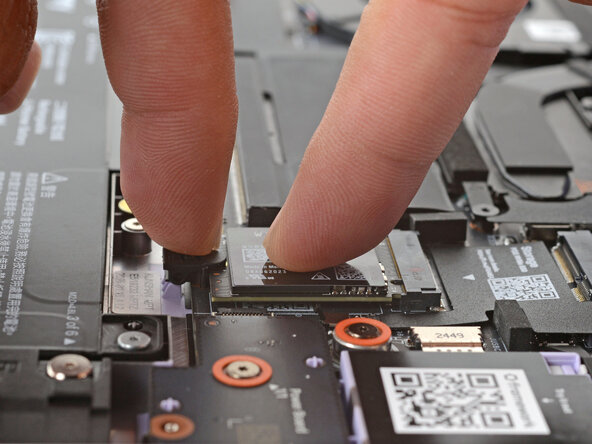
    • Use your finger to press down on the black SSD latch to keep it open.

    • Use another finger to press the SSD down until it lays flat.

    • If the SSD doesn't fit in the latch, you may need to insert the SSD further into its socket.

    • Use your finger to close the latch to secure the SSD.

    • You should hear a click, and the SSD should no longer pop up.

  16. Framework Laptop 12 SSD Clip Replacement, Install the Input Cover: crwdns2935265:016crwdnd2935265:01crwdnd2935265:03crwdne2935265:0 Framework Laptop 12 SSD Clip Replacement, Install the Input Cover: crwdns2935265:016crwdnd2935265:02crwdnd2935265:03crwdne2935265:0 Framework Laptop 12 SSD Clip Replacement, Install the Input Cover: crwdns2935265:016crwdnd2935265:03crwdnd2935265:03crwdne2935265:0
    • Angle the bottom edge of the Input Cover towards the base of the laptop.

    • Align and insert the bottom edge of the Input Cover into the base of the laptop.

    • Make sure the slots along the bottom edge of the Input Cover slide into the tabs in the base.

    • Lower the Input Cover's top edge onto the laptop until the magnets snap it in place.

    • Make sure the Input Cover sits neatly within the laptop frame and no corners are popping up.

  17. Framework Laptop 12 SSD Clip Replacement, Close and flip your laptop: crwdns2935265:017crwdnd2935265:01crwdnd2935265:02crwdne2935265:0 Framework Laptop 12 SSD Clip Replacement, Close and flip your laptop: crwdns2935265:017crwdnd2935265:02crwdnd2935265:02crwdne2935265:0
    • Close the laptop lid.

    • Flip your laptop face-down on a clean work surface.

  18. Framework Laptop 12 SSD Clip Replacement, Tighten the bottom screws: crwdns2935265:018crwdnd2935265:01crwdnd2935265:02crwdne2935265:0 Framework Laptop 12 SSD Clip Replacement, Tighten the bottom screws: crwdns2935265:018crwdnd2935265:02crwdnd2935265:02crwdne2935265:0
    • Use your Framework Screwdriver to tighten the eight captive T5 Torx screws on the bottom of your laptop.

    • Tighten the screws until they're snug. Don't over-tighten them, or you may strip the screws.

crwdns2915888:0crwdne2915888:0

You finished fixing your Framework Laptop!

Take your e-waste to an R2 or e-Stewards certified recycler.

If you need help, contact Framework support.

Arthur Shi

crwdns2935283:001/03/18crwdne2935283:0

296,612 crwdns2915208:0crwdne2915208:0

crwdns2935297:0682crwdne2935297:0

crwdns2915084:0crwdne2915084:0

Guide Team crwdns2935289:0Guide Teamcrwdne2935289:0

Staff

crwdns2931471:09crwdne2931471:0

crwdns2935297:012,807crwdne2935297:0

crwdns2947412:00crwdne2947412:0

crwdns2917038:0crwdne2917038:0

crwdns2936625:0crwdne2936625:0:

crwdns2936751:024crwdne2936751:0 0

crwdns2936753:07crwdne2936753:0 24

crwdns2936753:030crwdne2936753:0 44

crwdns2942667:0crwdne2942667:0 44