crwdns2915892:0crwdne2915892:0
Use this guide to replace a broken or defective screen on your Fairphone 4.
crwdns2942213:0crwdne2942213:0
-
-
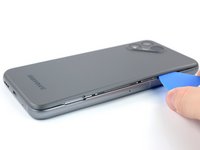
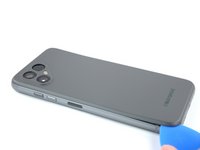
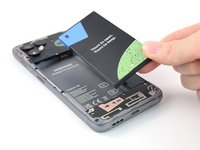
Insert your thumbnail, or a prying tool like a spudger, into the notch at the bottom right of the back cover.
-
Pry the back cover up to start separating its plastic clips.
-
-
-
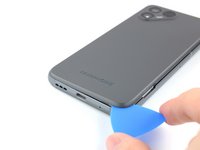
Using your thumbnail or an opening pick, slide along the right side of the phone to loosen the plastic clips.
-
-
-
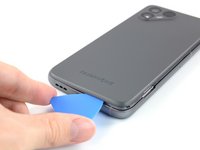
Slide along the bottom of the phone to loosen the plastic clips.
-
-
-
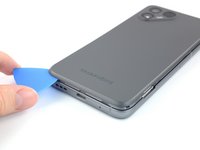
Slide along the left side of the phone to loosen the plastic clips.
-
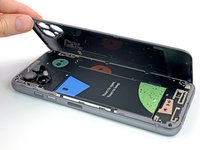
Lift the back cover to release the rest of the plastic clips and remove it.
-
-
-
-
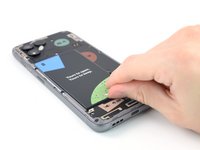
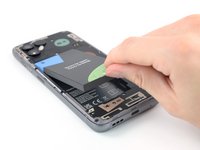
Use a fingernail or a prying tool at the marked notch to lever the battery out of its recess.
-
Lift the battery out of its recess and remove it.
-
Remove the battery.
Thank you for this very helpful guide. However I fail to see why you would conclude that replacing the battery is 'moderate'. Could you elaborate on this a little bit more, please?
For me 'moderate' means it is (very) complicated (i.e. plenty of steps) but feasible in general (i.e. there is a good chance you're not gonna brick your device) for which there is only one escalation level left: 'not feasible at all'. Non of that is true for the FP4. Could removing the battery more user-friendly, though? Well yes, of course but it is still by far very simple and straight forward.
Again, thank you very much for this great contribution.
Hey Dave S.,
thanks for your comment. You're totally right, the "moderate" rating was due to an oversight as it is the default in the system. I've changed the rating.
-
-
-
Remove the eight 4.8 mm-long Phillips screws.
Screw head size is PH0
Screw head size is PH00, as mentioned in the official video: https://www.youtube.com/watch?v=SUJERxuY...
-
-
-
Flip the phone over so the screen faces up
-
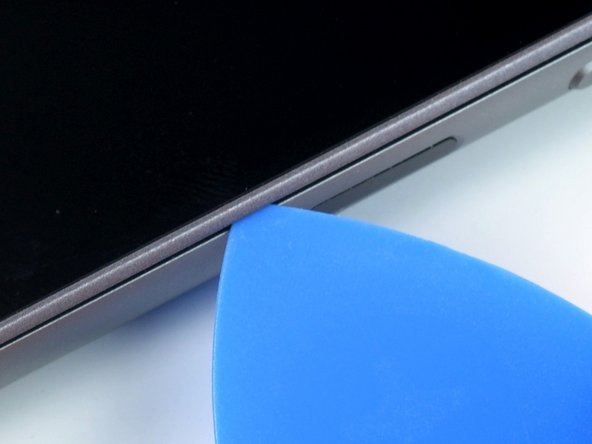
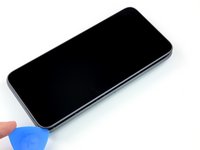
Insert an opening pick between the screen and the frame.
-
-
-
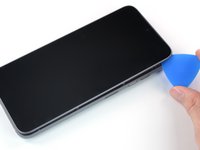
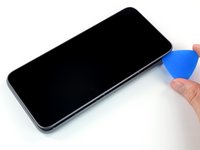
Slide the opening pick along the edge to the top right corner.
-
-
-
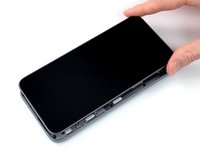
Continue to slide the opening pick along the top of the phone.
-
-
-
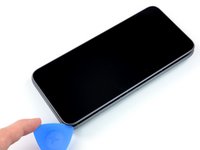
Slide the opening pick along the left side to the bottom left corner.
-
-
-
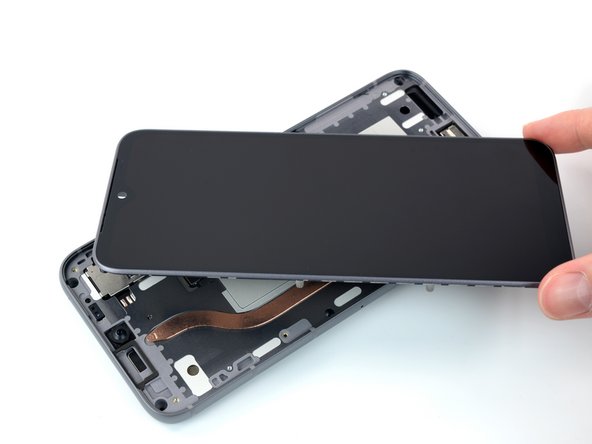
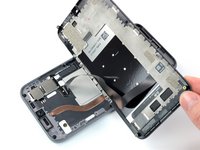
Grab the screen and lift it straight up just enough to clear its pegs from the frame.
-
Rotate the display carefully clock-wise and flip it over to get access to the connector.
-
Place the display on the device with the screen facing downwards.
-
-
-
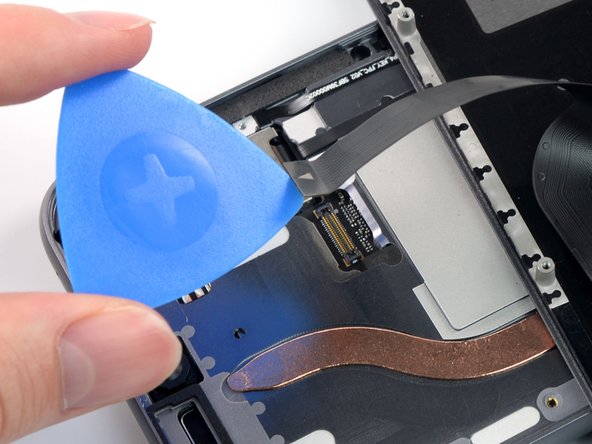
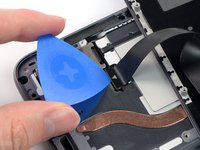
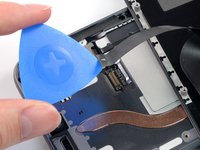
Use an opening pick to pry up and disconnect the display connection cable.
-
Remove the screen.
the new screen will have a tiny sticker in the selfie cam on the inside to prevent scratches don't forget to take it out before putting all the screws back in
Thanks for adding this advice!
This is the connector that a lot of users seem to experience being unreliable — the symptom is rapid false-touch inputs right up the centreline of the screen from time to time.
Augmenting the thickness of the pressure pad (that aligns to the connector from the back of the screen frame) seems to help.I wish Google would do a better job of indexing comments like this, this was my exact problem and I didn't figure out the cause until I read this comment, while replacing my screen 😕
-


To reassemble your device, follow these instructions in reverse order.
Take your e-waste to an R2 or e-Stewards certified recycler.
Repair didn’t go as planned? Try some basic troubleshooting, or ask our Answers community for help.
To reassemble your device, follow these instructions in reverse order.
Take your e-waste to an R2 or e-Stewards certified recycler.
Repair didn’t go as planned? Try some basic troubleshooting, or ask our Answers community for help.
crwdns2935221:0crwdne2935221:0
crwdns2935229:014crwdne2935229:0


crwdns2947412:012crwdne2947412:0
20-40 Minutes? ... more like 10 ... and I wasn't even pushing it
Thanks for your comment! The time estimate was set a little too high, you're right. I've adjusted it!
Vielen Dank für die präzise Anleitung. Auf alle heiklen Punkte wurde hingewiesen. Habe es locker geschafft und war danach ganz stolz!
I can confirm that you need a #0 screwdriver, not a #00, as has been changed in the latest unchecked version.
Hi Jonathan, thanks for you comment! While a #0 screwdriver will work, we recommend a #00 as Fairphone themselves do, see their website: "The only tool you will need is a Phillips #00 screwdriver to access all spare parts of the Fairphone 4."
Hi Manuel, that is odd - my #00 did have a tendency to slip and wear out the screw, while I did not have that issue with the #0.
Jonathan -
My replacement screen came with a dust cover over the selfie camera opening so the selfie camera didn't function: it just showed slight changes of lighting but no image. The instructions should contain a warning to remove this paper cover as it took me quite a while to figure out why the camera didn't work.
I've looked up this guide to just double check how the small ribbon cable connects again. while doing that finished the replacement in exactly10 minutes (set up a stopwatch just for fun.
I've used a LTT ratchet screwdriver, the supplied bits had a correct one.
10/10 would recommend to replace your screen your self. going to a store to get it done will take longer for sure
After removing the old screen and replacing it with a newly-purchased on that arrived today, neither my existing, broken screen (which was working this morning, just with cracked glass) nor the new replacement module are recognising touch inputs.
Can you provide more information on actions and checks I need to do please?
Hi R M Carter,
I'm sorry to hear about the issues during your repair. Based on your comment, it sounds like the display itself is working as expected? Did you try a hard reboot already? If that doesn't fix the issue, there might be a problem with the display connector. Reseat the connector, and if that doesn't do the try, check the connector socket for damages or dirt/dust. Please also check our general troubleshooting advice.
I managed to take away 4 screws with the 00 philips, but i doni manage to remove the other 4...what should i try?
Hi Chia, some folks have had more success with a #0 philips, so you might try that. If that doesn't work, we have a guide with some tips on how to handle stripped screws which might help you.