crwdns2915892:0crwdne2915892:0
You may be experiencing power issues with your BOSS CE-300 SuperChorus that aren't resolved by simply replacing a fuse. In that case, it might be necessary to replace the power supply. This guide will walk you through the steps to replace the power supply safely and effectively in about 15-20 minutes. The tools you'll need include #2 Phillips screwdriver, soldering iron, and de-soldering pump or desoldering cable.
We recommend reviewing How to Solder and Desolder Connections before beginning.
crwdns2942213:0crwdne2942213:0
-
-
Use a Phillips #2 screwdriver to remove the 3 14.8 mm screws located on the left side of the CE-300.
-
Repeat the previous bullet on the right side.
-
-
-
Remove the two 10 mm bolts using a Phillips #2 screwdriver.
-
-
-
On the back of the CE-300, remove the two 7.5 mm screws with a Phillips #2 screwdriver.
-
-
-
On the left side, remove the one 10 mm screws with a Phillips #2 screwdriver.
-
Repeat the previous bullet on the right side.
-
-
-
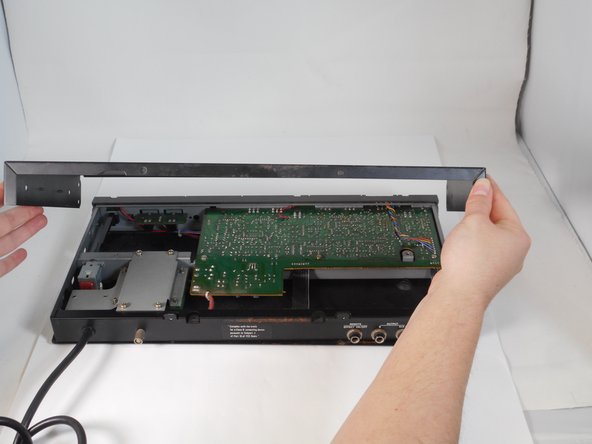
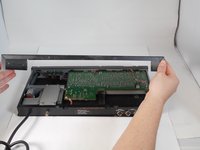
Slide the top panel away from the front.
-
Lift the panel up and off.
-
-
-
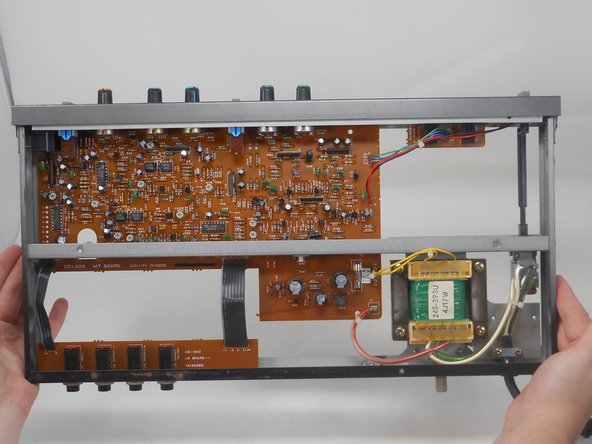
Remove the following screws with a Phillips #2 screwdriver:
-
Two 7.5 mm
-
Two 10 mm
-
-
-
-
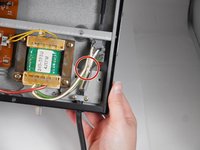
To remove the power supply, you have to look to the power cable.
-
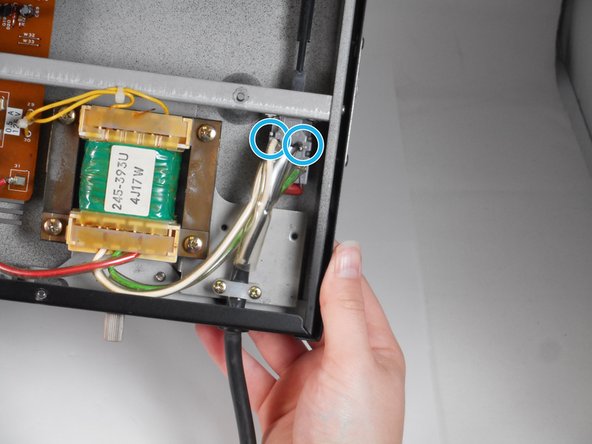
Remove the two 17 mm screws with a Phillips #2 screwdriver.
-
Remove the white bracket pieces that come loose with the removal of the two screws.
-
-
-
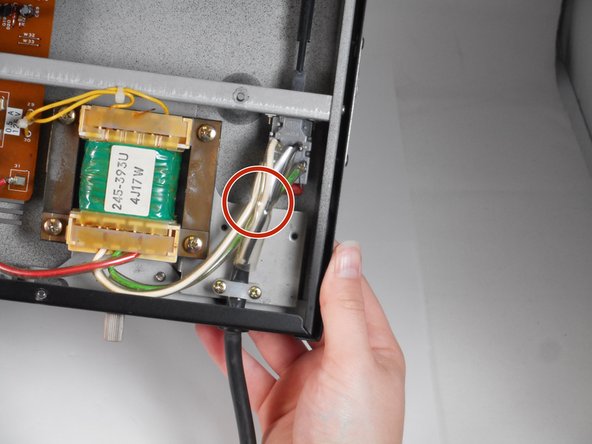
Push the power cable in toward the unit.
-
-
-
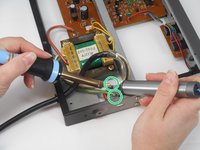
If you are just replacing the power supply, desolder the white and green wire.
-
If you are replacing the power cable as well, desolder the white and black cable of the power cable as well.
-
-
-
Cut the zipties tying the cables to the board and to the other cables.
-
Optional: The yellow cables can be removed without cutting the zipties, but it may be easier if they are cut.
-
-
-
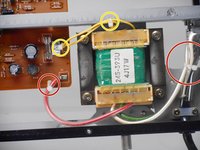
From the "bottom" of the board desolder the red cable.
-
-
-
From the "top" of the board, desolder the yellow cables.
-
-
-
Remove the four 10.4 mm screws using a Philips #2 screwdriver.
-
-
-
Optional: If your new power supply does not come with a bracket, remove the four 10 mm screws.
-


To reassemble your device, follow the above steps in reverse order.
Take your e-waste to an R2 or e-Stewards certified recycler.
Repair didn’t go as planned? Try some basic troubleshooting or ask our Answers community for help.
To reassemble your device, follow the above steps in reverse order.
Take your e-waste to an R2 or e-Stewards certified recycler.
Repair didn’t go as planned? Try some basic troubleshooting or ask our Answers community for help.

crwdns2915084:0crwdne2915084:0

University of Memphis, Team 1-2, Sneed Fall 2024 crwdns2935289:0University of Memphis, Team 1-2, Sneed Fall 2024crwdne2935289:0
UM-SNEED-F24S1G2
crwdns2931471:04crwdne2931471:0
crwdns2935297:09crwdne2935297:0