crwdns2915892:0crwdne2915892:0
Use this guide to replace a worn-out or dead battery in your Apple Watch Series 6.
This guide shows the procedure on the cellular/LTE version of the watch, but the GPS-only version is similar.
Note: The battery replacement procedure for the 40 mm Series 6 Apple Watch differs slightly from the 44 mm version. This guide shows how to replace the battery for both sizes.
Before you begin, make sure you have the appropriate replacement battery for your watch.
If your battery is swollen, take appropriate precautions. For your safety, discharge your battery below 25% before disassembling your watch. This reduces the risk of a dangerous thermal event if the battery is accidentally damaged during the repair.
You’ll need replacement adhesive to reattach components when reassembling the device.
crwdns2942213:0crwdne2942213:0
-
-
Before starting repairs, take your watch off the charger and power it down.
-
-
crwdns2935267:0crwdne2935267:0Safety Glasses$3.19
-
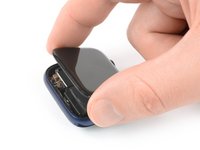
Because the gap between the screen and watch body is so thin, a sharp blade is needed to separate the two. Read the following warnings carefully before proceeding.
I found the supplied razor blade too thick to get in the gap between the screen and the case. I used half a Dorco razor blade to do the job, and some isopropyl alcohol once it started to lift.
-
-
-
Prepare an iOpener (or use a hair dryer or heat gun) and heat the face of the watch to loosen the display adhesive.
-
Leave the iOpener on the watch for at least two minutes to fully heat the screen and soften the adhesive holding it to the case.
-
-
-
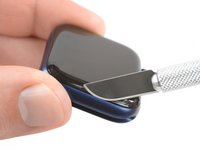
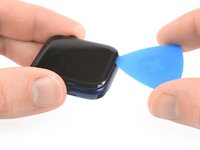
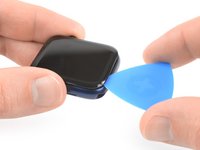
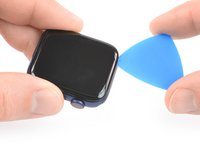
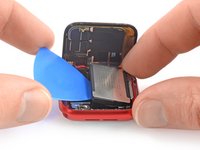
Place the edge of a curved blade into the thin gap between the display and the outer case. Start at the short side of the display, most distant to the digital crown.
-
Press firmly straight down into the gap.
-
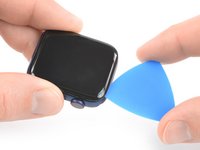
Once inserted, tilt the blade to pry the display open slightly.
I was unable to do this. and I ended up breaking the glass in the process. So this was not a great experience
Only thing that fit that gap for me was a razor blade. Used one of those plastic scraper frames to secure it. Everything went according to this guide.
With a titanium case there is no give to get the blade within the gap. This step probably works fine with an aluminum case as it has more give. Even purchased new knives to make it work but only ended up scratching the case. Will now need to take to Apple Store and live with scratches...
Instead of a knife I used an ultrathin 0.1 mm spudger pry blade (Amazon) to get under the display and actually cut the seal around the whole display.
-
-
-
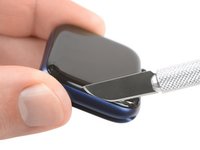
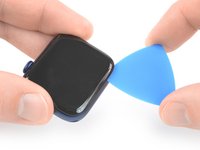
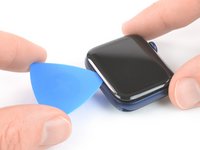
Insert an opening pick in the gap your created.
-
Slide the opening pick along the short edge of the watch to cut the adhesive.
-
-
-
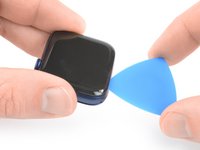
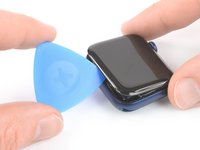
Slide the opening pick around the corner and along the long edge on the opposite side of the watch crown to cut the display adhesive.
-
-
-
Slide the opening pick around the corner to cut the remaining adhesive on the short edge of the watch next to the watch crown.
-
-
-
-
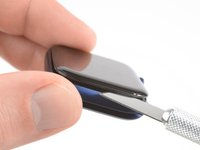
Place the watch on a flat surface and use an opening pick to slice through any remaining adhesive.
-
Slide an opening pick under the opposite display edge of the watch crown.
-
Twist the opening pick to loosen the display off the watch case.
-
-
-
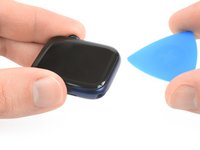
Lift the display and carefully pull it towards the watch crown.
-
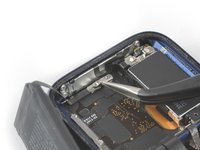
Swing the display open to an upward position.
When I opened my watch I saw two layers of adhesive or are they gaskets? I broke one accidentally but not sure if I should keep the undamaged one in there? Or should both side be totally bare and the adhesive itself is also the seal?
Also I think I damaged my battery when prying it up since it won’t hold a charge now. I bought a replacement battery and will try that but is there anything else it could be?
Be very careful here... My display cable broke before achieving the angle they show in the last pick above. You may well want to order new cables along with the battery and gaskets. The are only $19.95
-
-
-
Prepare an iOpener (or use a hair dryer or heat gun) and heat the rear side of the watch to loosen the battery adhesive. Leave the iOpener on the watch for at least two minutes.
-
-
These links for replacing the battery for the 40mm and 44mm are going to the battery section of the screen replacement instructions page. They should go to the battery replacement instructions below instead. (This is likely a copy-paste error from that other page)
Yeah, bad links in step 11
I have edited the links to stay on the correct guide so they should work right once the edit is approved by the admins.
-
-
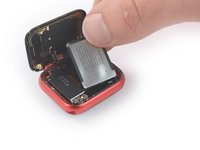
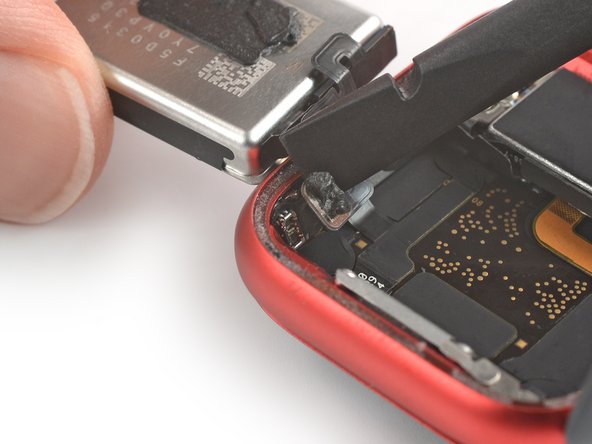
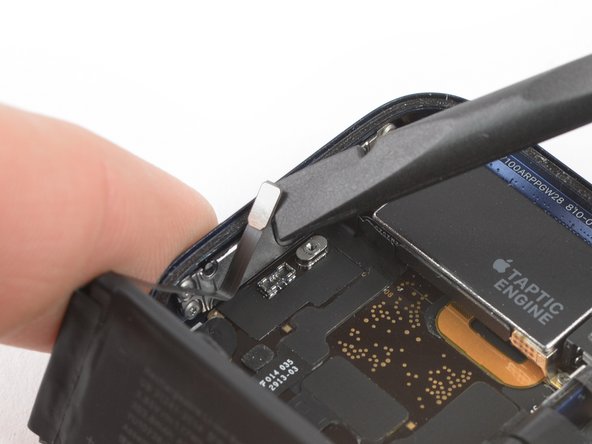
Insert an opening pick between the battery and the Taptic Engine.
-
Use constant, steady pressure to slowly pry the battery up, separating it from the adhesive securing it to the mainboard.
that ribbon at the top left corner of the battery in the picture is extremely fragile. my pick snapped it in half :(
-
-
-
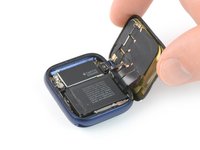
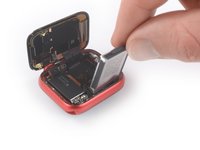
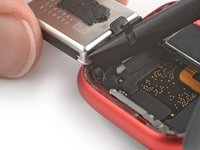
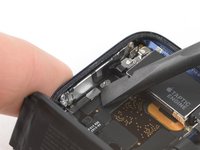
Carefully lift and swing the battery out of its recess.
-
-
-
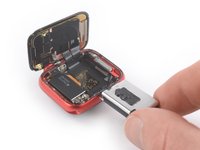
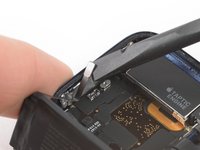
Use the flat end of a spudger to pry up and disconnect the battery connector.
-
-
crwdns2935267:0crwdne2935267:0Tesa 61395 Tape$5.99
-
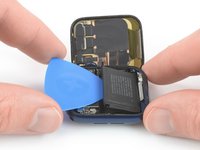
Remove the battery.
-
-
-
Insert an opening pick between the battery and the Taptic Engine.
-
Use constant, steady pressure to slowly pry the battery up, separating it from the adhesive securing it to the mainboard.
My watch has a metal shield in between the battery and screen?
Hi Eric,
I assume you own the 40mm version of the Apple Watch series 6 which has a slightly different build. The one you see here is the 44mm version.
Is removing the battery really necessary if you are only replacing the display? I can't see in the following steps where the battery would get in the way of detaching the old screen.
I’ve already taken off the screen , had a bad scratch I couldn’t get out then totally messed it up so for $50 bucks and some increased knowledge of Apple Watches I have the 6 44mm and the whole screen is off took 2days, I’m a little afraid I may have taken off the lcd part as well and I just bought a digitizer and new battery i didn’t get anything called an lcd they were more expensive but I’ve looked for hours and I didn’t tear anything, any thoughts?
Hi Jeremy,
Unfortunately what the sites that sell just the digitizer (AKA the front glass) aren't telling you is that it's extremely difficult to separate the LCD and the digitizer, as they're bonded together with glue called OCA (Optically Clear Adhesive). It takes specialized skills and equipment to successfully separate them without damaging the delicate LCD, then even more equipment to rebond the display with a new digitizer. I consider myself a very experienced DIY guy and this isn't something I'd try on an Apple Watch. I have done one on a couple of iPhone 6's that turned out with barely acceptable results, and one on a Samsung phone that failed miserably.
Sorry to say, you'll need to bite the bullet and just buy a new screen assembly, one that includes both the LCD and the digitizer. Presumably you haven't done anything with the replacement part you already bought, so hopefully you can return it.
-
-
-
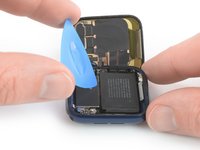
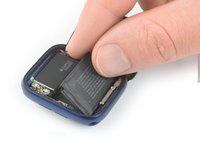
Carefully lift the battery out of its recess and place it outside the watch case opposite to the Taptic Engine.
-
-
-
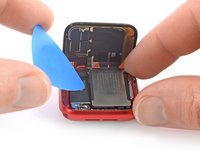
Remove the single 1.2 mm-long tri point Y000 screw.
-
-
crwdns2935267:0crwdne2935267:0Tweezers$4.99
-
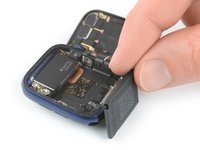
Use a pair of tweezers to remove the metal shield covering the battery connector.
-
-
-
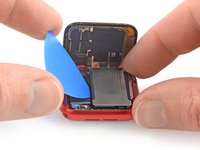
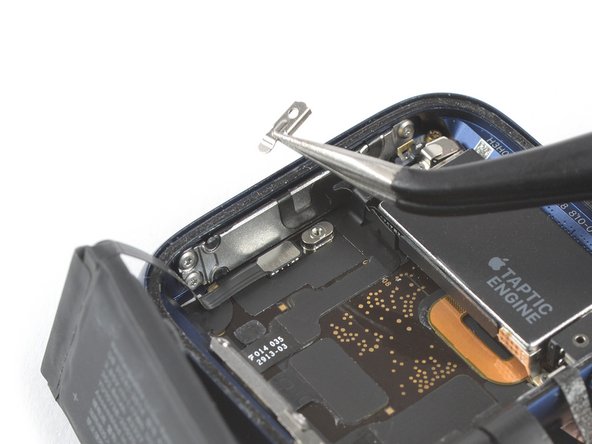
Use the flat end of a spudger to pry up and disconnect the battery connector.
Be careful that you don't push the spudger into the battery reciptical port and pop that off the motherboard like I did. Pry straight up. Do not press the spudger into the side of the battery connection port. I think I'm out of luck now.
-
-
crwdns2935267:0crwdne2935267:0Tesa 61395 Tape$5.99
-
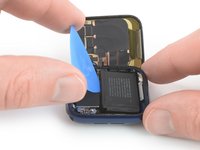
Remove the battery.
I did not really see any adhesive strip to remove, neither on the battery, nor in the housing. So installed the new one without any adhesive. Though the backside of the new battery had a plastic foil to remove, guessing that‘s the way to make the battery stick.
To seal the display to the housing again I used B-7000 glue.
-


If possible, turn on your device and test your repair before installing new adhesive and resealing.
Secure the new battery with pre-cut adhesive or double-sided adhesive tape. In order to position it correctly, apply the new adhesive into the device at the places where the old adhesive was located, not directly onto the battery. Press the new battery firmly into place.
To reassemble your Apple Watch Series 6, follow these instructions in reverse order. Apply a little bit of high isopropyl alcohol (>90%) to a Q-tip or use a cleaning pad to gently remove the leftover adhesive on the edges of the watch case and the screen before installing new adhesive.
For optimal performance, calibrate your newly installed battery after completing this guide.
Take your e-waste to an R2 or e-Stewards certified recycler.
Repair didn’t go as planned? Try some basic troubleshooting, or ask our Answers community for help.
crwdns2935221:0crwdne2935221:0
crwdns2935229:025crwdne2935229:0


crwdns2947412:016crwdne2947412:0
Where do I purchase a replacement battery?
You can Google this. There are several sites offering batteries.
agrior -
Moin Team !
Welches Klebeband benötige um das Display möglichst Wasserresistent abzudichten und festzukleben ?
None is needed for the series 6. You seal it with glue. I.e. B-7000 glue.
agrior -
Does the watch is still water resistant after replacing the battery ?
Not really, but I glue with certain types of glue and cure it for 1 hour and it seems to hold well. but I still wouldn't recommend going into pool.
You buy a new adhesive cut out. Ebay.
If you use b-7000 glue, yes.
Muss ich denn das Display ausbauen beim Akku Tausch? Oder reicht es einfach einen neuen Akku einzusetzen
Just completed the battery replacement for a series 6 40mm watch. The repair went smoothly, but now that it's all back together there are two bright blue vertical lines through the display. Any idea what I damaged? I'm assuming I damaged a cable or something and there is no fix, but I would like to know what I damaged so that I can be more careful next time.
It sounds like you damaged OLED. You will need new display for it but also want to make sure you transfer NFC chip in order to save Apple Pay function. but then, maybe it's time to upgrade.
Opening the case was difficult. Removing the battery was easy, but despite careful handling, the outer battery case became somewhat warped. I installed the new battery, and initially only the apple logo flashed... then after 20 minutes charging, the new battery showed 75 percent charged. I turned the unit off and completed the installation, sealing the case. Once finished, the watch only flashes the logo. The watch worked normally with the original battery, so suspect that the new battery is defective. Any similar experiences?
The guide doesn’t show how to install a new battery. Am I missing something?
Read the Conclusion section at the end; it gives you all the information you need in order to reassemble your watch with the new battery.
Seems to be very good instructions, but I had one issue that is now holding me up while I order adhesive for the case.
Please update your "what you need" list to discuss adhesive for the watch face/case not just the battery, I ordered what I thought was everything I needed but didn't include adhesive for the case reassembly because it was a "conclusion" section and it really isn't well discussed.
There also seems to be questions about it being water resistant after re-assembly which I would assume is related to the type of adhesive you need to use.
I'll need to figure out what I need for adhesive and pay shipping again because I will not be enough for free shipping from iFixit.
And maybe talk more about the iOpener and if it can be overused and cause heat damage to the watch beyond loosening the adhesives.
Is there good coverage of working with these adhesives in general ? Like what temperature they need to reach to soften enough for removal, what solvents are best and what happens if you just try to reuse them.
I used the Tesa 61395 1mm double-sided tape from iFixit. It's a bit of a struggle to lay down on the inside, by the edge. One must not forget to remove the old tape, of course.
A pre-cut piece would be best, if it even exists. Armed with a bit of patience and a steady hand, 4 pieces can be placed relatively easy. I found it easier to cut the tape around the corners to avoid bending it around the curve. The hardest part was on the side of the ring button because you have to work behind the cable. Got some pics, if anyone's interested.
I wouldn't call it waterproof, though.
As for the heating of the existing adhesive, I simply used a hair dryer and did 4-5 runs until the watch was warm-towards-hot to the touch.
Good luck!
Dan -
If you change the battery of the 44 mm Model, make sure you got the Y000 bit for the tiny screw. I have a pretty comprehensive bit set from iFixit, but that one was not included.
AD161 - crwdns2934203:0crwdne2934203:0