crwdns2915892:0crwdne2915892:0
This is a step by step guide to replace the battery in the Anker SoundCore 2.
Before replacing anything, be sure to take a look at the troubleshooting page for this device.
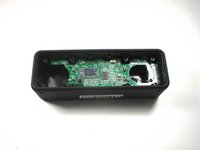
Accessing the battery will involve removing the speakers and motherboard using a Philips #1 screwdriver.
crwdns2942213:0crwdne2942213:0
-
-
Insert a spudger between the front panel and the body of the speaker.
-
Pry around the edges of the front panel with the spudger to pry it away from the speaker body.
-
-
-
Remove eight 10 mm screws from the speaker mount using a Phillips #1 screwdriver (Phillips #0 can strip the screw heads).
-
Insert a spudger in the gap between the speaker mount and speaker body to remove the speaker mount.
-
Be careful not to damage the rubber gasket around the speaker mount plate.
-
Use your hand to remove the speakers. Some variants have a wire from the speaker to the board, some rest on contact pins.
-
-
-
-
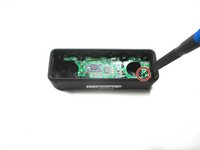
Remove the 10 mm screw that is holding the motherboard in place using a Phillips #1 screwdriver. Some variants have 2 screws.
-
Carefully remove the bluetooth antenna wire from the left of the board. It pulls up without much pressure.
-
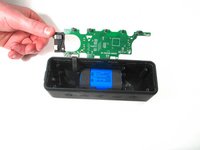
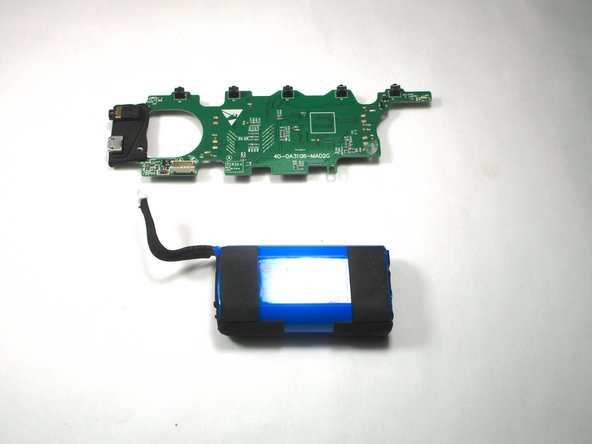
Flip up the motherboard to expose the battery.
-
-
-
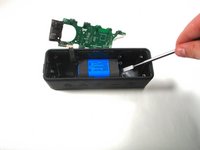
Use a nylon spudger to remove the battery from the speaker casing.
-
-
-
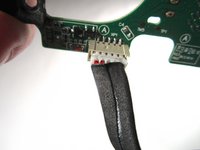
Unplug the wire that connects the battery with the motherboard.
-
Battery specs: 2 x 18650 2600mAh soldered in series (to bring voltage to 7.4V).
-
Can safely be upgraded to 2 x 18650 3500mAh for additional capacity.
-


To reassemble your device, follow these instructions in reverse order.
To reassemble your device, follow these instructions in reverse order.
crwdns2935221:0crwdne2935221:0
crwdns2935229:06crwdne2935229:0
crwdns2915084:0crwdne2915084:0

Illinois Wesleyan University, Team S1-G2, Bullock Spring 2021 crwdns2935289:0Illinois Wesleyan University, Team S1-G2, Bullock Spring 2021crwdne2935289:0
IWU-BULLOCK-S21S1G2
crwdns2931471:03crwdne2931471:0
crwdns2935297:07crwdne2935297:0
crwdns2947412:07crwdne2947412:0
It would be nice to have the specifications of the battery so availability can be checked before disassembly.
7.2V, 2550 mAh, 18.36 Watt - Hour
Hey I had a question.So i kind of dipped anker sound core 2 in water eithout the charging cover on and now it wont turn on.Can you Help what might be the problem here?
Kapazität 2600 mAh Leistung 19.24 Wh Spannung 7.4 V Typ Li-ion
Habe ihn mir mit 2 18650/3500mA Akkus von Temu selber gebaut. Lädt zwar jetzt länger und hält aber auch 20% länger. Dabei aufpassen und die Kabel an den Akkus wieder richtig anlöten. Wegen der Li-Ionen Ladeautomatik auf der Hauptplatine. Am Ende in einen passenden Schrumpfschlauch stecken und aufpassen das rundum kein Kurzschluss passieren kann.
Können Sie mir bitte sagen, welche Form die Kontakte eines 18650-Akkus haben müssen, um ihn neu zu löten?
Oleg M -
Phillips #1 won't strip the screw like a #0 can.
How do i put the front plate back on
Hardstarling - crwdns2934203:0crwdne2934203:0