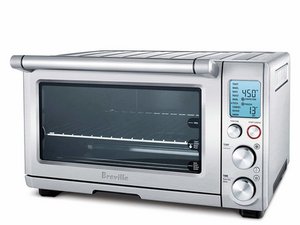
A couple of months our Breville BOV800XL started giving trouble. It would do the preheating but then not carry on heating at the set temperature at all. Sometimes it would work but mostly not. The START button seemed to be the problem, I thought. It would be intermittent and sometimes the fan would come on but no heat.
I took it apart and did not see anything obviously wrong. Then I re-arranged the small switches, discussed here, making sure one of those rarely used ones ended up in the START position. Still no joy, but sometimes the work-around suggested seemed to work. I decided to replace the switches and still no consistent performance. I could get it working on my workshop bench but when I put it all back together and back in the kitchen still no luck from time to time.
With the unit back on the bench and dis-assembled but with the 9 pin cable and 2 pin one connected, I noticed that if I moved the 9 pin cable near the connector on the main PCB I could get all sorts of odd behaviour when plugging the unit in, including the E5 error. I thought the cable that gets folded from the front panel to the PCB was the problem. I managed to get a few such cables cheaply (Ali-Express) and put a new one in, soldering it carefully on the control board. Astonishingly it did not solve the problem. I cut the front of the plastic on the 9 pin connector on the PCB. When I attached and then removed the connector plug I noticed a couple of the pins on the board were not at the same height and had moved slightly.
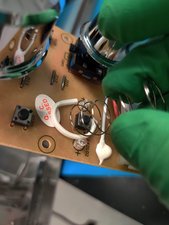
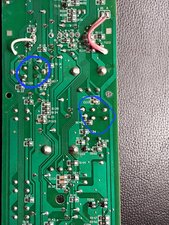
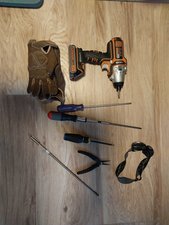
I then removed the PCB. Removing the spade connectors has to be done with long needled nosed pliers to release the connector. (You have to mark which connector goes where, especially 2 on the lower rhs of the board.) I then measured the resistance from each pin in the connector to a soldered component position on the correct metal trace on the non-component side of the board. Most of them had zero resistance but a couple a few kilo-ohm. When I measured the resistance from the solder of a problem pin to the same place on the metal trace I got zero ohms. When I looked at the solder joint of the pin on the board with a magnifying glass I found a hair line gap/crack where the base of the pin went into the solder, all around it! If you knew where to look you could hardly see it without the a magnifying glass. I re-soldered all the pins to get a good small lump of solder on each, and for good measure soldered the cable wires onto the pins of the connector, getting rid of the connector plug.
With this done I tested the unit. No problems at all, anymore! I found that if I plugged in a bench (non-dimmable) LED lamp to the same circuit as the unit, the light would flicker very slightly when the elements were on. Once the unit come up to the set temperature the elements switch on an off – it is hard to see them glow (Roast function) except in the dark. I also used a digital oven temperature probe to watch the unit maintain roughly the set temperature.
The unit gave trouble before I disassembled it so the pin problems on the PCB existed before I removed the 9 pin connector. I could have made it worse I suppose, but this is unlikely the original cause. Any good soldered joint should last for ages but when the unit has been used perhaps more than 1000 times by us, it could deteriorate since the board and the soldered connector gets hot each time the unit is used. It there is a small gap/crack that does not go all around the base of a pin the unit could work most of the time. A signal from the front control panel might be corrupted and a relay might not then work properly. Depending on which pin(s) have the problem you’d get different problems. I suspect some of the problems people have had might be related to the one I had. It is possible that with new switches the signal to the PCB board is good enough to overcome the resistance between a pin and its soldered joint to a metal trace.
So first when trouble shooting looking at the connector pins on the PCB might be a good place to start.
I nearly gave up a number of times. It was the fact that the unit worked sometimes that gave me hope. If I counted the hours I spent on this it might be embarrassing.
crwdns2934105:0crwdne2934105:0
crwdns2934113:0crwdne2934113:0
crwdns2915270:0crwdne2915270:0
crwdns2889612:0crwdne2889612:0
6
 2
2  2
2  1
1 




crwdns2944067:014crwdne2944067:0
Have you been able to fix this? Mine just started doing the same thing
crwdns2934271:0crwdnd2934271:0 CJT crwdne2934271:0
No, unfortunately.
crwdns2934271:0crwdnd2934271:0 Ken Haugen crwdne2934271:0
I added instructions on how to fix it. Hope it helps!
crwdns2934271:0crwdnd2934271:0 Chris Helming crwdne2934271:0
I had the same thought. So I too switched the ºF/ºC button for the on/off button. At first it appeared to help, but a few more tests and the problem was back. There must be another part on the circuit board that is out of tolerance...likely a capacitor. High heat can age capacitor more quickly.
I found a work around that helps sometimes. Press and hold the convection button then press the on/off button, and lastly release the convection button.
crwdns2934271:0crwdnd2934271:0 Brad Forden crwdne2934271:0
2 SECOND Solution! I had this same problem. One day, I was struggling to push the button hard enough to make "contact" to start the toaster when I used the back of a butter knife to depress the button. Barely touching the button, the oven turned on. I couldn't believe it....so I tried it again and again. The metal contact from the knife must create enough of a static charge to easily turn the toaster on/off. I was so happy I could get a lot more life out of this toaster oven without taking in a part!
crwdns2934271:0crwdnd2934271:0 Greg crwdne2934271:0
crwdns2934275:09crwdne2934275:0