crwdns2915892:0crwdne2915892:0
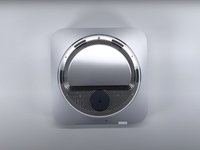
Teardown on the M2 Mac Mini (early 2023). The purpose of this guide is to provide a detailed look into the internals of the device. This teardown is not meant to be followed as a repair guide.
Disclaimer
The video incorrectly identifies several different screws as T5 Torx, specifically with the CPU fan, PSU, and speaker. The previous M1 identifies these screws as T6 screws in Apple's official repair guide. While the M2 mini is supposed to be an updated design of the M1, the overall design is for the most part unchanged.
crwdns2942213:0crwdne2942213:0
crwdns2936621:0crwdne2936621:0
-
-
This teardown applies to the base M2 model of Mac mini. This guide uses the following specs:
-
System on Chip M2 8-core CPU with 4 performance cores and 4 efficiency cores
-
8 GB of memory
-
Two Thunderbolt 4 ports with support for 6K resolution at 60 Hz.
-
256 GB of SSD Storage.
-
-
-
On the back of the unit, we find our I/O ports. The base M2 has two Thunderbolt 4 ports, although the M2 Pro model has four ports. We also have two USB-A ports, HDMI 2.0 port, a Gigabit ethernet port, and a standard 3.5 mm headphone jack.
-
-
crwdns2935267:0crwdne2935267:0iFixit Opening Tool$1.99
-
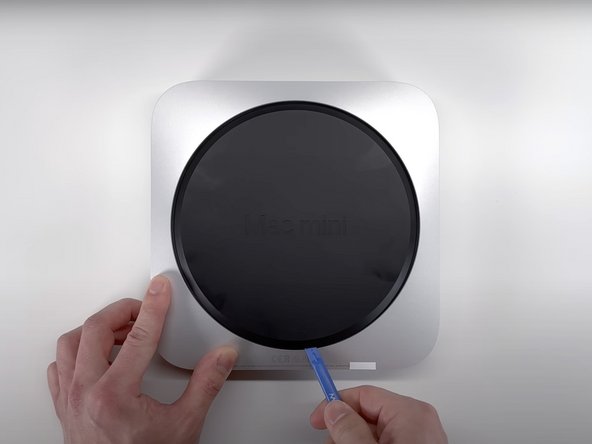
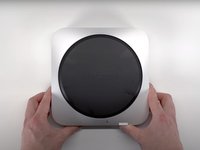
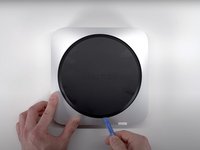
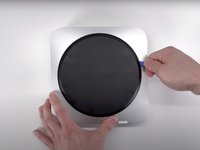
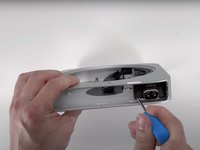
Flipping the device over, we can see the iconic bottom cover with the Mac mini logo molded into it. Removing the cover can be done easily enough with an Opening Tool, although Apple has recommended using a Spudger for this in their guide for the M1 Mac mini.
-
-
crwdns2935267:0crwdne2935267:0TR6 Torx Security Screwdriver$5.99
-
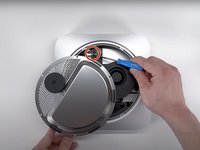
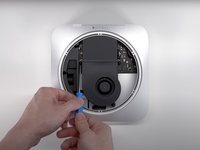
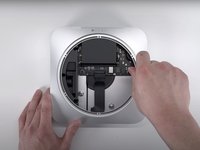
With the cover removed, we can see the antenna plate. This is held down with six Torx T6 security screws, which can be removed with the appropriate screwdriver.
-
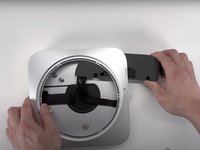
Carefully moving the plate to the side, we get just enough space to expose the antenna coaxial cable held down with a grounding clip and another T6 screw.
-
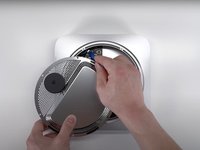
With the screw removed, a Spudger can be used to dislodge the antenna plate. Alternatively you can use an Opening Tool for this.
"a Spudger can be used to dislodge using an Opening Tool." Does this mean either can be used or is it a typo?
They there, the wording was incorrect, but you can use either for this step.
-
-
-
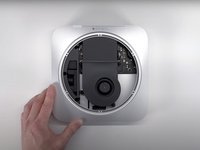
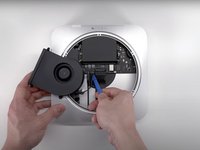
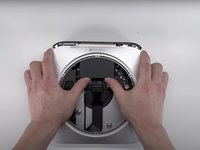
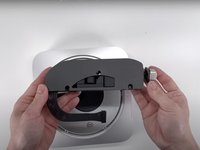
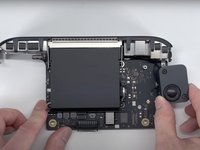
With the antenna plate removed, we can get access to the single fan as well as the PRAM battery.
-
The fan can be removed with minimal fuss after loosening the four T5 Torx screws.
So what is the spec on the PRAM battery? Can imagine someone consulting this guide in the future with just such a question.
Good Question
-
-
-
It is worth pointing out that with the fan removed it becomes abundantly obvious that there is a lot of empty space, especially when you consider that whole logic board only takes up about half of the full volume of the device.
The board in the Mac mini M2 Pro G170XD/A 12-Core CPU, 19-Core GPU, 1 TB, 32 GB is much longer. It covers 73% of the length of the unibody.
-
-
-
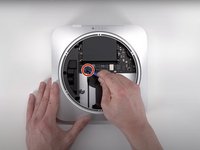
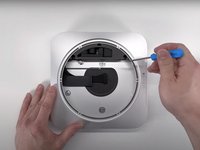
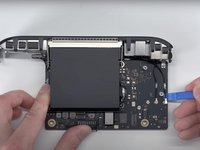
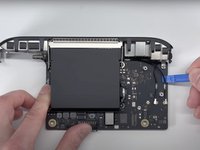
Once the fan is removed we can unplug the flex cable for the LED indicator light by flipping up the ZIF connector, and removing the cable from its housing.
-
We can also remove the power supply cable by peeling off the polyester film from the top of the connector, and carefully pulling the cable out of the connector.
-
-
-
crwdns2935267:0crwdne2935267:0TR10 Torx Security Screwdriver$5.99
-
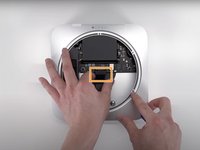
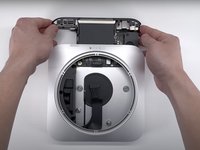
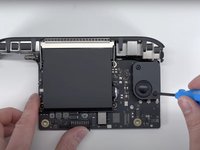
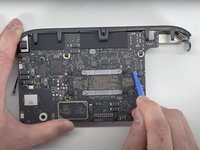
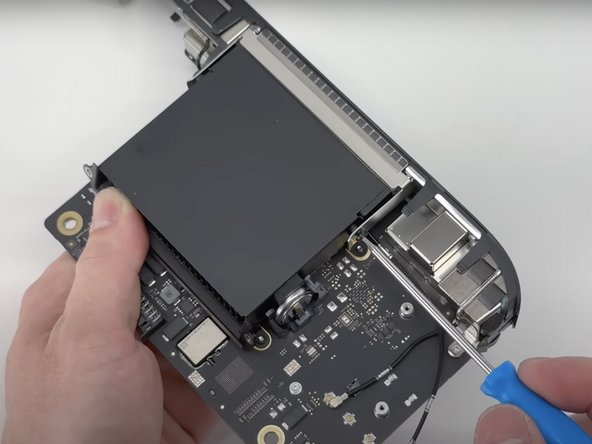
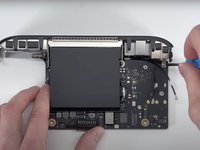
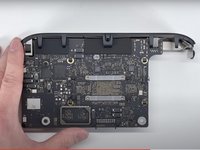
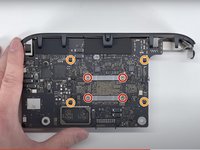
The logic board is only held down by two Torx T10 screws.
-
Once the screws are removed we can slide the board out of its housing with no fuss.
-
-
crwdns2935267:0crwdne2935267:0Tweezers$4.99
-
To remove the power supply from the housing first remove the three T6 screws from the power supply.
-
Using a set of tweezers, remove the retention clip from under the AC inlet. This will allow us to rotate the inlet. Rotating the inlet 90 degrees counterclockwise will allow us to slide the power supply out of the housing.
-
-
-
The power supply itself is for the most part unmarked, save for the small label on the bottom giving its specs.
-
Part Number: 614-00045
-
Input: 100-240 V, 50-60 Hz, 2.0 A
-
Output: 12 V, 12.5 A
-
-
-
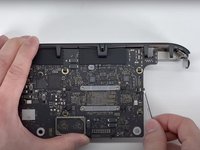
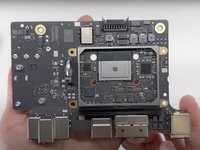
Moving right on to the logic board assembly, the overall layout of components remains unchanged. Everything from the speaker to the I/O wall, and even the heat sync has the same layout as the M1 mini.
-
-
-
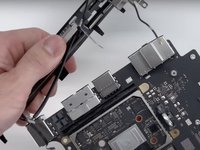
The speaker is held down by two T6 screws.
-
Moving the speaker over shows the speaker's connector on the logic board. Using an opening tool we can free the speaker from the connector.
-
-
-
The Bluetooth antenna is a simple coaxial connection. This is undone with an opening tool.
-
There are also three grounding clips that hold the cables in place. These are also easily undone with the opening tool.
-
-
-
On the back, we find the connection for the power button. This is a simple ZIF connection that can be easily undone using the opening tool to lift the clip.
-
-
-
Once all the cables have been undone, the only thing that is holding the I/O wall in place is five T6 Torx screws. Once the screw is attached to the logic board, the other four are attached to both sides of the heat sink's shroud.
-
-
crwdns2935267:0crwdne2935267:0Dust Blower$4.99
-
The final component that can be removed is the heat sink shroud, and the heat sink itself. Both sets of screws are T6 Torx screws.
-
All four screws for the shroud are each covered by a small rubber and are adhered to the screws themselves.
-
The heat sink is attached to the logic board with four screws, along with two brackets.
-
-
-
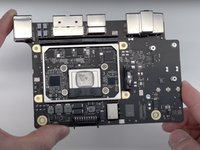
In typical Apple fashion, we see a small amount of thermal paste covering the CPU. Cleaning off the paste reveals Apple's signature logo.
Does anyone know why the thermal paste is not covering the entire metal shield of the CPU but only a smaller square-size area?
Hey there,
To answer your question, most companies that sell prebuilt systems will do this for two reasons. Cost cutting and consistency between units. Applying the right amount of thermal paste requires precision and care, which can increase manufacturing costs. Using less thermal paste can save money on materials and labor. In addition, mass-producing PCs involves a high degree of automation. Achieving consistent and precise thermal paste application across all units can be challenging. Applying too little paste may be seen as a way to ensure uniformity between Mac computers.
-
-
-
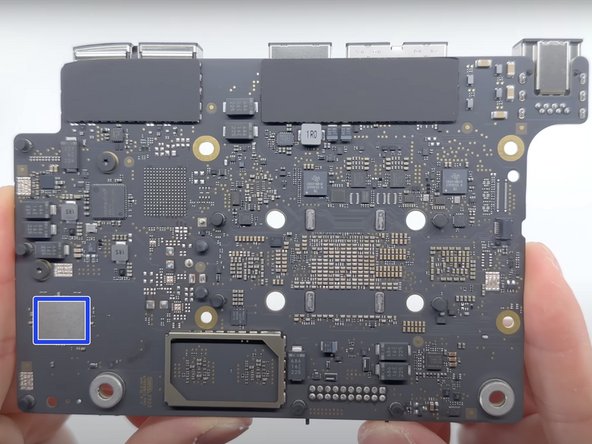
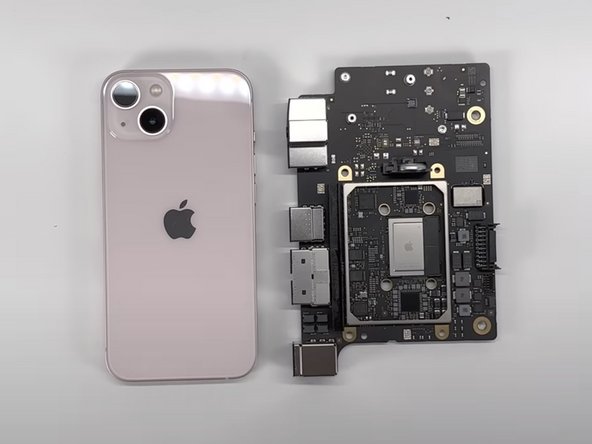
The overall footprint of the board itself is just a little bit wider than the iPhone 13.
-
64-bit M2 8-core SoC (system on a chip).
-
8 GB (2 x 4 GB) LPDDR5 SDRAM memory
-
PRAM battery housing
-
256 GB NAND Flash
-
PMIC Ethernet Controller
-
Wi-Fi/Bluetooth module
1. Should Apple M2 processor support LPDDR5? Why is it two LPDDR4 chips?
2. The chip marked is yellow color should PMIC for Apple M2 processor. Is the Ethernet NIC from Broadcom? There is Broadcom BCM577xx on the mainboard
Hello, I made some corrections to the chip identification. Yes, the processor is two 4 GB LPDDR5 chips. I also made a correction to the ethernet controller, although I am not aware if it is Broadcom or not.
-
-
-
No tough adhesive holds the M2 Mac mini or its components hostage.
-
Use of a few common tools, disassembly is straight-forward.
-
The disassembly does not differ significantly from the M1 mini, which makes many repairs familiar.
-
Apple's poor thermal paste job might prove to be a problem later on.
-
All I/O ports are soldered directly to the logic board. If one breaks then the whole board needs to be replaced.
-
Upgrading components like storage or memory are almost impossible due to the integration with the processor.
-
The CPU and storage are both soldered to the logic board and not user-upgradeable.
6/10? That's the same score that the Mac Mini 2014 and 2018 got, which you could upgrade either the disk (for the former) or the RAM (for the latter). There is NOTHING upgradable in this Mac, and no point opening it other than possibly to clear dust. It should score 1/10.
Howdy there,
My thought process for the score is that while it does not feature the same upgradeability for the major components, the disassembly is still very similar to the late 2018 Mac mini. It is also worth pointing out that the design also reduces the amount of tools needed to disassemble the device.
6/10 is accurate for disassemble-ability. There's nothing repairable here (aside from a power supply swap), so repairability is 1-2 at most.
KrisB -
Repairability doesn't equal "upgradeability", so yep, 6 is a pretty much fair score. Super simple layout and easy maintenance, actually, for such a capable machine. Go for a decent amount of RAM and storage at the time of buying, and you're futureproof for years to come. Maybe investing in Apple Care is also worth it, especially if you're planning to make money with this computer, do some everyday productive work, it totally is. Then you won't have to worry that much about soldered storage and stuff. Do backups and you'll be fine, that's a one great habit, anyway P) And then sometime in the future you'll always be able to sell it and upgrade, simply because that's a MAC;) And I seriously doubt Kioxia NAND (the top brand chip that sits there, yep) will go just totally dying on you in 3-4 years, unless you seriously and purposely abuse it, so there'll be an aftermarket for those, no worries/ Soldered stuff really isn't all that 'horrible' if it's done right, and that Apple can do.
Sorry, but repairability implies there's something that could be repaired.
Short of replacing the power supply (or mainboard), there's nothing repairable here -- even if you did have the soldering skills to swap a connector or component, good luck finding the parts.
Giving this anything more than a 1 or 2 out of 10 is ridiculous. Apple had might as well have superglued the bottom panel on.
KrisB -
-


crwdns2947412:011crwdne2947412:0
I'd give it a 3/10 repairability score, since every major component (CPU/RAM/SSD) is soldered and unreplaceable/not upgradeable. At least it's easy to open.
Howdy, my thought process for the score is that while it does not feature upgradeability for the major components, the disassembly is very similar to the late 2018 Mac mini and also reduces the number of tools needed for disassembly.
Seeing the similarities in the housing design of both the M2 model and the 2018 model, is it feasible that I should be able to switch the housing between the two without any trouble?
I strongly agree with Federico Barutto. This score feels rooted in the wrong place. A 9/10 repairability score when the CPU, RAM, and SSD can't be swapped? How is this a 9/10, when 63% of all desktops in the world (Windows desktops) have all of those things hotswappable? Since all Windows desktops are more repairable than this 9/10 system, does that mean that 63% of all desktops in the world have a reparability score of 10/10? Easily upgradeable CPU, RAM, and storage only merits a single point increase?
This should be a 5 or below on reparability. A rare miss from an otherwise excellent iFixit.
Score is 6/10
I strongly feel someone doesn’t get the difference between “repair” and “upgrade“
tarpot -
Hey all, I've decided to put the score up to a vote on iFixit's Meta site. Ultimately, I do want to do what is best for the community, and I do want to improve how I score future devices. https://meta.ifixit.com/Answers/View/197...
Does the mac mini m2 contain a lithium ion battery? Even if it’s a small one?
The PRAM battery is a Lithium Ion battery, but that's the only onboard battery on this device.
The PRAM battery looks like a normal coin cell, CR2032 or CR2025, these are Lithium-Manganese-dixoide cells, non-rechargeable with a voltage of 3.0V, NOT to be confused with so-called "Lithium-Ion" cells that are rechargeable with a voltage of 3.6/3.7V.
And you should call these cells, because they're single cells and not a battery of cells ;)
However rechargeable coin cells with lithium-ion chemistry nowadays exist, most true wireless earphones use these and they're also available in classic formats like said 2032 but I doubt that Apple uses such a rechargeable 2032 (or what size it is) cell.
it is sad that chips are not labeled and barely visible due to low res photos..