-
-
To loosen the adhesive holding the cover onto the bottom of the Echo Dot, heat up the bottom of the Echo Dot using a hairdryer at the lowest heat setting for approximately 10-20 seconds until the bottom feels warm to the touch and the cover is easier to pry off. Do not use excessive heat. If you do not have a heat source, go to the next step.
-
-
-
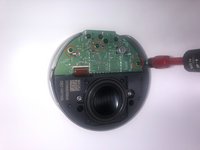
Remove the cover on the bottom of the Echo Dot by using a guitar pick or flat bladed tool. Be careful with any sharp objects. If you don't use a heat gun, pry it off with a flathead screwdriver.
-
-
-
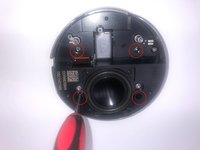
To remove the plastic base, remove the four Torx T7 screws with a Torx T7 screwdriver (Torx T6 works in a pinch).
-
-
-
-
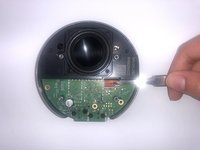
To remove the motherboard, remove the three Torx T7 screws and the small FPC cable. Note that there is no need to remove the four screws that keep the power and the headphone connectors down.
-
-
-
Quad Core MediaTek MT8516 applications processor (Four ARM Cortex-A35 CPU cores at up to 1.3 GHz)
-
Micron MT29F4G08ABAFAH4-IT:F 4Gb SLC NAND flash
-
Samsung K4B2G1646F-BYMA 2Gb DDR3 memory
-
-
-
Remove the four Torx screws that hold the metal frame to the top panel. Two of those are recessed pretty far, so you may need an extension bit.
-
-
-
To remove the white plastic ring from the top PCB, remove the four silver Torx T7 screws with a Torx screwdriver.
-
-
-
Under the shield we can find the MediaTek MT7658 WiFi/Bluetooth combo chip
-
-
-
Here are all the internal components of the Amazon Echo Dot 3rd Generation.
-