crwdns2933423:0crwdne2933423:0

crwdns2942213:0crwdne2942213:0

crwdns2935311:0crwdnd2935311:0crwdne2935311:0 crwdns2935313:0Aiper Seagull Procrwdnd2935313:0crwdnd2935313:0crwdne2935313:0

  1. Aiper Seagull Pro: Teardown, Remove the trash bin: crwdns2935265:01crwdnd2935265:01crwdnd2935265:02crwdne2935265:0 Aiper Seagull Pro: Teardown, Remove the trash bin: crwdns2935265:01crwdnd2935265:02crwdnd2935265:02crwdne2935265:0
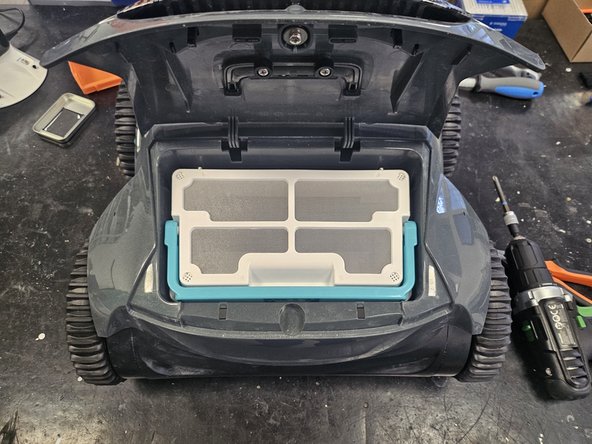
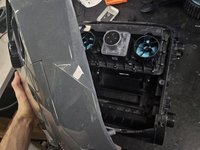
    • Start by removing the trash bin from the robot.

  2. Aiper Seagull Pro: Teardown, Wheels: crwdns2935265:02crwdnd2935265:01crwdnd2935265:03crwdne2935265:0 Aiper Seagull Pro: Teardown, Wheels: crwdns2935265:02crwdnd2935265:02crwdnd2935265:03crwdne2935265:0 Aiper Seagull Pro: Teardown, Wheels: crwdns2935265:02crwdnd2935265:03crwdnd2935265:03crwdne2935265:0
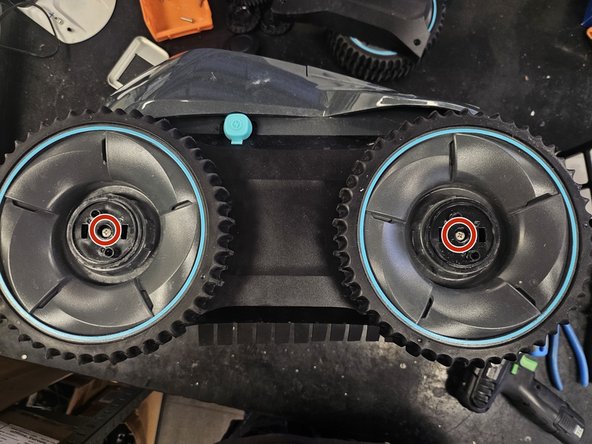
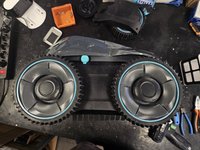
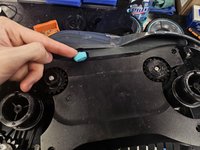
    • Put it on its side, then pry off the black plastic cap from the wheels.

    • Should be able to do this with your hand, but you could use a flathead screwdriver for some extra leverage.

    • Once the cap is removed, remove the screw.

    • Then remove the wheels.

  3. Aiper Seagull Pro: Teardown, Cover and middle cog: crwdns2935265:03crwdnd2935265:01crwdnd2935265:02crwdne2935265:0 Aiper Seagull Pro: Teardown, Cover and middle cog: crwdns2935265:03crwdnd2935265:02crwdnd2935265:02crwdne2935265:0
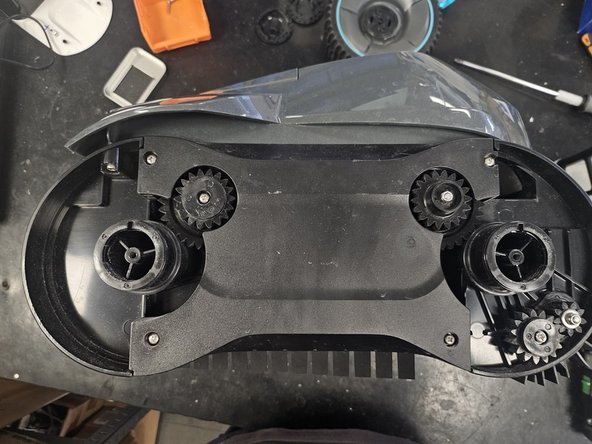
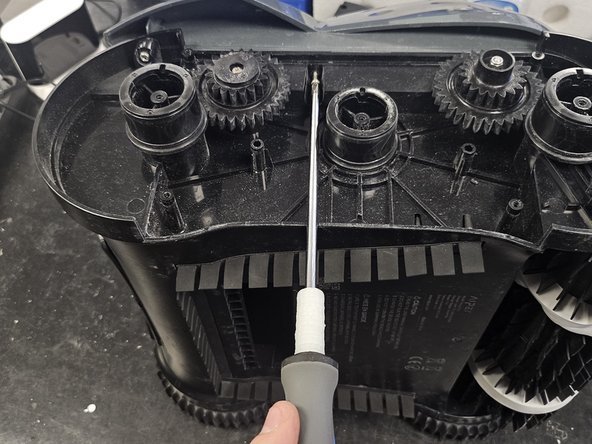
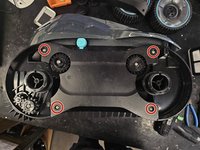
    • Remove the screws, then remove the plastic cover.

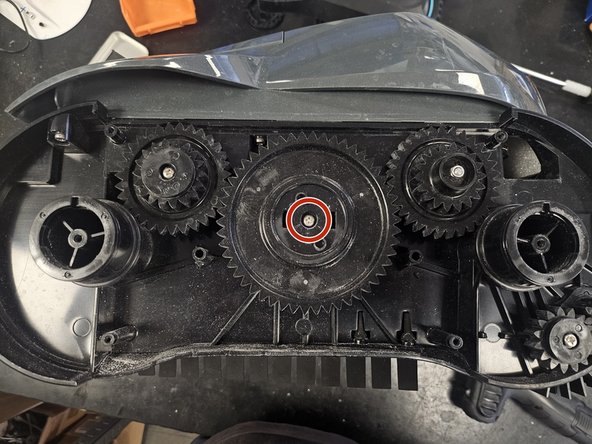
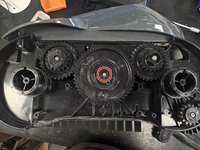
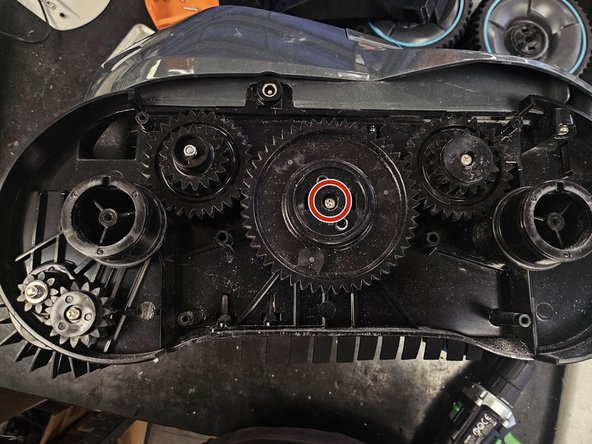
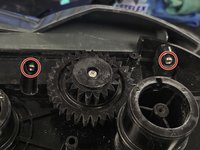
    • Remove the screw from the middle cog, then remove the cog.

  4. Aiper Seagull Pro: Teardown, Chassis screws: crwdns2935265:04crwdnd2935265:01crwdnd2935265:02crwdne2935265:0 Aiper Seagull Pro: Teardown, Chassis screws: crwdns2935265:04crwdnd2935265:02crwdnd2935265:02crwdne2935265:0
    • Remove the screws holding the chassis together.

    • I recommend a looong PH2 screwdriver for this task.

  5. Aiper Seagull Pro: Teardown, Other side's wheels: crwdns2935265:05crwdnd2935265:01crwdnd2935265:03crwdne2935265:0 Aiper Seagull Pro: Teardown, Other side's wheels: crwdns2935265:05crwdnd2935265:02crwdnd2935265:03crwdne2935265:0 Aiper Seagull Pro: Teardown, Other side's wheels: crwdns2935265:05crwdnd2935265:03crwdnd2935265:03crwdne2935265:0
    • Flip it over and remove the wheels.

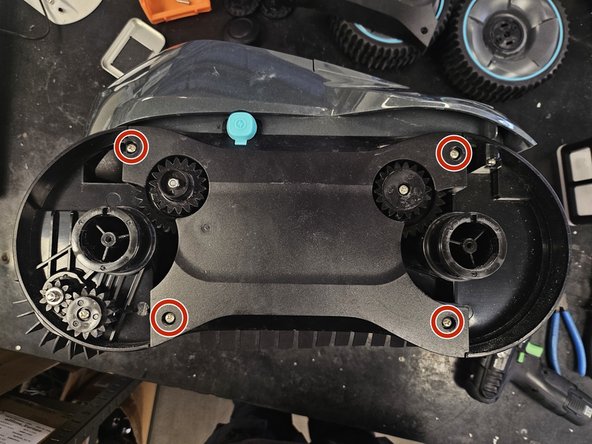
    • Then remove the side cover screws.

  6. Aiper Seagull Pro: Teardown, Other side's side cover and chassis screws: crwdns2935265:06crwdnd2935265:01crwdnd2935265:03crwdne2935265:0 Aiper Seagull Pro: Teardown, Other side's side cover and chassis screws: crwdns2935265:06crwdnd2935265:02crwdnd2935265:03crwdne2935265:0 Aiper Seagull Pro: Teardown, Other side's side cover and chassis screws: crwdns2935265:06crwdnd2935265:03crwdnd2935265:03crwdne2935265:0
    • Make sure to open the charging port cover, so that it doesn't stop you from remove the side cover.

    • Remove the side cover and the middle cog.

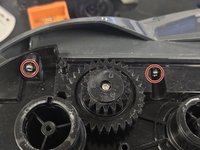
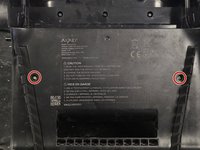
    • Remove the 2 screws holding the chassis together.

  7. Aiper Seagull Pro: Teardown, Brush assembly driver cog: crwdns2935265:07crwdnd2935265:01crwdnd2935265:03crwdne2935265:0 Aiper Seagull Pro: Teardown, Brush assembly driver cog: crwdns2935265:07crwdnd2935265:02crwdnd2935265:03crwdne2935265:0 Aiper Seagull Pro: Teardown, Brush assembly driver cog: crwdns2935265:07crwdnd2935265:03crwdnd2935265:03crwdne2935265:0
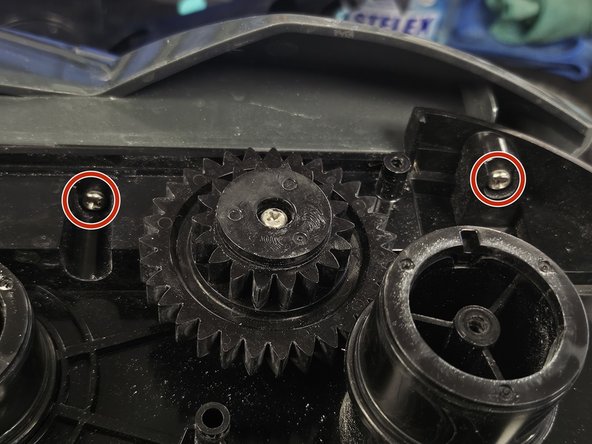
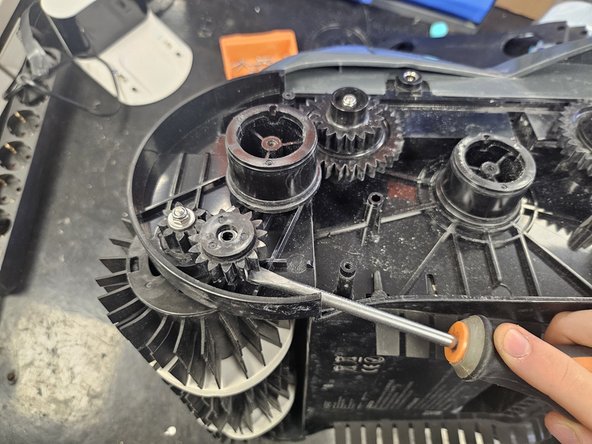
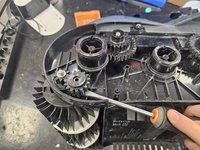
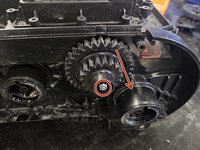
    • Remove the screw holding the side cog in place.

    • Use some leverage to remove the cog. It usually gets stuck in place due to limescale buildup.

    • Flip it on its back.

  8. Aiper Seagull Pro: Teardown, Brushes: crwdns2935265:08crwdnd2935265:01crwdnd2935265:03crwdne2935265:0 Aiper Seagull Pro: Teardown, Brushes: crwdns2935265:08crwdnd2935265:02crwdnd2935265:03crwdne2935265:0 Aiper Seagull Pro: Teardown, Brushes: crwdns2935265:08crwdnd2935265:03crwdnd2935265:03crwdne2935265:0
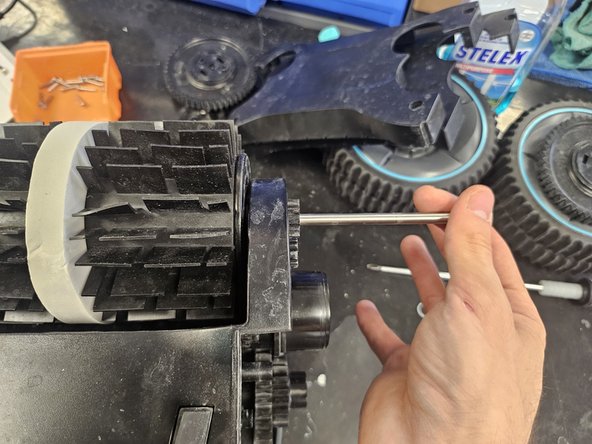
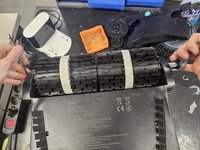
    • Use 2x 7mm wrenches to loosen the bolts on the rod going through the front brushes.

    • Remove the rod.

    • Do not lose the washers. One is on each side.

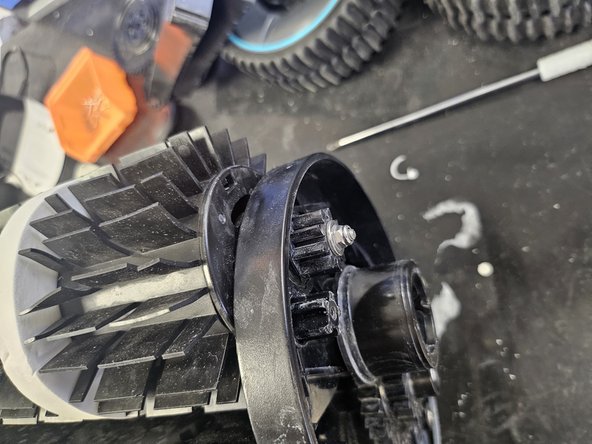
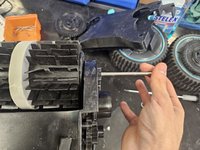
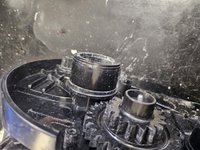
    • On the side that you removed the other cog, remove the now removable cog.

  9. Aiper Seagull Pro: Teardown, Chassis: crwdns2935265:09crwdnd2935265:01crwdnd2935265:03crwdne2935265:0 Aiper Seagull Pro: Teardown, Chassis: crwdns2935265:09crwdnd2935265:02crwdnd2935265:03crwdne2935265:0 Aiper Seagull Pro: Teardown, Chassis: crwdns2935265:09crwdnd2935265:03crwdnd2935265:03crwdne2935265:0
    • Remove the brushes by tilting them up on one side, then pulling them off.

    • If this is too difficult or the brushes are too tight due to wear, remove the 2 cogs on the other side and the brushes should just fall off.

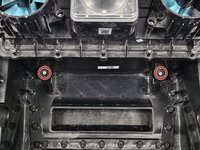
    • Remove the 2 screws that were covered by the brushes.

    • Remove the top half of the chassis.

  10. Aiper Seagull Pro: Teardown, Where's the feline assistant?: crwdns2935265:010crwdnd2935265:01crwdnd2935265:01crwdne2935265:0
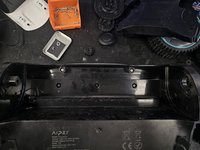
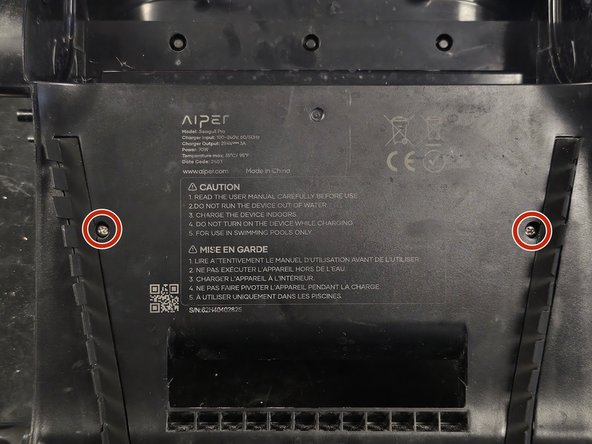
    • Under the box, of course.

  11. Aiper Seagull Pro: Teardown, Main motor cogs: crwdns2935265:011crwdnd2935265:01crwdnd2935265:03crwdne2935265:0 Aiper Seagull Pro: Teardown, Main motor cogs: crwdns2935265:011crwdnd2935265:02crwdnd2935265:03crwdne2935265:0 Aiper Seagull Pro: Teardown, Main motor cogs: crwdns2935265:011crwdnd2935265:03crwdnd2935265:03crwdne2935265:0
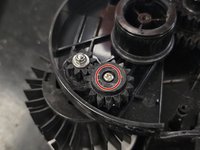
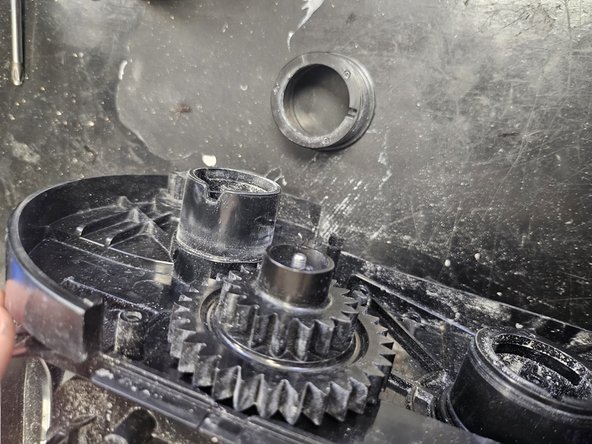
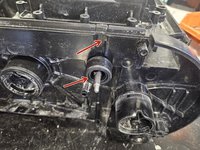
    • Use a 7mm wrench (or other tool) to remove this nut from the cog.

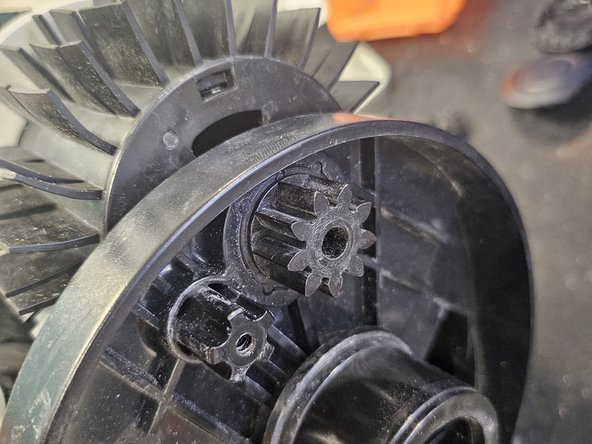
    • Then remove the plastic circle thing, as it covers it and prevents you from removing the cog.

    • Then remove the cog.

  12. Aiper Seagull Pro: Teardown, Plastic covers: crwdns2935265:012crwdnd2935265:01crwdnd2935265:02crwdne2935265:0 Aiper Seagull Pro: Teardown, Plastic covers: crwdns2935265:012crwdnd2935265:02crwdnd2935265:02crwdne2935265:0
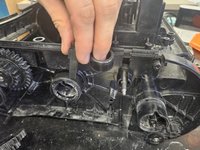
    • Remove the plastic circle and tab.

    • The tab may be a bit stuck. I usually help myself with some pliers.

    • Repeat this and the previous step on the other side as well.

  13. Aiper Seagull Pro: Teardown, Final chassis screws: crwdns2935265:013crwdnd2935265:01crwdnd2935265:03crwdne2935265:0 Aiper Seagull Pro: Teardown, Final chassis screws: crwdns2935265:013crwdnd2935265:02crwdnd2935265:03crwdne2935265:0 Aiper Seagull Pro: Teardown, Final chassis screws: crwdns2935265:013crwdnd2935265:03crwdnd2935265:03crwdne2935265:0
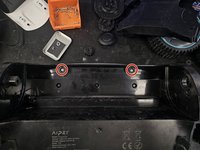
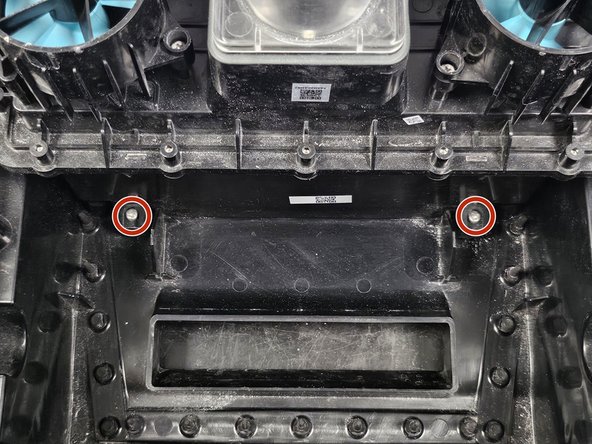
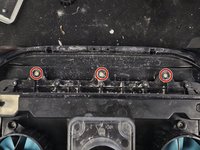
    • Remove all of the marked screws.

  14. Aiper Seagull Pro: Teardown, Remove the assembly: crwdns2935265:014crwdnd2935265:01crwdnd2935265:03crwdne2935265:0 Aiper Seagull Pro: Teardown, Remove the assembly: crwdns2935265:014crwdnd2935265:02crwdnd2935265:03crwdne2935265:0 Aiper Seagull Pro: Teardown, Remove the assembly: crwdns2935265:014crwdnd2935265:03crwdnd2935265:03crwdne2935265:0
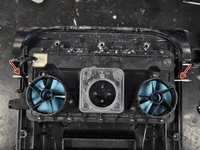
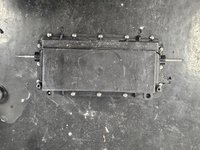
    • Pull on the 2 rods to remove the assembly from the chassis.

    • If the assembly is stuck to the chassis, use some frontal or side leverage to get it free.

    • It can get stuck due to limescale, dirt, sand buildup. And it can stick like glue.

  15. Aiper Seagull Pro: Teardown, Voila!: crwdns2935265:015crwdnd2935265:01crwdnd2935265:02crwdne2935265:0 Aiper Seagull Pro: Teardown, Voila!: crwdns2935265:015crwdnd2935265:02crwdnd2935265:02crwdne2935265:0
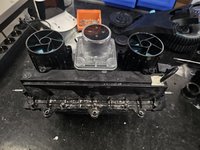
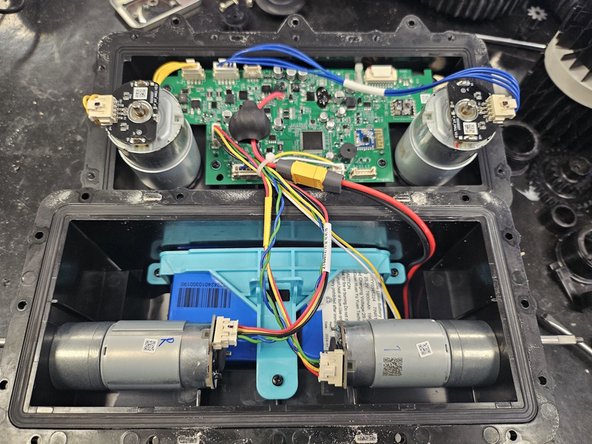
    • Unscrew all of the screws in the assembly, and voila!

    • It's open.

    Thank you sir !

    My unit no longer charging, most likely due to corrosion on the plug. Thanks for taking the time to do this. Good to see that battery is easily replaceable RC type

    Paul Gordon - crwdns2934203:0crwdne2934203:0

    So the battery is replaceable?

    Oscar Ortiz -

DegenFixer

crwdns2935283:009/18/24crwdne2935283:0

4,649 crwdns2915208:0crwdne2915208:0

crwdns2935297:024crwdne2935297:0

crwdns2947410:01crwdne2947410:0

Hi very good instructions- but i timed all screws as directed but cannnot pull off the main cover - using flat screw driver to separate top from body but plastic is breaking in pieces - any suggestion pls? thnks , Norman from Canada

Norman - crwdns2934203:0crwdne2934203:0

crwdns2917038:0crwdne2917038:0

crwdns2936625:0crwdne2936625:0:

crwdns2936751:024crwdne2936751:0 13

crwdns2936753:07crwdne2936753:0 88

crwdns2936753:030crwdne2936753:0 308

crwdns2942667:0crwdne2942667:0 1,143