iPod Touch 3rd Generation, Battery Replacement Experience
Lou1492 -


crwdns2853023:0crwdne2853023:0
The original battery would no longer hold a charge.
crwdns2853024:0crwdne2853024:0
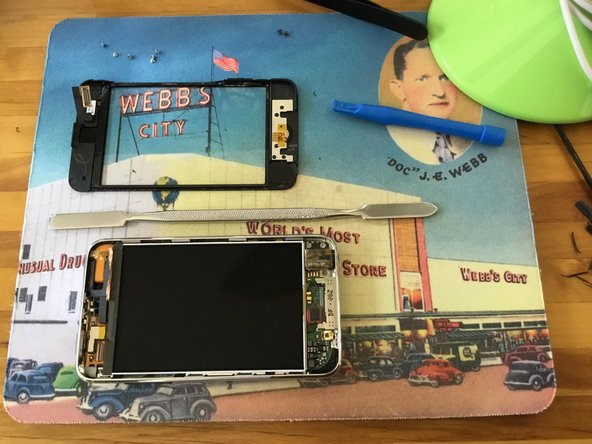
The most difficult part was removing the outer front glass. Luckily, I had purchased a small electronics repair kit awhile back and it had a plastic prying tool in it. The one provided with the battery replacement kit from iFixit was quickly mangled. Eventually I managed to pry the screen off, but damaged the rubber seal around the screen and the plastic outer frame. Surprisingly, everything still went back together fine, although there is a slight gap around the front glass now, but it's not terribly bad.
crwdns2853025:0crwdne2853025:0
The iFixit guide for this procedure is actually pretty spot on. Certainly be extra careful when soldering the ribbon cable from the new battery. I used a small, low wattage (Weller BP865MP) battery operated soldering iron and it saved me from melting anything. My first attempt, one of the contacts came loose as I was fitting the battery back in, so I had to re-solder it. Definitely use some electrical tape to hold the ribbon cable down while soldering. I also used scissors to cut the old ribbon cable from the old battery, before I unsoldered and removed it. I had read that suggestion from another story here and it helped to prevent shorting anything out, in case the old battery had a residual charge.
crwdns2947414:01crwdne2947414:0
Congrats on your repair
gillrios - crwdns2934203:0crwdne2934203:0