crwdns2933423:0crwdne2933423:0

Remplacement du LCD du Lenovo Yoga Tab 3 8

crwdns2936315:0crwdne2936315:0
crwdns2936317:0crwdne2936317:0
crwdns2931653:02crwdne2931653:0
Lenovo Yoga Tab 3 8 LCD Replacement: crwdns2935265:00crwdnd2935265:01crwdnd2935265:03crwdne2935265:0 Lenovo Yoga Tab 3 8 LCD Replacement: crwdns2935265:00crwdnd2935265:02crwdnd2935265:03crwdne2935265:0 Lenovo Yoga Tab 3 8 LCD Replacement: crwdns2935265:00crwdnd2935265:03crwdnd2935265:03crwdne2935265:0
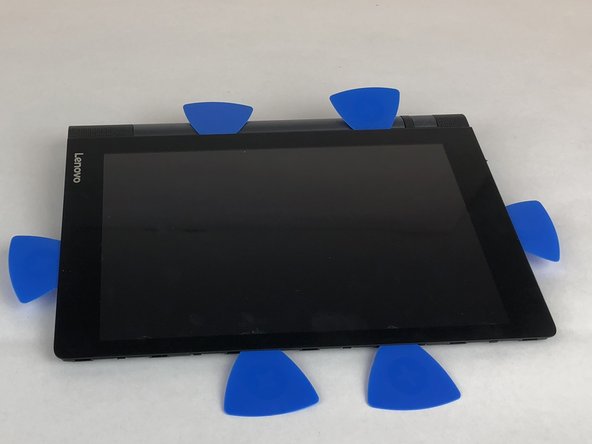
  • Heat the iOpener and lay it flat along an edge of the LCD for 2-5 minutes to loosen the screen adhesive.

  • Insert a plastic opening tool under the LCD and gently pry it away from the adhesive. Place opening picks as you go along all four edges to keep the adhesive from sticking again.

  • Do not insert the opening picks too far or it might damage the LCD

  • Do not force the LCD while prying or it may shatter. Reheat and reapply your iOpener if the adhesive does not separate easily.

Chauffez l'iOpener et posez-le à plat le long d'un bord de l'écran LCD pendant 2 à 5 minutes afin de détacher la colle pour écran.

Insérez un outil d’ouverture en plastique sous l’écran LCD et dégagez-le doucement de l’adhésif. Placez les pointes d’ouverture au fur et à mesure que vous avancez sur les quatre bords pour empêcher l’adhésif de coller à nouveau.

N'insérez pas les crochets d'ouverture trop loin sinon cela pourrait endommager l'écran LCD

Ne forcez pas l'écran LCD pendant que vous soulevez, sinon il pourrait se briser. Réchauffez et réappliquez votre iOpener si l'adhésif ne se sépare pas facilement.

crwdns2944171:0crwdnd2944171:0crwdnd2944171:0crwdnd2944171:0crwdne2944171:0