crwdns2935425:01crwdne2935425:0
crwdns2931653:01crwdne2931653:0


-
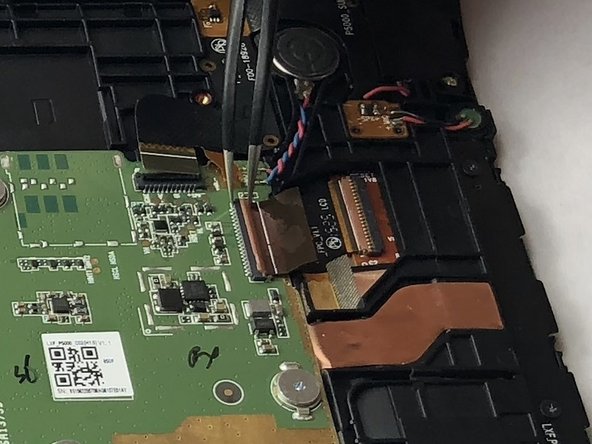
With the device oriented screen side down and hinge opposite of you, locate the LCD connection on the motherboard. It is the small copper and white connector to the left of the kickstand lock. Disengage the lock on the connector by flipping it up with a pair of tweezers. Use the tweezers to then pull the wire out of the connector.
-
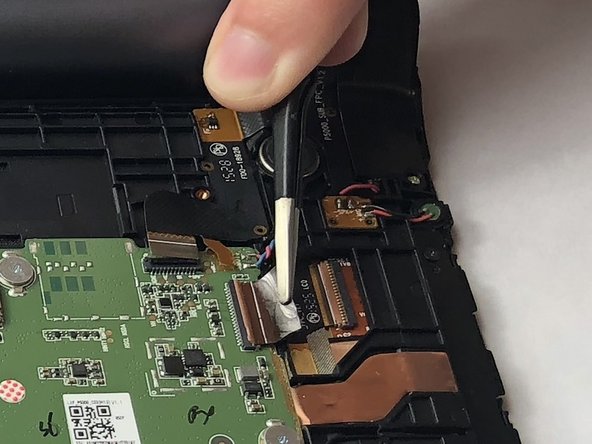
On the right edge of the motherboard, locate the large brown and black LCD connection. Disengage the lock and pull the wire out of the connector with the tweezers.
| - | [* black] With the device oriented screen side down and hinge opposite of you, locate the LCD connection on the motherboard. It is the small copper and white connector to the left of the kickstand lock. Disengage the lock on the connector by flipping it up with a pair of tweezers. Use the tweezers to then pull the wire out of the connector. |
|---|---|
| + | [* black] With the device oriented screen side down and hinge opposite of you, locate the LCD connection on the motherboard. It is the small copper and white connector to the left of the kickstand lock. Disengage the lock on the connector by flipping it up with a pair of [product|IF145-020|tweezers]. Use the tweezers to then pull the wire out of the connector. |
| [* black] On the right edge of the motherboard, locate the large brown and black LCD connection. Disengage the lock and pull the wire out of the connector with the tweezers. |
crwdns2944171:0crwdnd2944171:0crwdnd2944171:0crwdnd2944171:0crwdne2944171:0