crwdns2933423:0crwdne2933423:0

Motorola Moto G5 Plus Vervanging van de schermmodule

crwdns2931529:0crwdnd2931529:0crwdnd2931529:0crwdnd2931529:05crwdnd2931529:0crwdne2931529:0

crwdns2936315:0crwdne2936315:0
crwdns2936313:0crwdne2936313:0
crwdns2931653:03crwdne2931653:0
Motorola Moto G5 Plus Display Assembly Replacement: crwdns2935265:00crwdnd2935265:01crwdnd2935265:03crwdne2935265:0 Motorola Moto G5 Plus Display Assembly Replacement: crwdns2935265:00crwdnd2935265:02crwdnd2935265:03crwdne2935265:0 Motorola Moto G5 Plus Display Assembly Replacement: crwdns2935265:00crwdnd2935265:03crwdnd2935265:03crwdne2935265:0
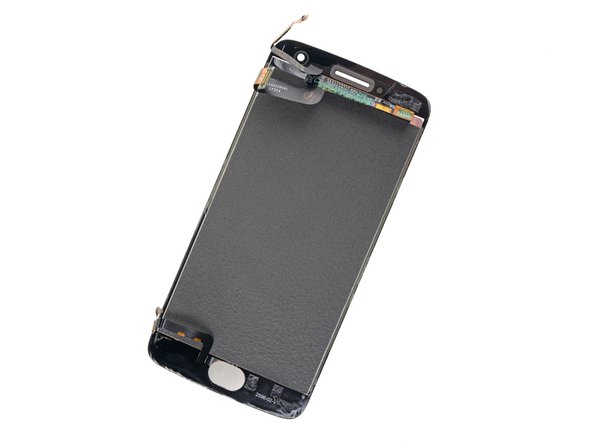
  • In the following steps you will be cutting through the adhesive around the edge of the display assembly.

  • Refer to the second and third images and familiarize yourself with the width of the adhesive around edges of the display.

  • If you plan to re-use the display assembly, be particularly careful as you cut the adhesive on the sides of the phone. Don't insert your tool more than 2 mm into the phone, and angle it down (away from the display assembly) as much as possible.

In de volgende stappen zul je de lijm langs de gehele buitenkant van de schermmodule door gaan snijden.

Neem je tijd om goed naar de tweede en de derde afbeelding te kijken om jezelf vertrouwd te maken met de breedte van de lijm aan de buitenkant van het scherm.

Als je van plan bent het scherm te hergebruiken, zul je extra voorzichtig moeten zijn bij het doorsnijden van de lijm aan de twee zijkanten van de telefoon. Steek je tool niet verder dan 2 mm in je toestel en zorg dat je de punt zo ver mogelijk naar beneden (weg van de schermmodule) in het toestel steekt.

crwdns2944171:0crwdnd2944171:0crwdnd2944171:0crwdnd2944171:0crwdne2944171:0