crwdns2933423:0crwdne2933423:0

iPod Touch 4. Generation Logic Board Einheit austauschen

crwdns2931529:0crwdnd2931529:0crwdnd2931529:0crwdnd2931529:02crwdnd2931529:0crwdne2931529:0

crwdns2936315:0crwdne2936315:0
crwdns2936319:0crwdne2936319:0
crwdns2931653:02crwdne2931653:0
iPod Touch 4th Generation Logic Board Assembly Replacement: crwdns2935265:00crwdnd2935265:01crwdnd2935265:03crwdne2935265:0 iPod Touch 4th Generation Logic Board Assembly Replacement: crwdns2935265:00crwdnd2935265:02crwdnd2935265:03crwdne2935265:0 iPod Touch 4th Generation Logic Board Assembly Replacement: crwdns2935265:00crwdnd2935265:03crwdnd2935265:03crwdne2935265:0
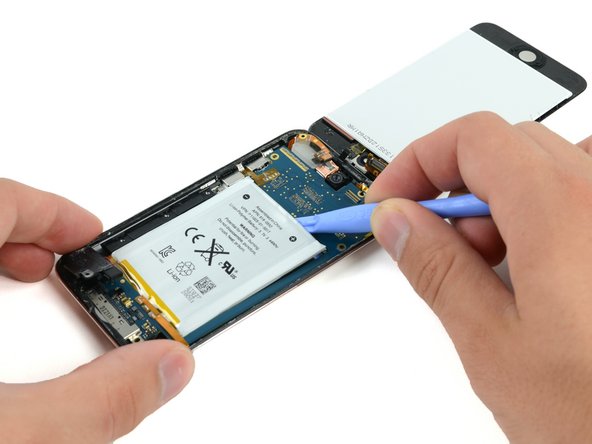
  • In the next few steps, you will loosen the adhesive from underneath the battery, the logic board, and the frame under the battery. Do this slowly, carefully, and evenly. Take care not to puncture the battery or bend the logic board.

  • Use a plastic opening tool to pry up the adhesive around the three exposed edges of the battery.

  • Do not try to pry the battery out, just start loosening the adhesive.

In den nächsten Schritten wirst du den Kleber unter dem Akku, dem Logic Board und dem Rahmen unter dem Akku lösen. Arbeite langsam, sorgfältig und gleichmäßig. Achte darauf, dass du weder den Akku beschädigst noch das Logic Board verbiegst.

Heble den Kleber an den drei offen liegenden Kanten des Akkus mit einem Plastiköffnungswerkzeug hoch.

Hebe den Akku noch nicht heraus, fange nur damit an, den Kleber zu lösen.

crwdns2944171:0crwdnd2944171:0crwdnd2944171:0crwdnd2944171:0crwdne2944171:0