crwdns2933423:0crwdne2933423:0

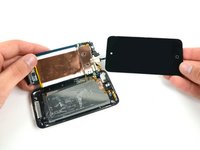
iPod Touch 4th Generation Logic Board Assembly Replacement

crwdns2862623:0crwdne2862623:0
crwdns2942641:0crwdne2942641:0

crwdns2942213:0crwdne2942213:0

  1. iPod Touch 4th Generation Logic Board Assembly Replacement, Logic Board Assembly: crwdns2935265:01crwdnd2935265:01crwdnd2935265:03crwdne2935265:0 iPod Touch 4th Generation Logic Board Assembly Replacement, Logic Board Assembly: crwdns2935265:01crwdnd2935265:02crwdnd2935265:03crwdne2935265:0 iPod Touch 4th Generation Logic Board Assembly Replacement, Logic Board Assembly: crwdns2935265:01crwdnd2935265:03crwdnd2935265:03crwdne2935265:0
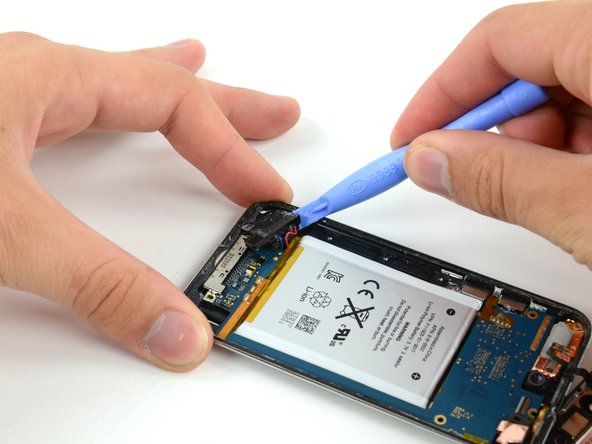
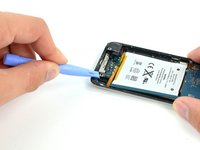
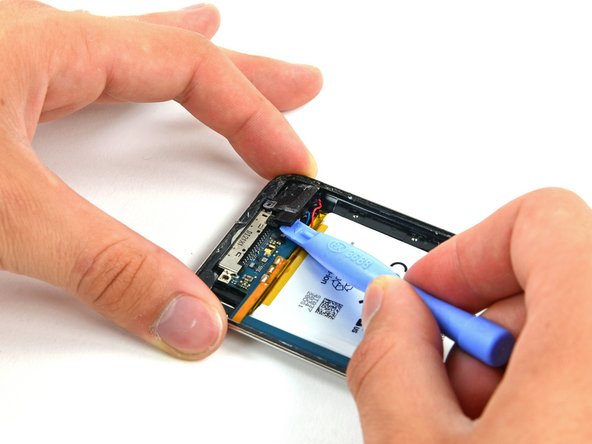
    • With a plastic opening tool, gently pry the iPod's speaker out of its recess in the outer case.

    • Do not try to completely remove the speaker. It is still soldered to the underside of the logic board.

    • Allow the speaker to rest above the battery so that you can proceed with battery installation.

  2. iPod Touch 4th Generation Logic Board Assembly Replacement: crwdns2935265:02crwdnd2935265:01crwdnd2935265:03crwdne2935265:0 iPod Touch 4th Generation Logic Board Assembly Replacement: crwdns2935265:02crwdnd2935265:02crwdnd2935265:03crwdne2935265:0 iPod Touch 4th Generation Logic Board Assembly Replacement: crwdns2935265:02crwdnd2935265:03crwdnd2935265:03crwdne2935265:0
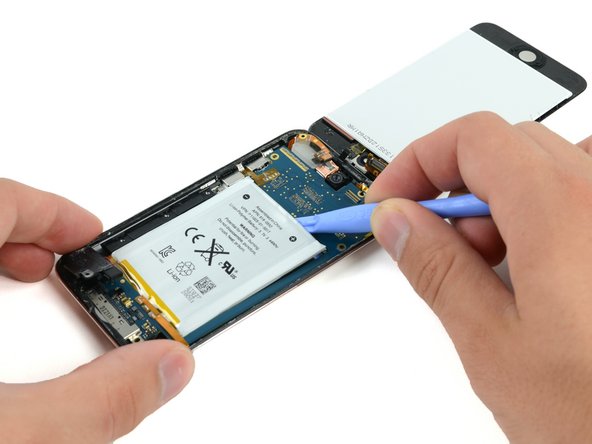
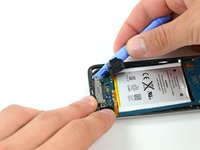
    • In the next few steps, you will loosen the adhesive from underneath the battery, the logic board, and the frame under the battery. Do this slowly, carefully, and evenly. Take care not to puncture the battery or bend the logic board.

    • Use a plastic opening tool to pry up the adhesive around the three exposed edges of the battery.

    • Do not try to pry the battery out, just start loosening the adhesive.

  3. iPod Touch 4th Generation Logic Board Assembly Replacement: crwdns2935265:03crwdnd2935265:01crwdnd2935265:02crwdne2935265:0 iPod Touch 4th Generation Logic Board Assembly Replacement: crwdns2935265:03crwdnd2935265:02crwdnd2935265:02crwdne2935265:0
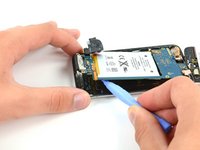
    • After the edges of the battery are loosened, begin prying up the edge of the logic board. Start at the top and work your way down the side of the board.

    • To prevent bending/breaking the logic board, do not try to remove the logic board, yet. The dock connector is still embedded in the frame. Again, you are only trying to loosen more of the adhesive.

  4. iPod Touch 4th Generation Logic Board Assembly Replacement: crwdns2935265:04crwdnd2935265:01crwdnd2935265:02crwdne2935265:0 iPod Touch 4th Generation Logic Board Assembly Replacement: crwdns2935265:04crwdnd2935265:02crwdnd2935265:02crwdne2935265:0
    • With a plastic opening tool, carefully push the dock connector out of its outer case recess. Work each corner evenly until the connector comes free.

    • Since the dock connector is attached to the logic board, pushing it out of the case may cause the logic board to begin to flex. Take extra care not to permanently warp the board.

  5. iPod Touch 4th Generation Logic Board Assembly Replacement: crwdns2935265:05crwdnd2935265:01crwdnd2935265:03crwdne2935265:0 iPod Touch 4th Generation Logic Board Assembly Replacement: crwdns2935265:05crwdnd2935265:02crwdnd2935265:03crwdne2935265:0 iPod Touch 4th Generation Logic Board Assembly Replacement: crwdns2935265:05crwdnd2935265:03crwdnd2935265:03crwdne2935265:0
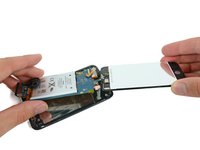
    • Once all of the adhesive is freed from under the logic board/battery assembly, lift the assembly up from the side and carefully rotate it over to access the underside of the battery.

    • The logic board is still attached to the rear case. Do not try to completely separate the assembly, or you will rip this ribbon cable.

crwdns2915888:0crwdne2915888:0

To reassemble your device, follow these instructions in reverse order.
Jake Devincenzi

crwdns2935283:004/18/11crwdne2935283:0

117,225 crwdns2915208:0crwdne2915208:0

crwdns2935297:057crwdne2935297:0

crwdns2944067:00crwdne2944067:0

crwdns2917038:0crwdne2917038:0

crwdns2936625:0crwdne2936625:0:

crwdns2936751:024crwdne2936751:0 0

crwdns2936753:07crwdne2936753:0 0

crwdns2936753:030crwdne2936753:0 0

crwdns2942667:0crwdne2942667:0 144