crwdns2933423:0crwdne2933423:0

iPod Touch 4. Generation Akku austauschen

crwdns2936315:0crwdne2936315:0
crwdns2936319:0crwdne2936319:0
crwdns2931653:08crwdne2931653:0
iPod Touch 4th Generation Battery Replacement: crwdns2935265:00crwdnd2935265:01crwdnd2935265:03crwdne2935265:0 iPod Touch 4th Generation Battery Replacement: crwdns2935265:00crwdnd2935265:02crwdnd2935265:03crwdne2935265:0 iPod Touch 4th Generation Battery Replacement: crwdns2935265:00crwdnd2935265:03crwdnd2935265:03crwdne2935265:0
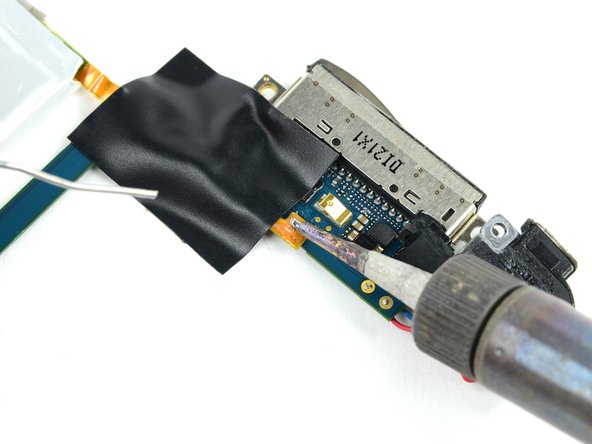
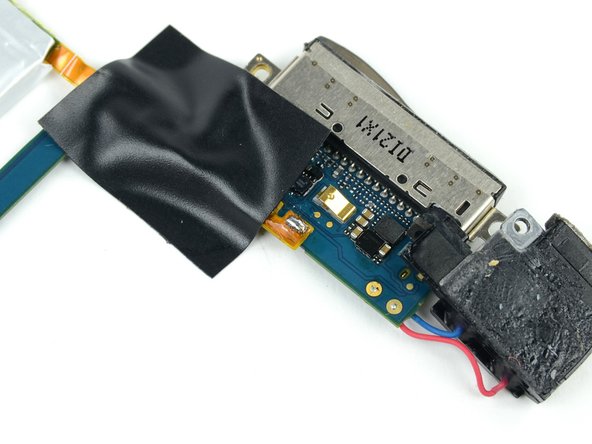
  • Place the new battery in place and align the far contact with the outer solder pad. Use a small strip of electrical tape to hold the cable against the solder pads.

  • Installing the battery upside down (with the cable facing up) will destroy the logic board.

  • Place the strip of tape over the end of the battery ribbon cable to cover two of the solder pads and hold the contacts down against the logic board.

  • Heat the rightmost contact until the solder below melts, then apply a small amount of solder to the contact, allowing it to flow through the two holes in the cable and down to the logic board.

  • Do not apply too much solder. The amount required for a proper bond is miniscule.

  • As soon as the solder has flowed into the joint, remove both the solder and the iron.

Lege den neuen Akku an die richtige Stelle und richte den äußersten Kontakte mit der äußeren Lötstelle aus. Klebe das Kabel mit einem kleinen Streifen Isolierband so fest, dass das Kabel auf den Lötstellen gehalten wird.

Wenn du den Akku mit der Unterseite nach oben einbaust, ( dann zeigt das Kabel nach oben) wird das Logic Board zerstört.

Klebe das Isolierband über das Ende des Flachbandkabels zum Akku, so dass zwei der Lötstellen bedeckt sind und die Kontakte am Logic Board festgehalten werden.

Erwärme den Kontakt ganz rechts, bis das Lötzinn darunter schmilzt, bringe dann etwas Lötzinn am Kontakt an, so dass es durch die beiden Löcher im Kabel zum Logic Board durchfließt.

Bringe nicht zu viel Lötzinn an. Eine winzige Menge ist völlig ausreichend für eine gute Verbindung.

Wenn das Lötzinn die Verbindung hergestellt hat, musst du sofort den Lötkolben und den Lötdraht entfernen.

crwdns2944171:0crwdnd2944171:0crwdnd2944171:0crwdnd2944171:0crwdne2944171:0