crwdns2935425:03crwdne2935425:0
crwdns2931653:03crwdne2931653:0


-
Slip the three cables out of the sockets.
-
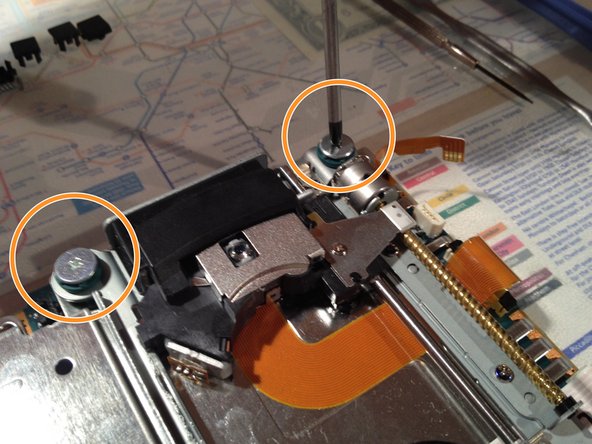
Use a PH01 screwdriver to remove the four screws securing the optical drive
-
Lift up the optical drive and remove the duct tape under the flex cable.
| - | [* |
|---|---|
| + | [* red] Slip the three cables out of the sockets. |
| [* orange] Use a PH01 screwdriver to remove the four screws securing the optical drive | |
| - | [* |
| + | [* green] Lift up the optical drive and remove the duct tape under the flex cable. |
| [* icon_note] Now the optical drive is free and ready for replacement |
crwdns2944171:0crwdnd2944171:0crwdnd2944171:0crwdnd2944171:0crwdne2944171:0