crwdns2935425:04crwdne2935425:0
crwdns2931653:04crwdne2931653:0


-
Gently disconnect the three ribbon cables.
-
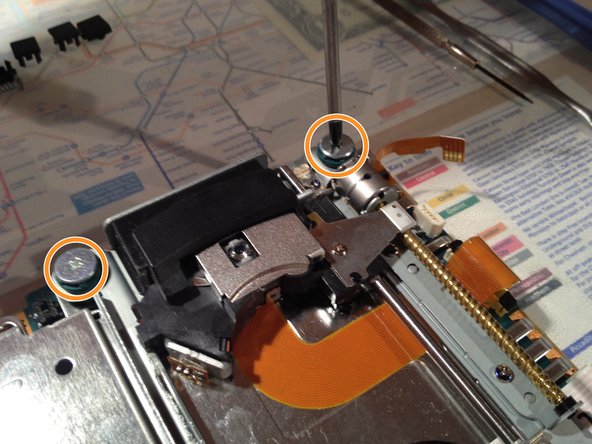
Take a Phillips #1 screwdriver and remove the four screws on the optical drive.
-
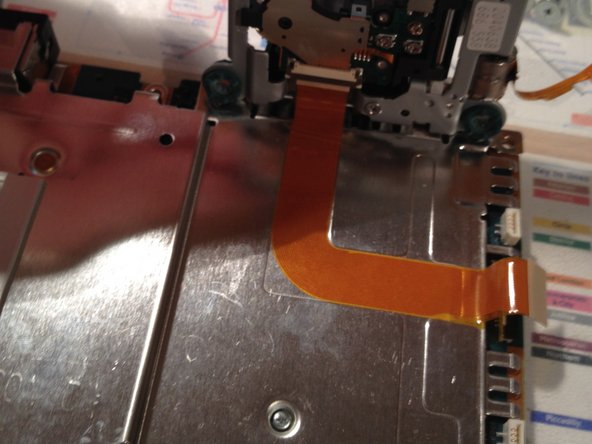
Pull up the optical drive and carefully peel the flex cable, attached underneath the drive, from the metal plate.
| - | [* |
|---|---|
| - | [* |
| - | [* |
| - | [* |
| + | [* red] Gently disconnect the three ribbon cables. |
| + | [* orange] Take a Phillips #1 screwdriver and remove the four screws on the optical drive. |
| + | [* icon_note] Two of the screws can't be seen on the picture, they are located on the opisite side from the visable ones. |
| + | [* black] Pull up the optical drive and carefully peel the flex cable, attached underneath the drive, from the metal plate. |
crwdns2944171:0crwdnd2944171:0crwdnd2944171:0crwdnd2944171:0crwdne2944171:0