crwdns2933423:0crwdne2933423:0

Nintendo GameCube Laseroptik kalibrieren

crwdns2936315:0crwdne2936315:0
crwdns2936319:0crwdne2936319:0
crwdns2931653:07crwdne2931653:0
Nintendo GameCube Lens Recalibration, Removing the optical drive: crwdns2935265:00crwdnd2935265:01crwdnd2935265:03crwdne2935265:0 Nintendo GameCube Lens Recalibration, Removing the optical drive: crwdns2935265:00crwdnd2935265:02crwdnd2935265:03crwdne2935265:0 Nintendo GameCube Lens Recalibration, Removing the optical drive: crwdns2935265:00crwdnd2935265:03crwdnd2935265:03crwdne2935265:0
Removing the optical drive
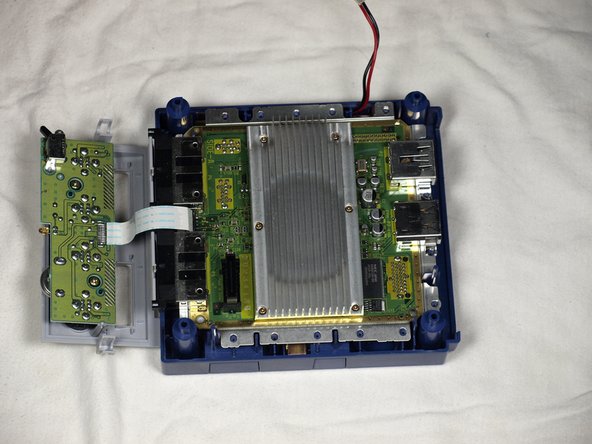
  • Carefully remove the optical drive unit.

  • The optical drive unit is connected to the main motherboard via a slot, located at the front right of the unit, so some force will be needed when removing the unit.

  • Carefully place the rest of the Gamecube unit aside and focus on the optical drive. Refer to picture 3.

Entferne vorsichtig das optische Laufwerk.

Das optische Laufwerk ist vorne rechts an der Hauptplatine angeschlossen. Du benötigst etwas Kraft, um es herauszuziehen.

Lege den restlichen GameCube vorsichtig zur Seite und arbeite am optischen Laufwerk weiter. (Bild 3)

crwdns2944171:0crwdnd2944171:0crwdnd2944171:0crwdnd2944171:0crwdne2944171:0