crwdns2933423:0crwdne2933423:0

Nintendo GameCube Lens Recalibration

crwdns2936315:0crwdne2936315:0
crwdns2936325:0crwdne2936325:0
crwdns2931653:05crwdne2931653:0
Nintendo GameCube Lens Recalibration, Removing the optical drive main screws: crwdns2935265:00crwdnd2935265:01crwdnd2935265:03crwdne2935265:0 Nintendo GameCube Lens Recalibration, Removing the optical drive main screws: crwdns2935265:00crwdnd2935265:02crwdnd2935265:03crwdne2935265:0 Nintendo GameCube Lens Recalibration, Removing the optical drive main screws: crwdns2935265:00crwdnd2935265:03crwdnd2935265:03crwdne2935265:0
Removing the optical drive main screws
  • Locate and remove the twelve (12) Phillips #2 screws around the outside of the metal chassis located underneath the optical drive.

  • Three (3) of the twelve (12) screws are located underneath the cooling fan housing

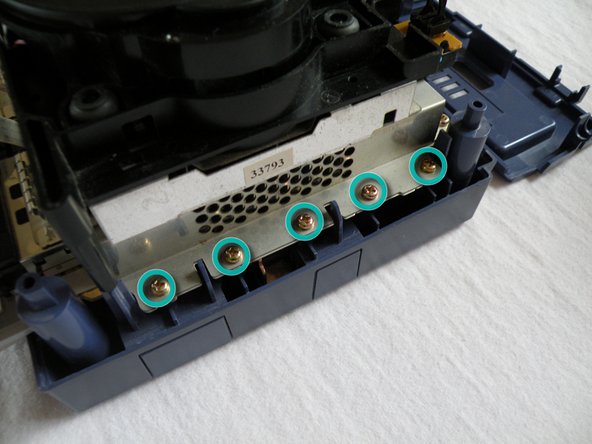
  • Five (5) of the twelve (12) screws are located to the right of the optical drive unit. Refer to picture 2.

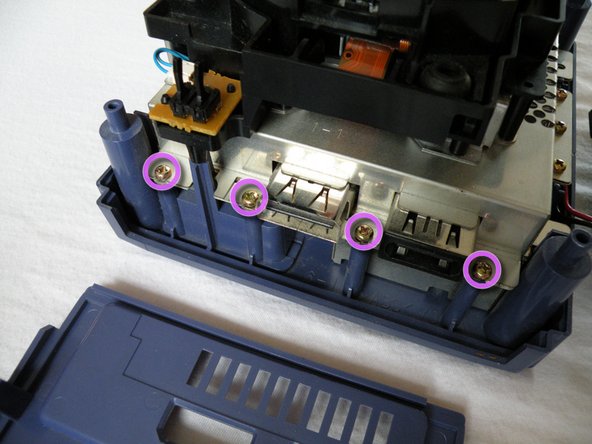
  • Four (4) of the twelve (12) screws are located to the rear of the unit, shown in picture 3.

crwdns2935429:0crwdne2935429:0

crwdns2935429:0crwdne2935429:0

crwdns2935429:0crwdne2935429:0

crwdns2935429:0crwdne2935429:0

crwdns2944171:0crwdnd2944171:0crwdnd2944171:0crwdnd2944171:0crwdne2944171:0