crwdns2933423:0crwdne2933423:0

Nintendo GameCube Laseroptik kalibrieren

crwdns2936315:0crwdne2936315:0
crwdns2936319:0crwdne2936319:0
crwdns2931653:05crwdne2931653:0
Nintendo GameCube Lens Recalibration, Removing the optical drive main screws: crwdns2935265:00crwdnd2935265:01crwdnd2935265:03crwdne2935265:0 Nintendo GameCube Lens Recalibration, Removing the optical drive main screws: crwdns2935265:00crwdnd2935265:02crwdnd2935265:03crwdne2935265:0 Nintendo GameCube Lens Recalibration, Removing the optical drive main screws: crwdns2935265:00crwdnd2935265:03crwdnd2935265:03crwdne2935265:0
Removing the optical drive main screws
  • Locate and remove the twelve (12) Phillips #2 screws around the outside of the metal chassis located underneath the optical drive.

  • Three (3) of the twelve (12) screws are located underneath the cooling fan housing

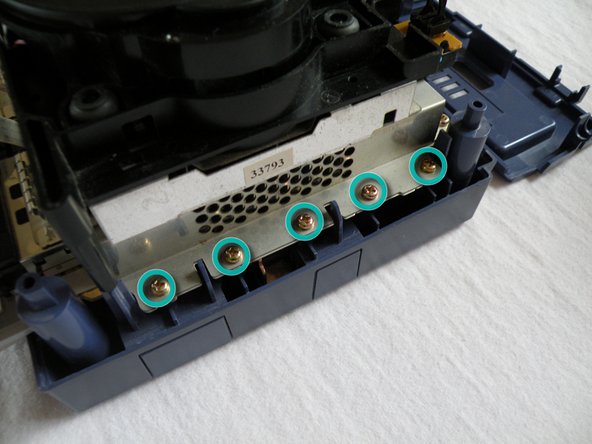
  • Five (5) of the twelve (12) screws are located to the right of the optical drive unit. Refer to picture 2.

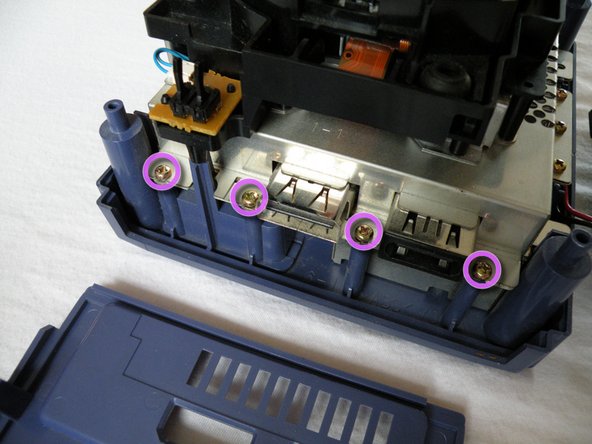
  • Four (4) of the twelve (12) screws are located to the rear of the unit, shown in picture 3.

Unter dem optischen Laufwerk befindet sich ein Metallkäfig. Er ist an der Außenseite mit zwölf Kreuzschlitzschrauben #2 befestigt, die du entfernen musst:

Drei Schrauben sind unter dem Lüftergehäuse

Fünf Schrauben sind rechts vom optischen Laufwerk (Bild 2)

Vier Schrauben sind auf der Rückseite des optischen Laufwerks (Bild 3)

crwdns2944171:0crwdnd2944171:0crwdnd2944171:0crwdnd2944171:0crwdne2944171:0