crwdns2933423:0crwdne2933423:0

Sostituzione gruppo schermo LCD e digitizer Moto G4 Plus

crwdns2936315:0crwdne2936315:0
crwdns2936321:0crwdne2936321:0
crwdns2931653:08crwdne2931653:0
Motorola Moto G4 Plus LCD Screen and Digitizer Assembly Replacement: crwdns2935265:00crwdnd2935265:01crwdnd2935265:03crwdne2935265:0 Motorola Moto G4 Plus LCD Screen and Digitizer Assembly Replacement: crwdns2935265:00crwdnd2935265:02crwdnd2935265:03crwdne2935265:0 Motorola Moto G4 Plus LCD Screen and Digitizer Assembly Replacement: crwdns2935265:00crwdnd2935265:03crwdnd2935265:03crwdne2935265:0
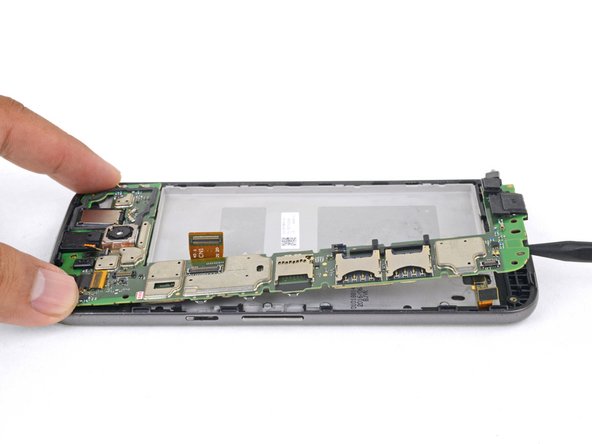
  • Insert the point of a spudger into a groove at the bottom of the motherboard.

  • Gently pry up to loosen the motherboard from the frame and from the edge clips.

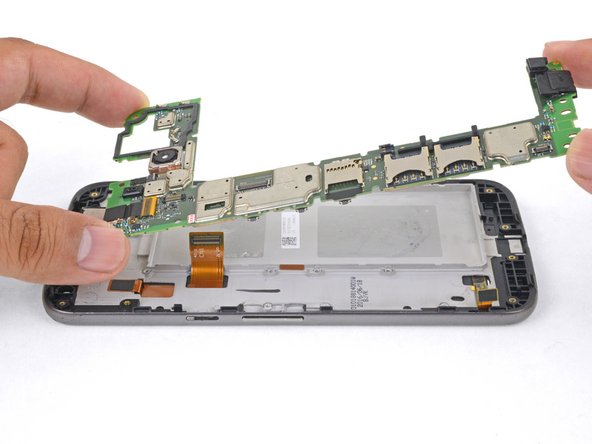
  • Use a spudger to move any flex cables out of the way, as well as making sure that any modules attached to the motherboard (such as the front-facing camera) are loose from the frame.

  • If you feel any resistance, stop. Make sure there are no components still holding the frame to the motherboard.

  • Lift the motherboard up from the frame and remove it.

Inserisci la punta di uno spudger nell'incavo della parte inferiore della scheda madre.

Fai leva con attenzione per liberare la scheda madre dalla scocca e dalle clip sui bordi.

Usa uno spudger per spostare i cavi flessibili che potrebbero dare fastidio; accertati che tutti i moduli attaccati alla scheda madre (come la fotocamera anteriore) non siano in alcun modo ancorati alla scocca.

Se avverti della resistenza, fermati. Accertati che non si alcun componente che tiene collegata la scheda madre alla scocca.

Solleva dalla scocca la scheda madre e rimuovila.

crwdns2944171:0crwdnd2944171:0crwdnd2944171:0crwdnd2944171:0crwdne2944171:0