crwdns2935425:05crwdne2935425:0
crwdns2931653:05crwdne2931653:0


-
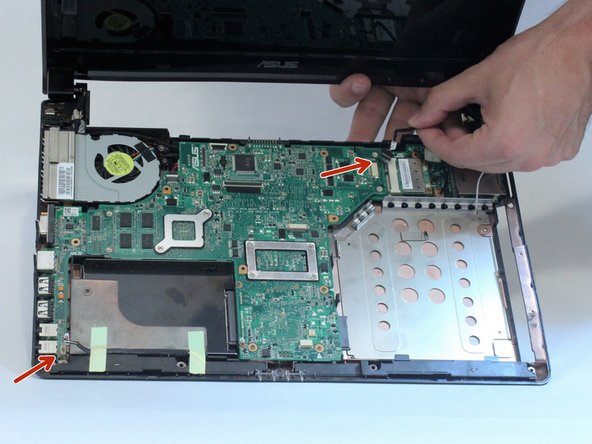
After you remove the front cover, the motherboard should be exposed, along with the two port boards.
-
Remove the seven, 3 mm screws holding the motherboard and ports into the frame of the laptop, as well as the two wire bundles indicated by red arrows.
-
You can now lift the motherboard out of the frame while simultaneously disconnecting the wires on the underside.
crwdns2944171:0crwdnd2944171:0crwdnd2944171:0crwdnd2944171:0crwdne2944171:0