crwdns2935425:02crwdne2935425:0
crwdns2931653:02crwdne2931653:0


-
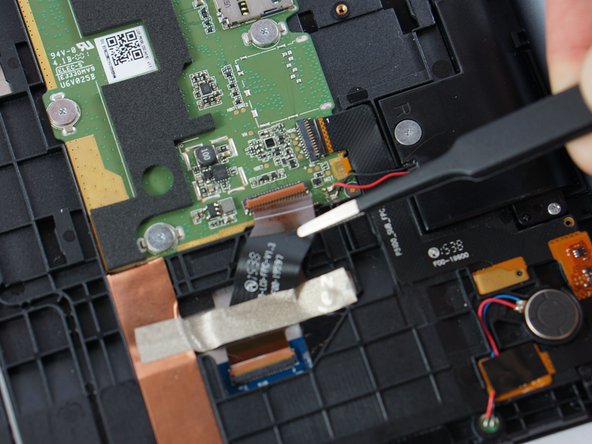
With tweezers, lift the locking flaps and detach the connected ribbon cables for both the LCD and digitizer (blue bordered areas in previous step photo)
-
Using a spudger lift the gold- colored base up away from the adhesive.
| - | [* black] Before detaching the LCD and digitiser connectors. Remove the two small screws at the top left. Remove the shield and disconnect the battery connector |
|---|---|
| - | [* black] With tweezers, detach the connected ribbon cables for both the LCD and digitizer. |
| + | [* black] With [product|IF145-020|tweezers], lift the locking flaps and detach the connected ribbon cables for both the LCD and digitizer (blue bordered areas in previous step photo) |
| [* black] Using a spudger lift the gold- colored base up away from the adhesive. | |
| [* icon_note] This particularly ribbon connection will likely be difficult to detach from the casing. Proceed with patience and caution during removal process. | |
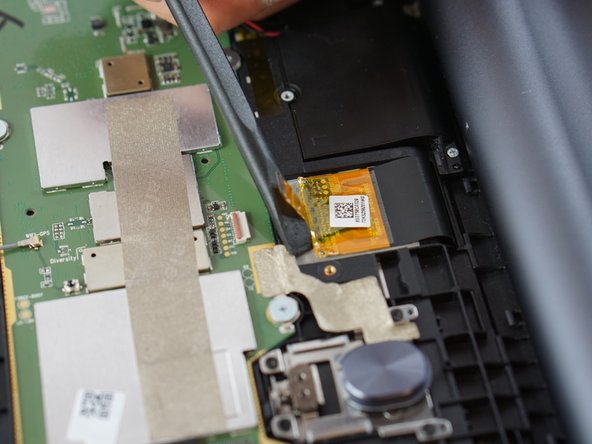
| + | [* icon_note] Check your replacement LCD to see if it includes a new ribbon cable (black one in second photo). If not, you'll need to peel up the tape securing it, and disconnect it at the LCD end instead of the motherboard end. |
crwdns2944171:0crwdnd2944171:0crwdnd2944171:0crwdnd2944171:0crwdne2944171:0