crwdns2933423:0crwdne2933423:0

Smontaggio MacBook Pro 13" Touch Bar fine 2016

crwdns2936315:0crwdne2936315:0
crwdns2936321:0crwdne2936321:0
crwdns2931653:017crwdne2931653:0
MacBook Pro 13" Touch Bar Teardown: crwdns2935265:00crwdnd2935265:01crwdnd2935265:03crwdne2935265:0 MacBook Pro 13" Touch Bar Teardown: crwdns2935265:00crwdnd2935265:02crwdnd2935265:03crwdne2935265:0 MacBook Pro 13" Touch Bar Teardown: crwdns2935265:00crwdnd2935265:03crwdnd2935265:03crwdne2935265:0
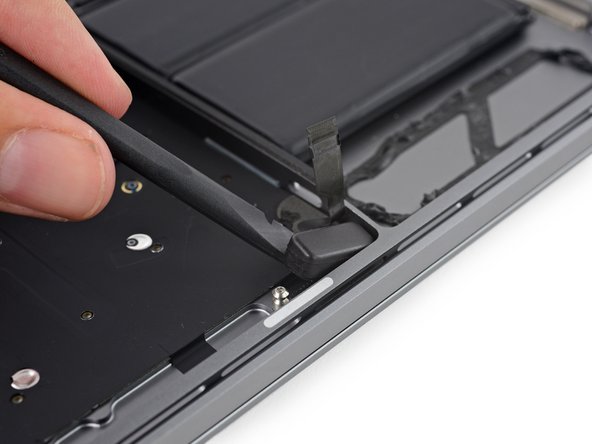
  • Met with resistance from heavy adhesive, we employ a combination of an opening pick and a spudger to pry the right speaker off the upper case.

  • We spy with our little eyes what might be a teeny speaker, wedged in the corner above the "true" speaker.

  • Judging from the through-holes under the smaller speaker, we assume this is a tweeter designed to produce high frequency audio.

  • We loved the cute rubber-bumper sound-isolating screws holding down the speakers in the Function Keys MBP. Looks like the Touch Bar opted to use extra gooey glue instead.

Accolti dalla resistenza opposta da un tenace adesivo, adoperiamo una combinazione di plettro di apertura e spudger per staccare l'altoparlante destro dal case superiore.

Con i nostri occhietti scopriamo quello che potrebbe essere un minuscolo altoparlante, incuneato nell'angolo al di sopra del "vero" altoparlante.

Guardando i fori passanti sotto l'altoparlante più piccolo, supponiamo che sia un tweeter pensato per riprodurre le alte frequenze.

Ci era piaciuta la bella soluzione delle viti ammortizzate con la gomma in nome dell'isolamento acustico per ancorare gli altoparlanti nel MBP Function Keys. Sembra che invece il Touch Bar adoperi una colla tenacissima.

crwdns2944171:0crwdnd2944171:0crwdnd2944171:0crwdnd2944171:0crwdne2944171:0