crwdns2933423:0crwdne2933423:0

Remplacement du port d'alimentation du Linksys EA6900

crwdns2935425:02crwdne2935425:0

crwdns2936315:0crwdne2936315:0
crwdns2936317:0crwdne2936317:0
crwdns2931653:02crwdne2931653:0
Linksys EA6900 Power Port Replacement: crwdns2935265:00crwdnd2935265:01crwdnd2935265:03crwdne2935265:0 Linksys EA6900 Power Port Replacement: crwdns2935265:00crwdnd2935265:02crwdnd2935265:03crwdne2935265:0 Linksys EA6900 Power Port Replacement: crwdns2935265:00crwdnd2935265:03crwdnd2935265:03crwdne2935265:0
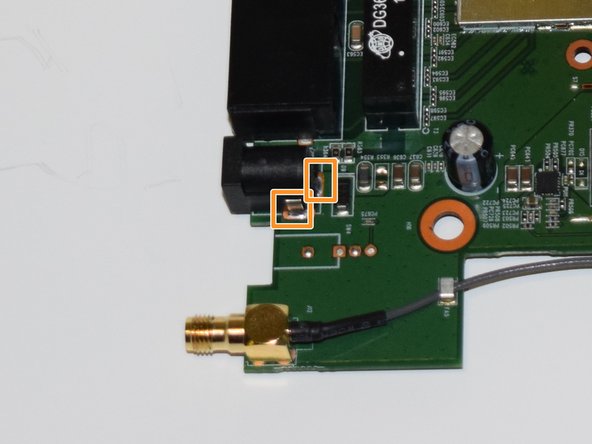
  • Carefully apply the soldering iron on each of the three points on the bottom side of the motherboard to melt them.

  • Be careful to not touch the motherboard with the soldering iron, you can damage the circuits.

  • After you have melted and removed the solder, flip the mother board around and identify the connecting points of the power port.

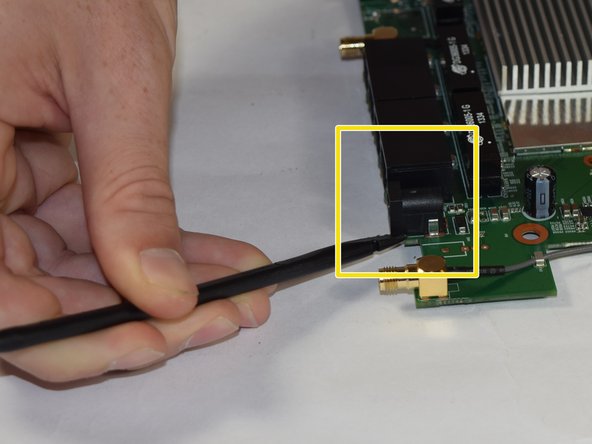
  • Use a black spudger to gently separate the power port from the motherboard

Appliquez délicatement le fer à souder sur chacun des trois points situés sous la carte mère pour les faire fondre.

Attention à ne pas toucher la carte mère avec le fer à souder, vous pourriez endommager les circuits.

Après avoir fondu et retiré la soudure, retournez la carte mère et identifiez les points de connexion du port d'alimentation.

Utilisez une spatule noire pour séparer délicatement le port d'alimentation de la carte mère

crwdns2944171:0crwdnd2944171:0crwdnd2944171:0crwdnd2944171:0crwdne2944171:0