crwdns2933423:0crwdne2933423:0

Démontage du Sony Ericsson S710a

crwdns2936315:0crwdne2936315:0
crwdns2936317:0crwdne2936317:0
crwdns2931653:05crwdne2931653:0
Sony Ericsson s710a Teardown: crwdns2935265:00crwdnd2935265:01crwdnd2935265:01crwdne2935265:0
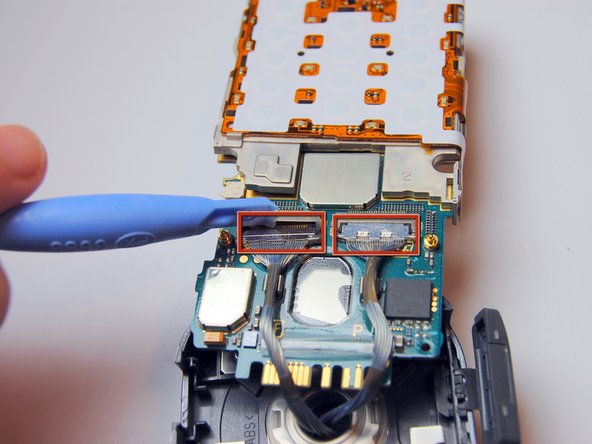
  • Remove the LCD cable connectors coming from through the hinge hole with a flathead screwdriver.

  • Be sure to record which port each cable was in, including the orientation in which they were plugged into each socket.

  • Now the two parts of the phone are separated.

Retirez les connecteurs du câble LCD provenant du trou de charnière avec un tournevis à tête plate.

IMPORTANT: assurez-vous d'enregistrer le port sur lequel se trouvaient chaque câble et l'orientation sur laquelle ils ont été branchés dans chaque socket.

Maintenant, les deux parties du téléphone sont séparées.

-[* red] Remove the LCD cable connectors coming from through the hinge hole with a flat head screw driver.
-[* icon_note] IMPORTANT: be sure to record which port each cable was in and the orientation they were plugged into each socket.
+[* red] Remove the LCD cable connectors coming from through the hinge hole with a flathead screwdriver.
+ [* icon_reminder] Be sure to record which port each cable was in, including the orientation in which they were plugged into each socket.
[* black] Now the two parts of the phone are separated.

crwdns2944171:0crwdnd2944171:0crwdnd2944171:0crwdnd2944171:0crwdne2944171:0