crwdns2933423:0crwdne2933423:0

Motorola Moto X Pureエディションのバックカバーの交換

crwdns2935425:09crwdne2935425:0

crwdns2936315:0crwdne2936315:0
crwdns2936323:0crwdne2936323:0
crwdns2931653:09crwdne2931653:0
Motorola Moto X Pure Edition Back Cover Replacement: crwdns2935265:00crwdnd2935265:01crwdnd2935265:03crwdne2935265:0 Motorola Moto X Pure Edition Back Cover Replacement: crwdns2935265:00crwdnd2935265:02crwdnd2935265:03crwdne2935265:0 Motorola Moto X Pure Edition Back Cover Replacement: crwdns2935265:00crwdnd2935265:03crwdnd2935265:03crwdne2935265:0
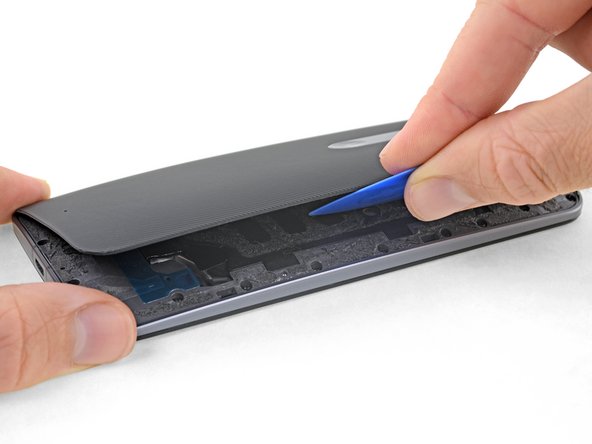
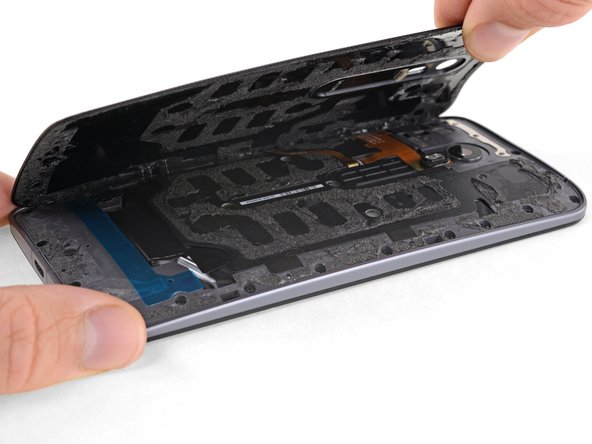
  • Carefully pry the cover away from the phone.

  • This may take a lot of force if the adhesive in the middle is still attached. As you lift the cover, you may need to use an opening pick to slice through any remaining adhesive.

  • To reinstall the back cover:

  • First use tweezers to peel away any remaining adhesive from both the back cover and the phone's chassis.

  • Then, clean the adhesion areas with high concentration isopropyl alcohol (at least 90%) and a lint-free cloth. Swipe in one direction only, not back and forth. This will help prep the surface for the new adhesive.

  • If it didn't already fall off, lift the metal camera plate away from the back cover. Carefully apply adhesive to the cover. Replacement adhesive comes in a pre-cut sheet to match the exact contours of the back cover. If that's not available, you can use a high-bond double-sided tape, such as Tesa 61395. With the new adhesive applied, reinstall the camera plate.

  • After installing the rear cover, apply strong, steady pressure to your phone for several minutes to help the adhesive form a good bond.

  • If desired, you may reinstall the back cover without replacing the adhesive. Remove any large chunks of adhesive that might prevent the back cover from sitting down flush. After installation, warm the back cover and apply pressure to secure it.

デバイスからカバーを慎重にこじ開けます。

中央の接着剤がまだ付着している場合、これには多くの力が必要になる場合があります。 カバーを持ち上げるときに、開口ピックを使用して、残っている接着剤をスライスする必要がある場合があります。

バックカバーを再装着する際は、

まず、ピンセットとスパッジャーを使用して、リアカバーとデバイス筐体の両方に残っている接着剤を剥がし取ります。

次に、高濃度のイソプロピルアルコール(90%以上)と糸くずの出ない布で接着エリアを綺麗に拭き取ります。 拭き取る際は、前後ではなく、一方向に動かしてください。 新しい接着剤を付けるため表面を準備してくれます。

バックカバーがまだ外れていない場合は、メタル製カメラプレートをバックカバーから外します。カバーに接着剤を装着します。交換用の接着剤は、バックカバーの形状完全フィットするようにプレカットされたシートで提供されてます。 このプレカットシートがない場合は、Tesa 61395などの高接着両面テープを使用できます。接着剤を装着してから、インサートを交換します。

バックカバーを取り付けた後、デバイスに強い安定した圧力を数分間加えて、接着剤をしっかりと接着させます。

必要に応じて、接着剤を交換せずにバックカバーを再装着できます。 バックカバーが平らに装着できない可能性のある接着剤の大きな塊を取り除きます。 装着後、バックカバーを温めて、圧力をかけて固定します。

crwdns2944171:0crwdnd2944171:0crwdnd2944171:0crwdnd2944171:0crwdne2944171:0