crwdns2933423:0crwdne2933423:0

AirPort Time Capsule A1470 ハードドライブの換装

crwdns2931527:0crwdnd2931527:0crwdnd2931527:0crwdnd2931527:0crwdne2931527:0

crwdns2936315:0crwdne2936315:0
crwdns2936323:0crwdne2936323:0
crwdns2931653:07crwdne2931653:0
Airport Time Capsule A1470 Hard Drive Replacement, Insert new drive: crwdns2935265:00crwdnd2935265:01crwdnd2935265:03crwdne2935265:0 Airport Time Capsule A1470 Hard Drive Replacement, Insert new drive: crwdns2935265:00crwdnd2935265:02crwdnd2935265:03crwdne2935265:0 Airport Time Capsule A1470 Hard Drive Replacement, Insert new drive: crwdns2935265:00crwdnd2935265:03crwdnd2935265:03crwdne2935265:0
Insert new drive
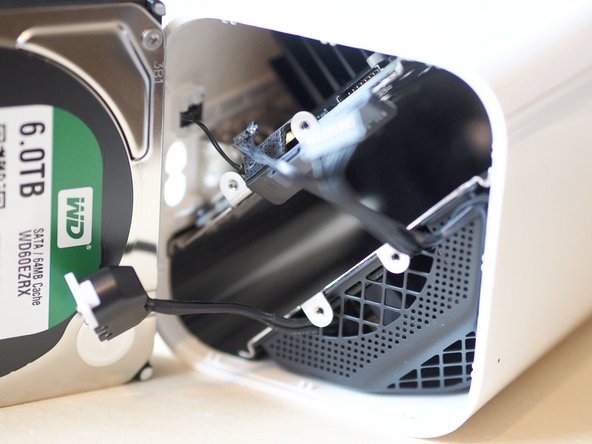
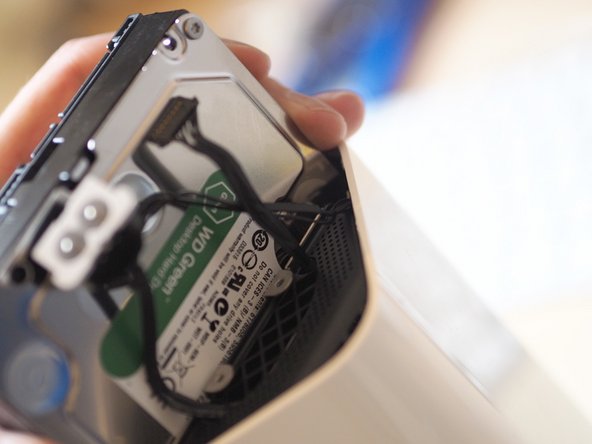
  • Slide the new drive into place, making sure no cables get caught up on the way in. Ensure the drive is seated properly in the newly trimmed rubber segments, and not sitting proud of the enclosure.

  • Reattach the drive SATA/Power connector.

  • The top rubber pad also requires trimming bits off to accommodate the 6TB replacement drive.

  • Replace rubber pad.

新しいHDDを挿入します。ケーブル類に引っかけないようご注意ください! ドライブが先ほど成形しなおしたゴム部品にちゃんと収まっているか確認してください。

HDDにSATA/Powerコネクターを繋ぎます。

上部に被さるゴム部品も、交換した6TBのHDDのサイズに合わせてナイフで少し削ります。

ゴムパッドを交換します。

crwdns2944171:0crwdnd2944171:0crwdnd2944171:0crwdnd2944171:0crwdne2944171:0