crwdns2933423:0crwdne2933423:0

Electronics Skills Kit 101

crwdns2936315:0crwdne2936315:0
crwdns2936321:0crwdne2936321:0
crwdns2931653:034crwdne2931653:0
Electronics Skills Kit 101: crwdns2935265:00crwdnd2935265:01crwdnd2935265:03crwdne2935265:0 Electronics Skills Kit 101: crwdns2935265:00crwdnd2935265:02crwdnd2935265:03crwdne2935265:0 Electronics Skills Kit 101: crwdns2935265:00crwdnd2935265:03crwdnd2935265:03crwdne2935265:0
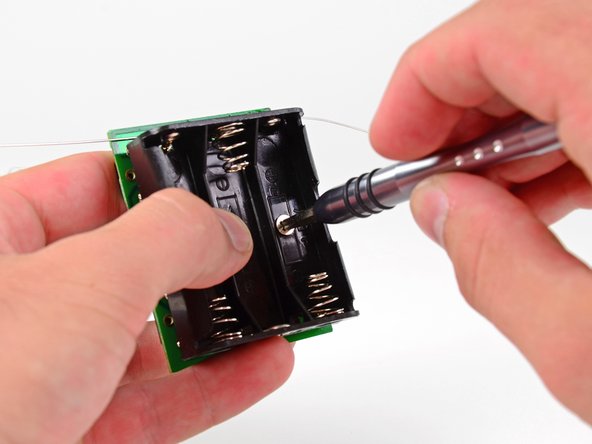
  • Place a 5.5 mm nut driver or socket over one of the battery compartment screw nuts.

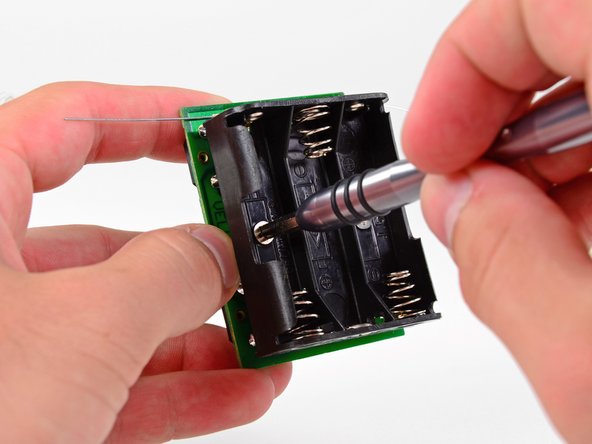
  • Turn the circuit board over.

  • Use one hand to hold the socket in place and tighten the battery compartment screw with a Phillips #2 screwdriver.

  • Follow the same procedure to tighten the other battery compartment screw.

Posiziona un cacciavite a bussola o una punta bussola per bulloni esagonali da 5,5 mm sopra uno dei bulloni delle viti del compartimento della batteria.

Gira la scheda logica a faccia in giù.

Usa una mano per tenere ferma la presa ed avvita la vite del compartimento della batteria con un cacciavite a croce Phillips #2.

Segui la stessa procedura per stringere l'altra vite del compartimento della batteria.

crwdns2944171:0crwdnd2944171:0crwdnd2944171:0crwdnd2944171:0crwdne2944171:0