crwdns2933423:0crwdne2933423:0

Elektronik-Übungsbausatz MK112

crwdns2936315:0crwdne2936315:0
crwdns2936319:0crwdne2936319:0
crwdns2931653:028crwdne2931653:0
Electronics Skills Kit 101: crwdns2935265:00crwdnd2935265:01crwdnd2935265:03crwdne2935265:0 Electronics Skills Kit 101: crwdns2935265:00crwdnd2935265:02crwdnd2935265:03crwdne2935265:0 Electronics Skills Kit 101: crwdns2935265:00crwdnd2935265:03crwdnd2935265:03crwdne2935265:0
  • No, you weren't ripped off; those two leads aren't supposed to have any components in the middle of them.

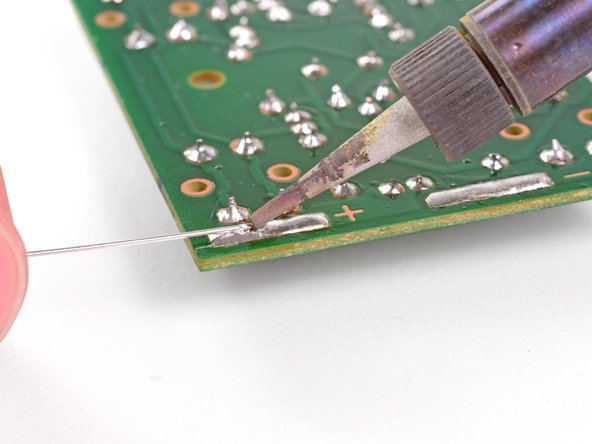
  • To solder the battery leads to the circuit board, set the tip of the soldering iron on the solder that's on the positive pad.

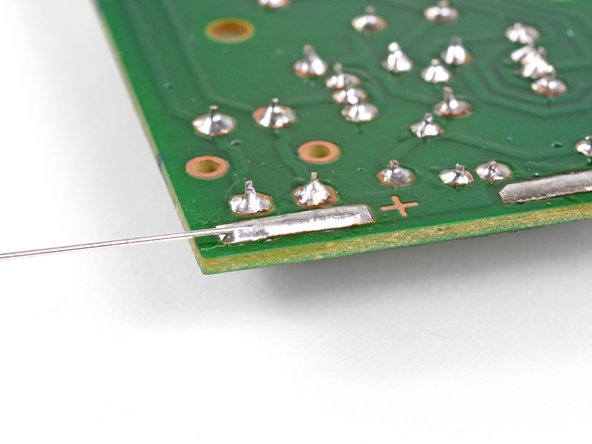
  • When the solder begins to melt again, quickly insert the end of the lead into the melted solder so that the lead hangs off the side of the board, as shown.

  • The leads will heat up and may burn you if you hold them near the soldering iron for more than a few seconds.

  • Remove the soldering iron and let the solder cool around the lead.

  • You can melt the solder again or add more solder if you don't get it right the first time.

Nein, das ist kein Betrug, diese beiden Drahtstücke enthalten kein Bauteil in der Mitte.

Um diese Batterieanschlussdrähte zu verlöten, setze zunächst die Lötspitze auf den positiven Lötkontakt auf der Leiterplatte.

Wenn das Lötzinn wieder flüssig ist, dann lege schnell einen der Drähte darauf, so dass er so wie im Bild zu sehen über die Seite herausragt.

Die Drähte werden sehr heiß und können dich verbrennen, wenn du sie mehr als ein paar Sekunden lang Nähe an der Lötspitze hältst.

Entferne den Lötkolben und lasse das Lötzinn um den Draht abkühlen und fest werden.

Wenn es beim ersten Mal nicht gleich klappt, kannst du das Lötzinn nochmals erwärmen und etwas mehr Lötzinn zufügen.

crwdns2944171:0crwdnd2944171:0crwdnd2944171:0crwdnd2944171:0crwdne2944171:0