crwdns2933423:0crwdne2933423:0

Elektronik-Übungsbausatz MK112

crwdns2936315:0crwdne2936315:0
crwdns2936319:0crwdne2936319:0
crwdns2931653:023crwdne2931653:0
Electronics Skills Kit 101: crwdns2935265:00crwdnd2935265:01crwdnd2935265:03crwdne2935265:0 Electronics Skills Kit 101: crwdns2935265:00crwdnd2935265:02crwdnd2935265:03crwdne2935265:0 Electronics Skills Kit 101: crwdns2935265:00crwdnd2935265:03crwdnd2935265:03crwdne2935265:0
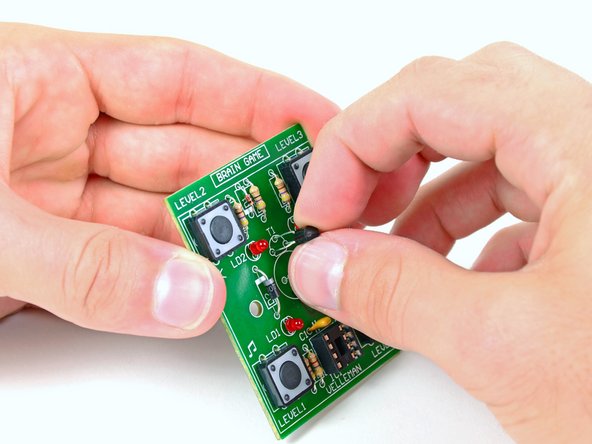
  • Locate the semi-circle labeled T1 and insert the three leads through the holes.

  • Make sure that you line up the flat part of the transistor with the flat edge of the semi-circle on the board. The two end leads fit into the holes on the ends of the flat part of the drawing. The middle lead will need to be bent so that it feeds through the hole closest to the T1.

  • Solder the three leads to the board and cut the excess off the leads.

Suche den mit T1 markierten Halbkreis und stecke die drei Anschlussdrähte durch die Löcher.

Achte darauf, dass die flache Seite des Transistors mit der Abflachung am Halbkreis übereinstimmt. Die beiden Drähtchen an den Enden passen passen in die Löcher, das mittlere Drähtchen muss noch etwas gebogen werden, damit es in das Loch bei der Aufschrift T1 passt.

Löte die Drähte fest und schneide überstehende Drahtstücke ab.

crwdns2944171:0crwdnd2944171:0crwdnd2944171:0crwdnd2944171:0crwdne2944171:0