crwdns2933423:0crwdne2933423:0

Elektronik-Übungsbausatz MK112

crwdns2936315:0crwdne2936315:0
crwdns2936319:0crwdne2936319:0
crwdns2931653:020crwdne2931653:0
Electronics Skills Kit 101: crwdns2935265:00crwdnd2935265:01crwdnd2935265:03crwdne2935265:0 Electronics Skills Kit 101: crwdns2935265:00crwdnd2935265:02crwdnd2935265:03crwdne2935265:0 Electronics Skills Kit 101: crwdns2935265:00crwdnd2935265:03crwdnd2935265:03crwdne2935265:0
  • The next components to install are the LEDs. Light emitting diodes are used in all sorts of electronics to provide bright, different colored lights.

  • Note that the two leads are different lengths. Since an LED is a diode, it only allows current to travel in one direction, so it is important to install the correct lead in the correct hole.

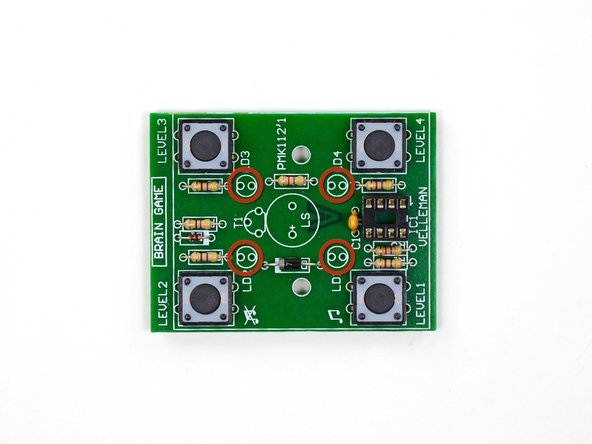
  • The four LEDs belong in each of the four terminals marked LD1 through LD4.

  • When installing the LEDs, insert the shorter of the two leads into the hole next to the flat part of the printed circle.

Als nächste Bauteile müssen die LEDs verlötet werden. Eine LED (Light Emitting Diode) ist eine Diode, die leuchten kann. Leuchtdioden werden weithin zum Erzeugen von hellem Licht in verschiedenen Farben verwendet.

Beachte, dass die Anschlussdrähte verschieden lang sind. Eine LED ist eine Diode, die den Strom nur in einer Richtung fließen lässt. Du musst deswegen darauf achten, dass die Anschlüsse im richtigen Loch stecken.

Die vier LEDs gehören in die mit LD1 bis LD4 markierten Stellen.

Achte beim Einsetzen der LEDs darauf, dass die kürzeren Anschlussdrähte in das Loch nahe an der Abflachung am aufgedruckten Kreis hinein gehen.

crwdns2944171:0crwdnd2944171:0crwdnd2944171:0crwdnd2944171:0crwdne2944171:0