crwdns2933423:0crwdne2933423:0

Elektronik-Übungsbausatz MK112

crwdns2936315:0crwdne2936315:0
crwdns2936319:0crwdne2936319:0
crwdns2931653:018crwdne2931653:0
Electronics Skills Kit 101: crwdns2935265:00crwdnd2935265:01crwdnd2935265:03crwdne2935265:0 Electronics Skills Kit 101: crwdns2935265:00crwdnd2935265:02crwdnd2935265:03crwdne2935265:0 Electronics Skills Kit 101: crwdns2935265:00crwdnd2935265:03crwdnd2935265:03crwdne2935265:0
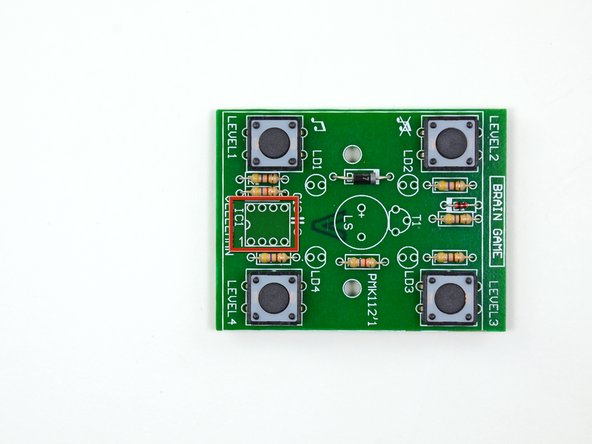
  • Next you will install the IC socket, also known as a CPU socket. IC sockets use a mechanical connection to connect a processor to a printed circuit board. These sockets allows the processor to be easily replaced without the risk of damage associated with soldering processors directly to a circuit board.

  • Stick the eight leads of the IC socket through the holes in the rectangle marked IC1. Make sure that the semi-circle on the top of the socket lines up with the semi-circle printed on the edge of the rectangle on the circuit board.

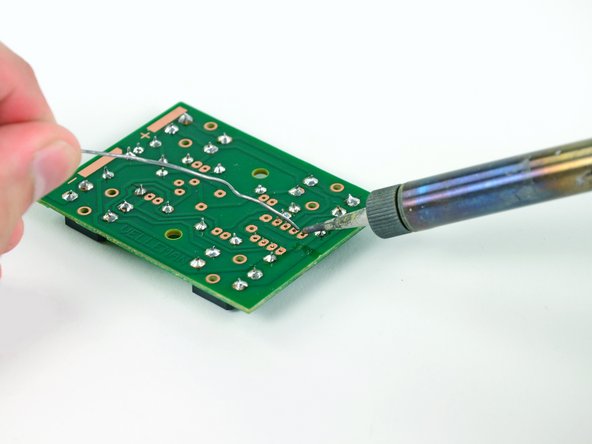
  • Turn the board over and solder the eight leads of the IC socket to the board. Similar to soldering the buttons, there is no need to trim any excess off the leads.

Als nächstes sollst du den IC-Sockel (CPU-Sockel) einbauen. Der Sockel ist eine rein mechanische Verbindung zwischen der Leiterplatte und dem Mikroprozessor. Er ermöglicht den einfachen Austausch des Mikroprozessors ohne zu löten, so dass er nicht so leicht beschädigt werden kann.

Stecke die acht Anschlüsse des Sockels durch die Löcher im mit IC1 markierten Rechteck. Achte darauf, dass der aufgedruckte Halbkreis mit dem Halbkreis auf dem Sockel übereinstimmt.

Drehe die Leiterplatte um und löte die acht Anschlüsse des IC-Sockels fest. Genau wie bei den Tasten brauchst du hier keine überstehenden Drähte abzuschneiden.

crwdns2944171:0crwdnd2944171:0crwdnd2944171:0crwdnd2944171:0crwdne2944171:0