crwdns2933423:0crwdne2933423:0

Gateway LT4004u Screen Replacement

crwdns2936315:0crwdne2936315:0
crwdns2936323:0crwdne2936323:0
crwdns2931653:03crwdne2931653:0
Gateway LT4004u Screen Replacement: crwdns2935265:00crwdnd2935265:01crwdnd2935265:03crwdne2935265:0 Gateway LT4004u Screen Replacement: crwdns2935265:00crwdnd2935265:02crwdnd2935265:03crwdne2935265:0 Gateway LT4004u Screen Replacement: crwdns2935265:00crwdnd2935265:03crwdnd2935265:03crwdne2935265:0
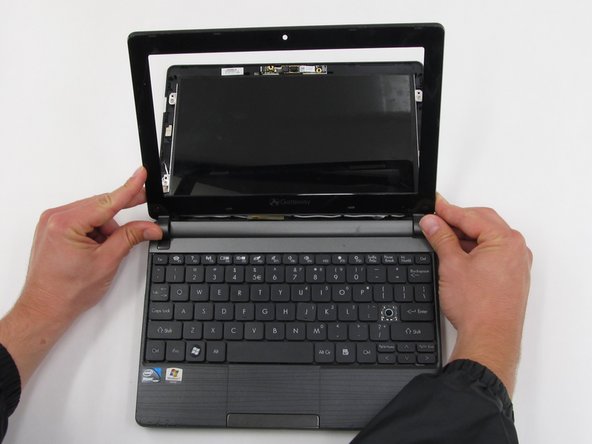
  • Once the two screws are removed, pry the screen casing away from the screen. You can use your fingernails or a tool such as tweezers to separate the screen casing from the backing.

  • Be prepared to hear cracking noises. These are expected.

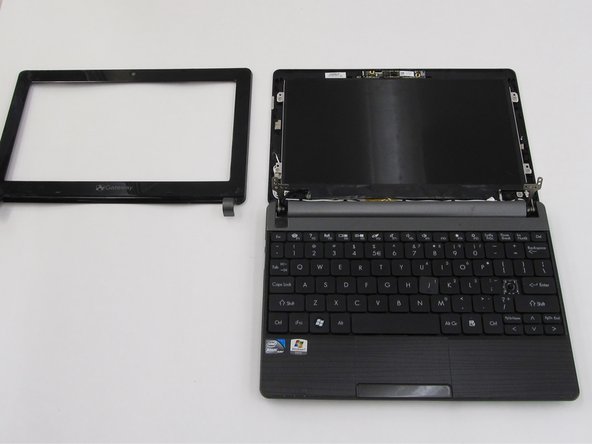
  • Unhook the screen casing at the bottom of the screen from the central hinges on the left and right side connecting the screen casing to the keyboard.

  • Remove the screen casing.

crwdns2935429:0crwdne2935429:0

crwdns2935429:0crwdne2935429:0

crwdns2935429:0crwdne2935429:0

crwdns2935429:0crwdne2935429:0

crwdns2944171:0crwdnd2944171:0crwdnd2944171:0crwdnd2944171:0crwdne2944171:0