crwdns2935425:02crwdne2935425:0
crwdns2931653:02crwdne2931653:0


-
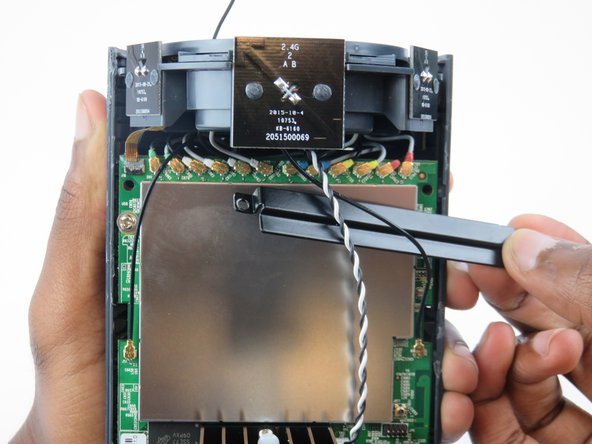
Using tweezers, gently disconnect each of the 12 wire connections, attached to the top of the motherboard.
| [* icon_reminder] Make a note of each wire's position and color, so it will be easier to reconnect later. | |
| - | [* black] Using tweezers, gently disconnect each of the 12 wire connections, attached to the top of the motherboard. |
| + | [* black] Using [product|IF145-020|tweezers], gently disconnect each of the 12 wire connections, attached to the top of the motherboard. |
| [* icon_caution] Be careful when removing the gold connectors as they are easily bent. | |
| [* icon_note] The connection points can be bent back if not damaged too badly. |
crwdns2944171:0crwdnd2944171:0crwdnd2944171:0crwdnd2944171:0crwdne2944171:0