crwdns2933423:0crwdne2933423:0

Panasonic LUMIX DMC-LX100の分解

crwdns2936315:0crwdne2936315:0
crwdns2936323:0crwdne2936323:0
crwdns2931653:03crwdne2931653:0
Disassembling Panasonic LUMIX DMC-LX100: crwdns2935265:00crwdnd2935265:01crwdnd2935265:03crwdne2935265:0 Disassembling Panasonic LUMIX DMC-LX100: crwdns2935265:00crwdnd2935265:02crwdnd2935265:03crwdne2935265:0 Disassembling Panasonic LUMIX DMC-LX100: crwdns2935265:00crwdnd2935265:03crwdnd2935265:03crwdne2935265:0
  • Use a Phillips #000 screwdriver to remove the three 3.5 mm screws.

  • Use a Phillips #000 screwdriver to remove the three 3 mm screws.

  • In some models these may be T3 or T4 Torx screws.

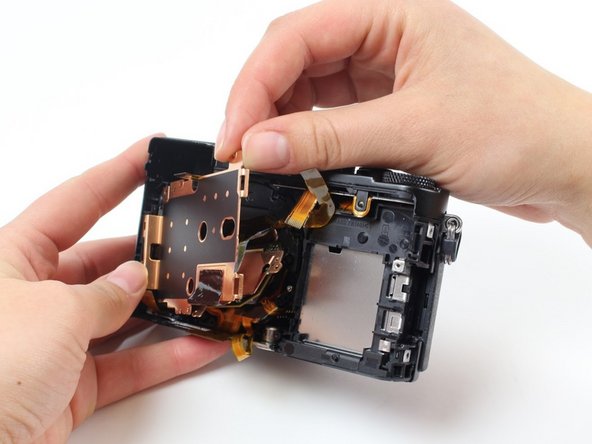
  • Gently pull the copper plate towards you to remove it.

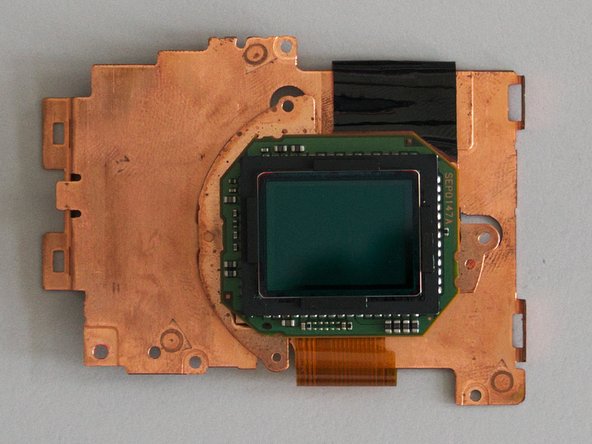
  • The sensor is attached to the copper plate and will come out with the copper plate. The thin, red glass plate glued to the front of the sensor is the infrared filter.

#000のプラスドライバー(PH000)を使って、長さ3.5mmのネジ3本を外します。

#000のプラスドライバー(PH000)を使って、長さ3mmのネジ3本を外します。

機種によっては、代わりにT3もしくはT4トルクスネジが使われている場合があります。

銅色の板を慎重に手前に引っ張って取り外します。

センサーは銅色の板に取り付けられており、銅色の板と一緒に外れます。センサー前面に貼られている薄くて赤いガラス板は赤外線フィルターです。

crwdns2944171:0crwdnd2944171:0crwdnd2944171:0crwdnd2944171:0crwdne2944171:0