crwdns2935425:01crwdne2935425:0
crwdns2931653:01crwdne2931653:0


-
Flip the pieces that secure the ribbons to the motherboard up. This is for the front facing camera.
-
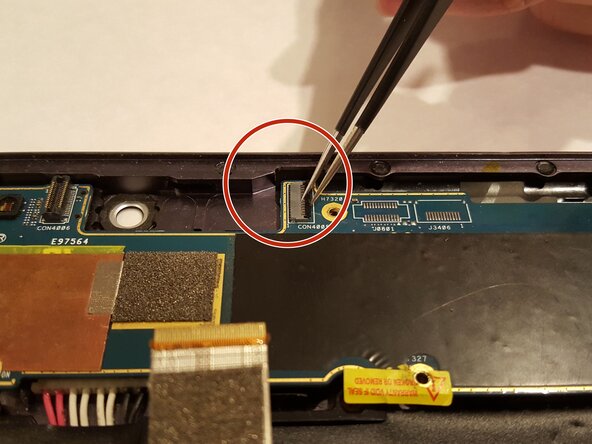
Take out the ribbon connected to the motherboard. Pull the ribbon cable straight out of the soket to disconnect them.
| [* black] Flip the pieces that secure the ribbons to the motherboard up. This is for the front facing camera. | |
| - | [* black] Take out the ribbon connected to the motherboard. This is for the rear camera. |
| - | [* black] Note: Only follow what is needed for the camera you are replacing. If both cameras need replacement, do both steps. Otherwise, follow the one designated for the camera you need to replace. |
| - | [* black] Note: The first photo shows the overall image. The second photo shows the step for the front facing camera. The third photo shows the step for the rear camera. |
| + | [* icon_caution] Before removing the ribbon connectors, check for a release mechanism. Also make sure it is not a ZIF connector. Doing so can help prevent permanet damage. |
| + | [* red] Take out the ribbon connected to the motherboard. Pull the ribbon cable straight out of the soket to disconnect them. |
| + | [* icon_note] Only follow what is needed for the camera you are replacing. If both cameras need replacement, do both steps. Otherwise, follow the one designated for the camera you need to replace. |
| + | [* icon_note] The first photo shows the overall image. The second photo shows the step for the front-facing camera. The third photo shows the step for the rear camera. |
crwdns2944171:0crwdnd2944171:0crwdnd2944171:0crwdnd2944171:0crwdne2944171:0