crwdns2933423:0crwdne2933423:0

Nintendo DS LiteのWi-Fiアンテナの交換

crwdns2936315:0crwdne2936315:0
crwdns2936323:0crwdne2936323:0
crwdns2931653:02crwdne2931653:0
Nintendo DS Lite Wi-Fi Antenna Replacement: crwdns2935265:00crwdnd2935265:01crwdnd2935265:03crwdne2935265:0 Nintendo DS Lite Wi-Fi Antenna Replacement: crwdns2935265:00crwdnd2935265:02crwdnd2935265:03crwdne2935265:0 Nintendo DS Lite Wi-Fi Antenna Replacement: crwdns2935265:00crwdnd2935265:03crwdnd2935265:03crwdne2935265:0
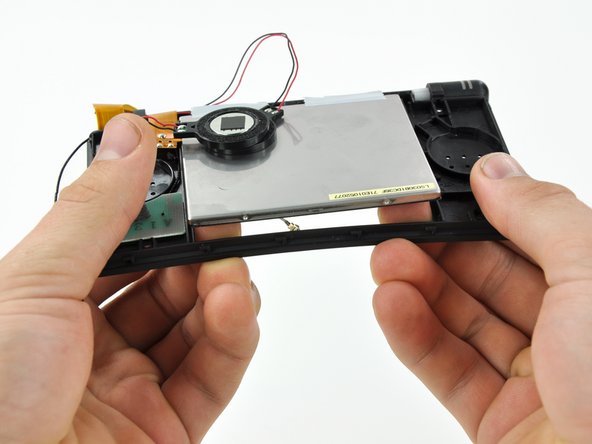
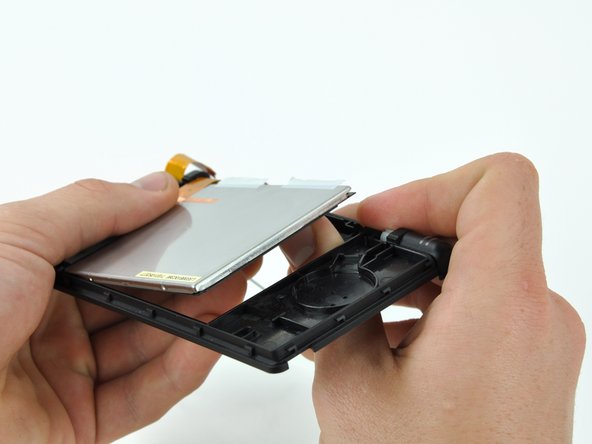
  • Starting in the top right corner, use both hands to slowly separate the LCD from the front display bezel.

  • Continue separating along the top and left edges of the LCD.

  • Finally, push the LCD up and away from the front display bezel.

  • Do not try to remove the LCD yet, as it is still connected to the front display bezel via the LCD ribbon cable.

上部右側角から作業を始めます。両手を使ってフロントディスプレイベゼルからLCDをゆっくりと押し出します。

続けてLCDの上部と左端に沿って押し出します。

最後に、フロントディスプレイベゼル全体からLCDを押し出して外します。

LCDを完全に取り外さないでください。まだLCDリボンケーブルがディスプレイベゼルにつながっています。

crwdns2944171:0crwdnd2944171:0crwdnd2944171:0crwdnd2944171:0crwdne2944171:0