crwdns2933423:0crwdne2933423:0

Remplacement de l'antenne WIFI de la Nintendo DS Lite

crwdns2936315:0crwdne2936315:0
crwdns2936317:0crwdne2936317:0
crwdns2931653:02crwdne2931653:0
Nintendo DS Lite Wi-Fi Antenna Replacement: crwdns2935265:00crwdnd2935265:01crwdnd2935265:03crwdne2935265:0 Nintendo DS Lite Wi-Fi Antenna Replacement: crwdns2935265:00crwdnd2935265:02crwdnd2935265:03crwdne2935265:0 Nintendo DS Lite Wi-Fi Antenna Replacement: crwdns2935265:00crwdnd2935265:03crwdnd2935265:03crwdne2935265:0
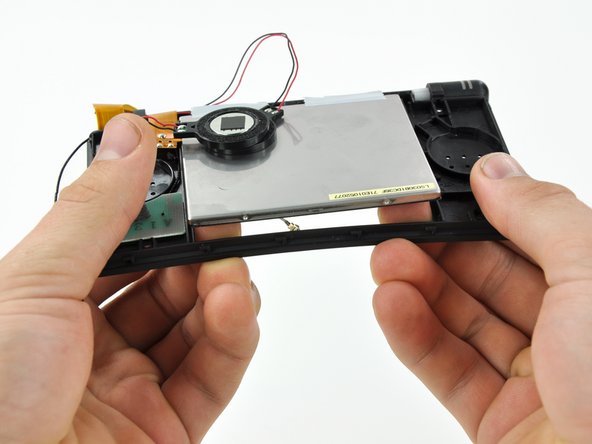
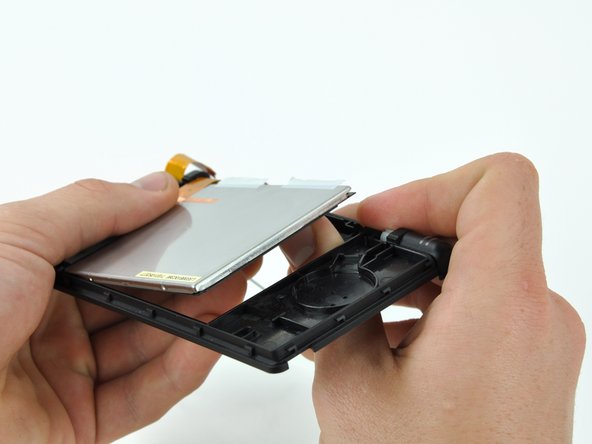
  • Starting in the top right corner, use both hands to slowly separate the LCD from the front display bezel.

  • Continue separating along the top and left edges of the LCD.

  • Finally, push the LCD up and away from the front display bezel.

  • Do not try to remove the LCD yet, as it is still connected to the front display bezel via the LCD ribbon cable.

En commençant par le coin supérieur droit, séparez lentement l’écran du joint avant en utilisant vos deux mains.

Continuez le long des bords supérieur et gauche de l'écran LCD.

Enfin poussez l'écran vers le haut pour le séparer du joint.

Ne retirez pas totalement l'écran du joint, le câble de l'écran LCD le relie encore au joint.

crwdns2944171:0crwdnd2944171:0crwdnd2944171:0crwdnd2944171:0crwdne2944171:0